
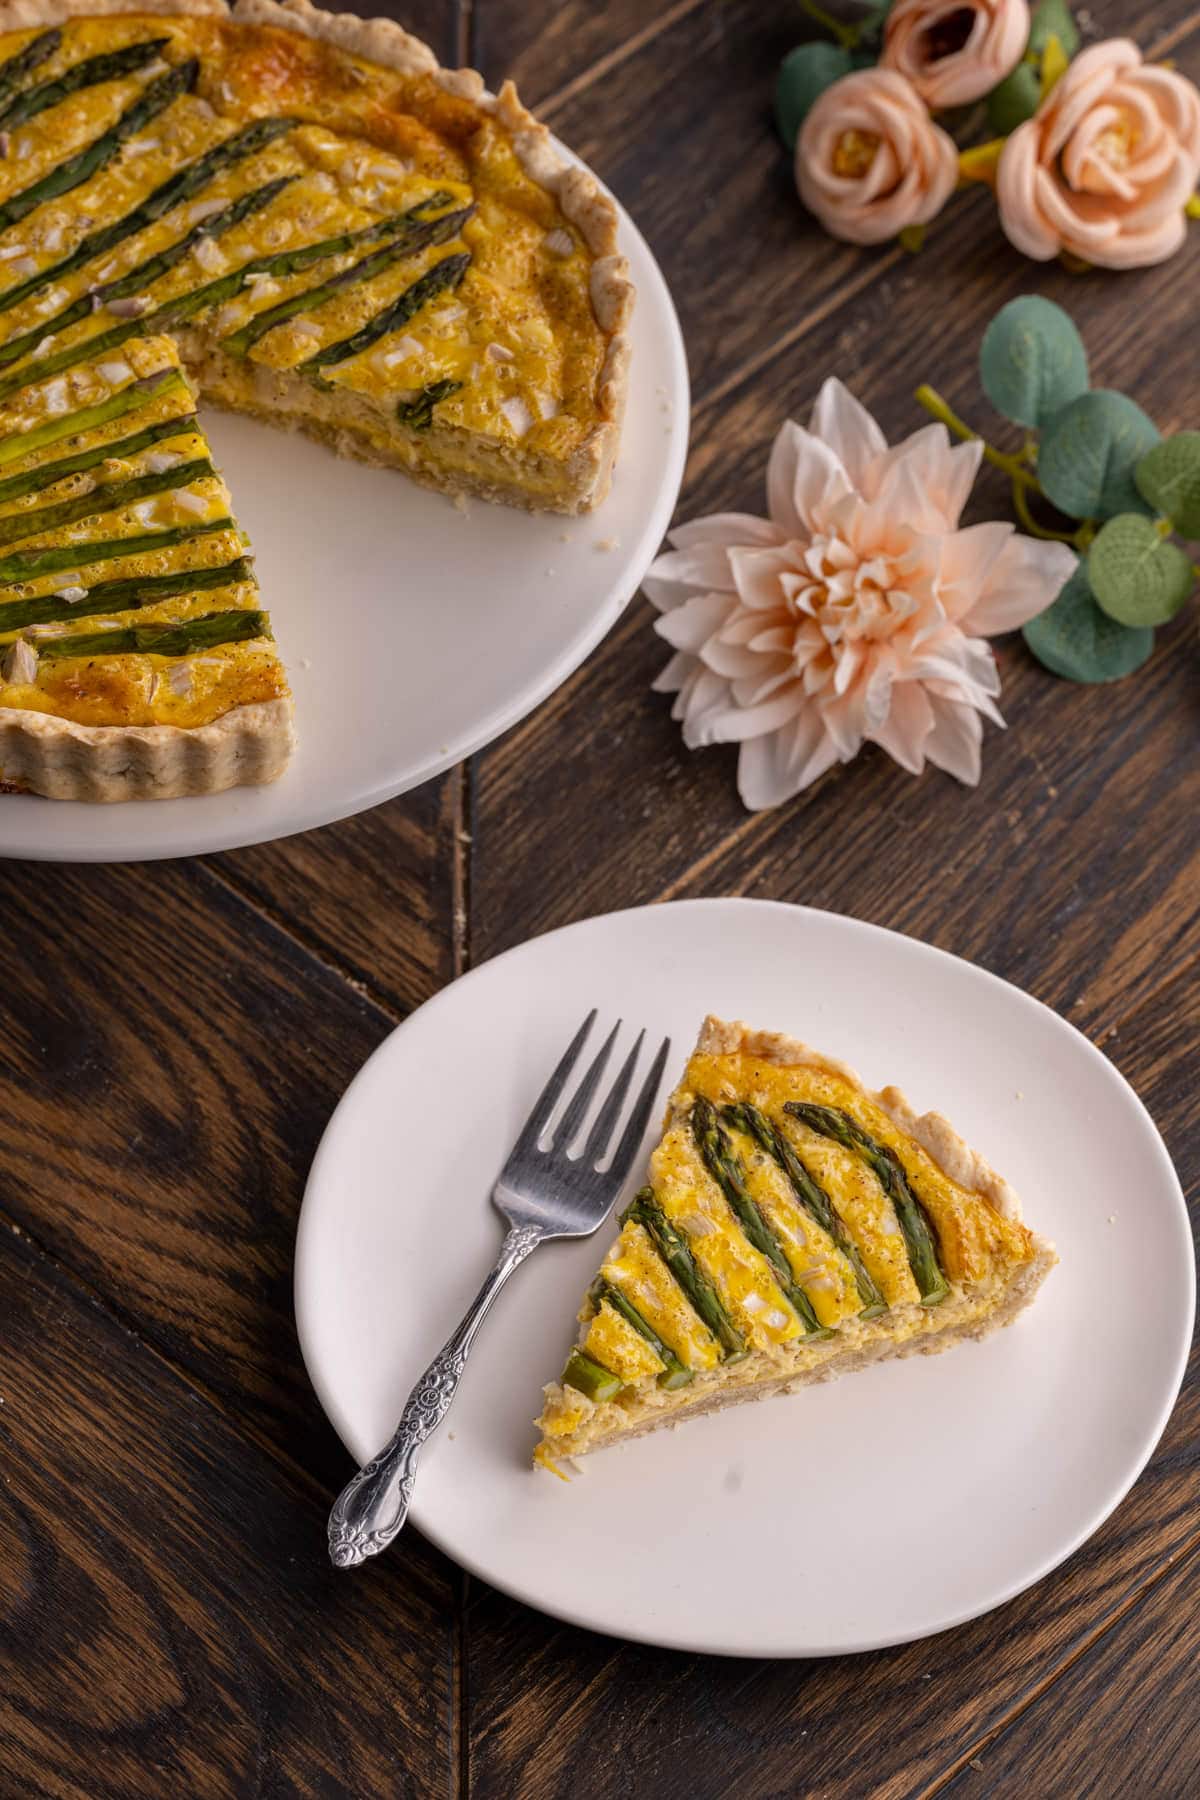
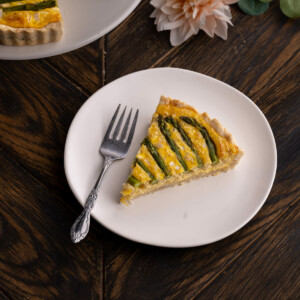
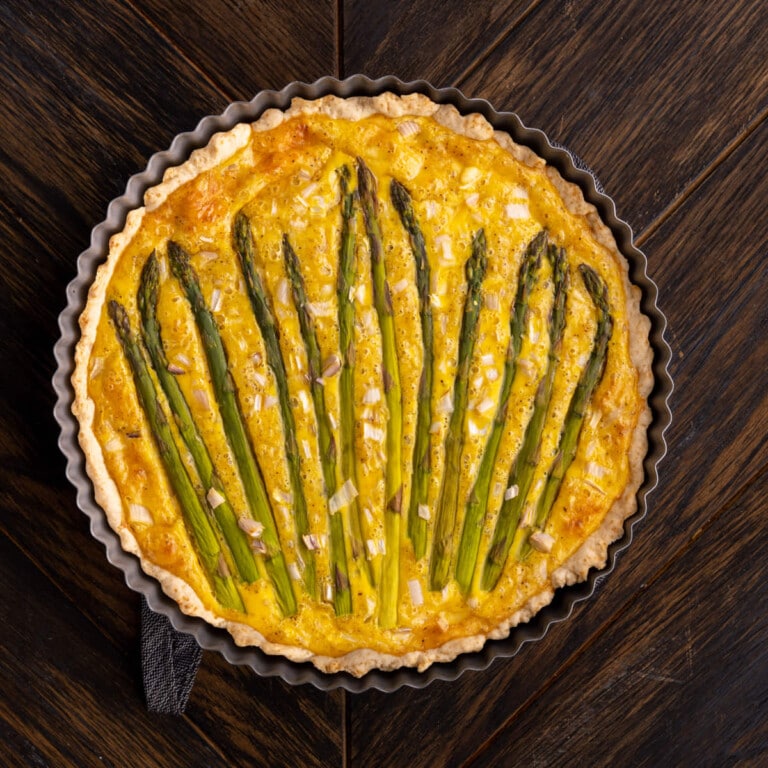
Need a brunch-worthy dish that will serve a crowd? This Asparagus Quiche celebrates the fresh flavors of spring, with a buttery crust and creamy egg filling to showcase the fresh asparagus!
In this homemade quiche recipe you will learn how to make a simple quiche crust in the blender, the best way to store, prep, and blanch your asparagus for use in the quiche, how to serve your quiche, and how to store and reheat leftovers.
As an environmental scientist, I always try my best to stick to seasonal eating! It’s one of the easiest (and most delicious!) ways to support local farmers and improve your carbon footprint.
Green tip: Seasonal and local foods have less associated transportation costs and fuel emissions. Check when asparagus is in season in your area with this Seasonal Food Guide.
Asparagus Quiche Ingredients
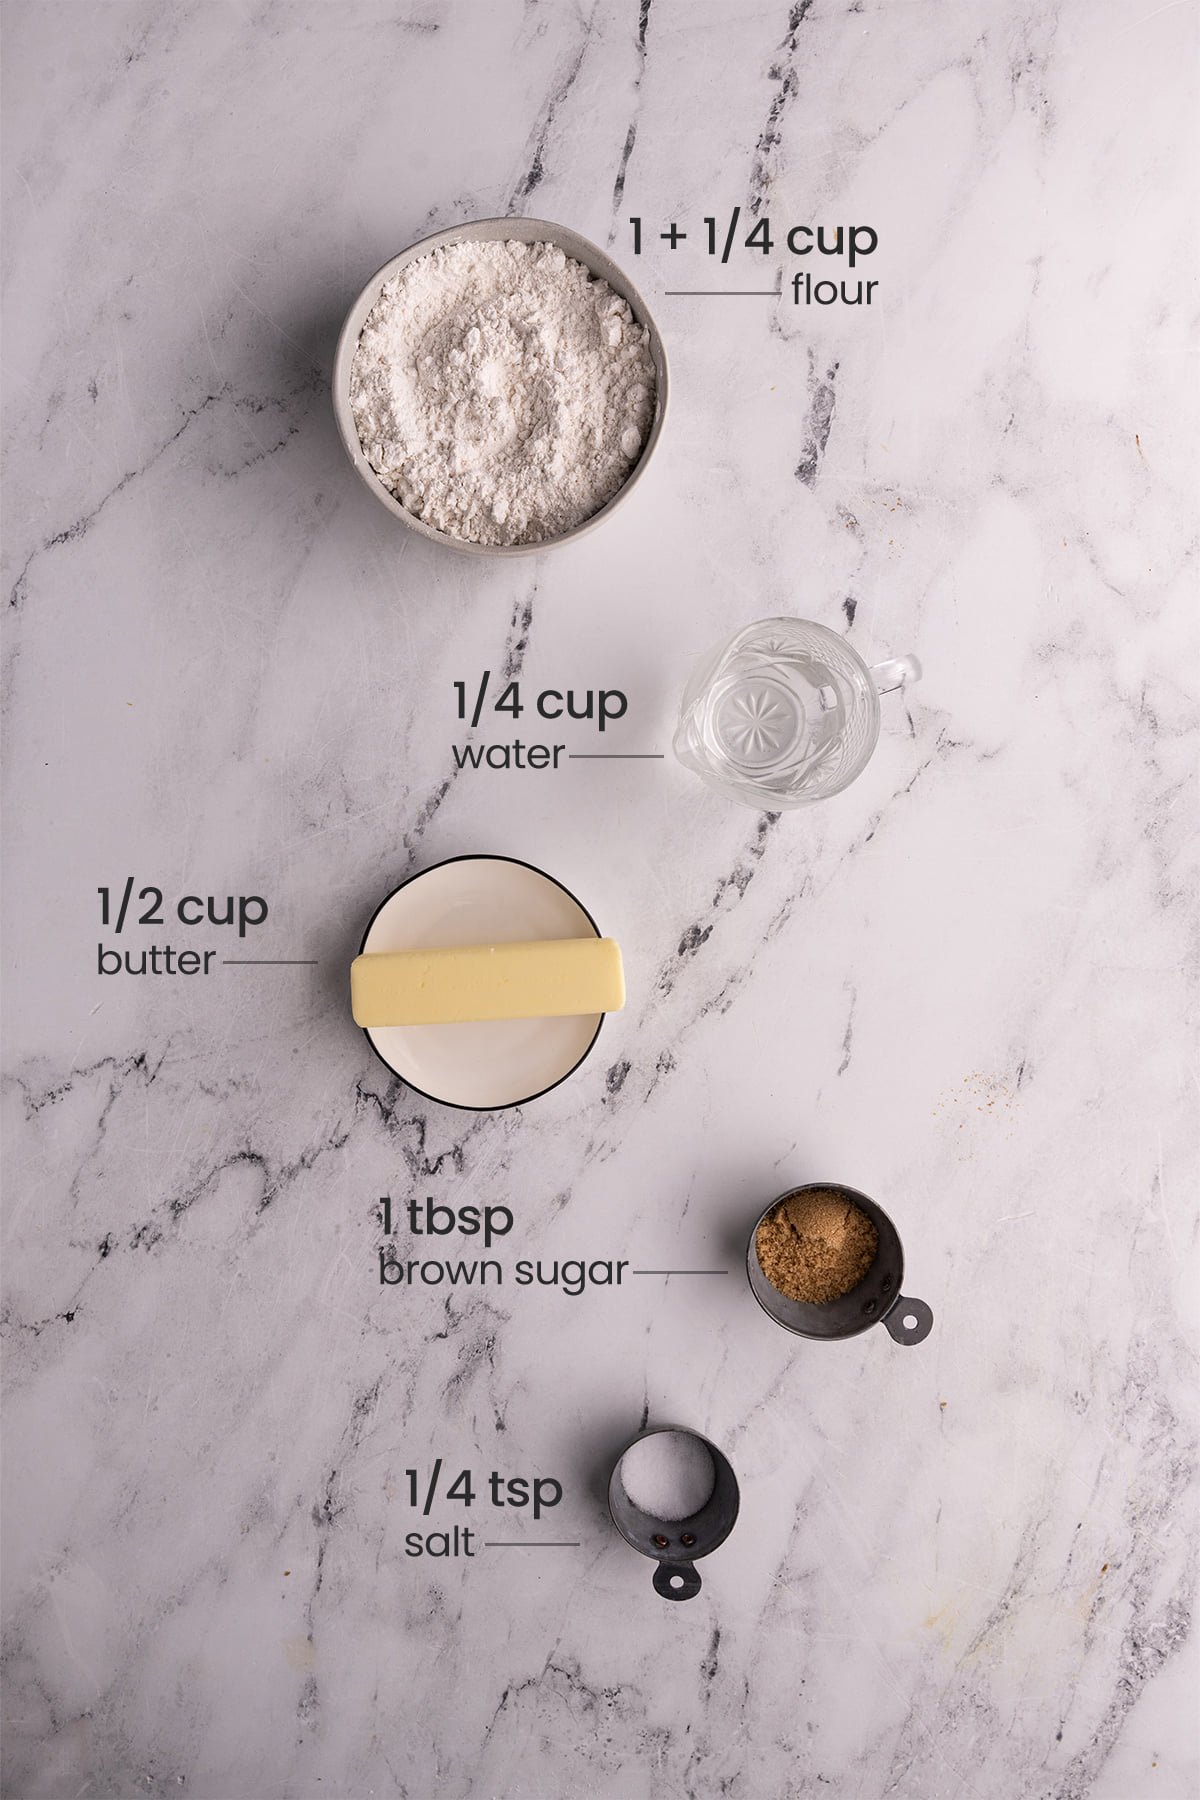
Here’s everything you need for the crust:
- All-purpose flour. This acts as the base to your quiche crust.
- Unsalted butter. Frozen, so the blender or food processor doesn’t completely break it down. Ideally, you’ll be left with some butter chunks even after blending.
- Brown sugar. For subtle sweetness and browning on the crust.
- Salt. To ramp up the flavor.
- Cold water. To help bring the dough together. You’ll add this while your blender is on.
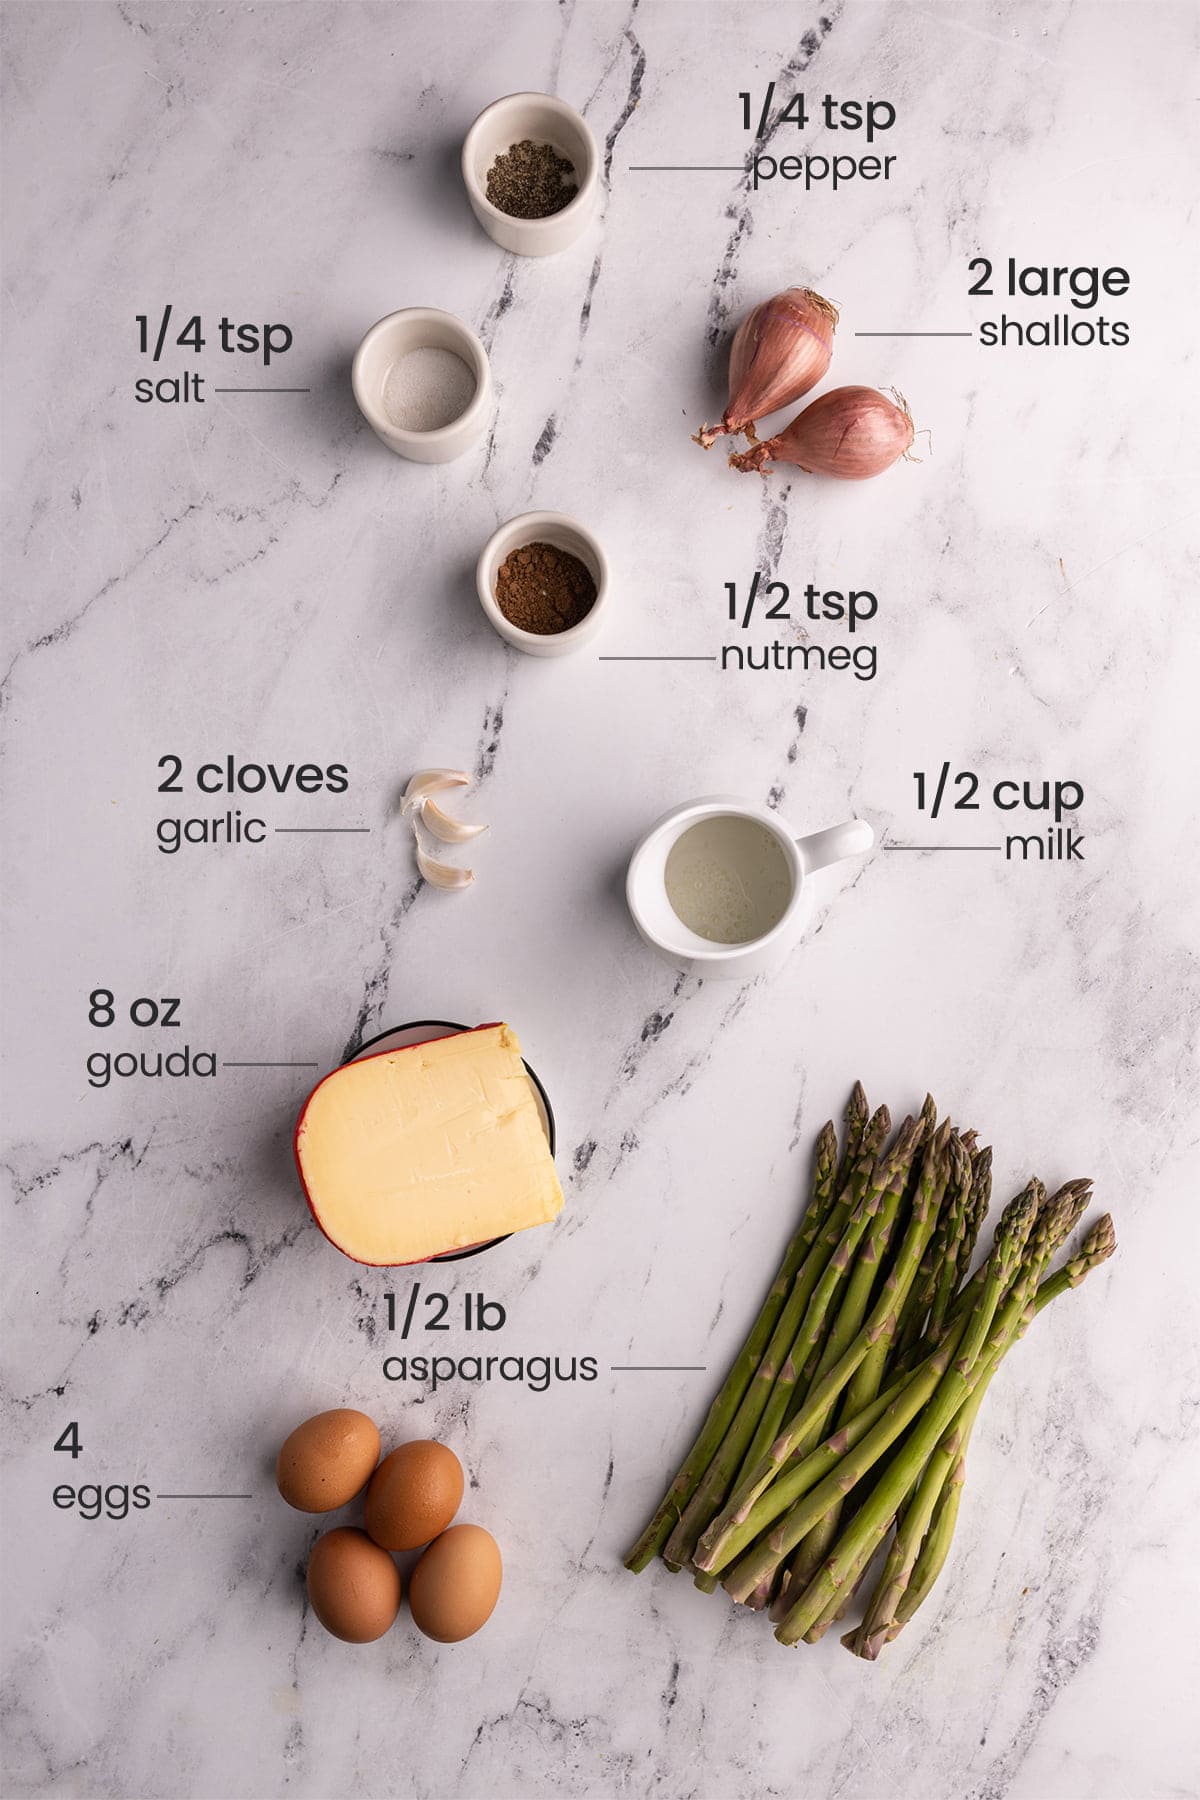
Here’s everything you need for the filling:
- Eggs. Whisked until completely smooth.
- Milk. To make for a creamier quiche. This recipe uses less milk and more cheese than a lot of other quiche recipes, and I find this gives the best texture and flavor to both the filling and the crust.
- Gouda cheese. Mild gouda cheese is ultra creamy, and adds just enough cheesy flavor while still allowing the asparagus to be the main flavor profile. You can also opt to use cheddar in place of gouda in this recipe if you prefer.
- Salt, pepper, & nutmeg. To season your quiche and add subtle nuttiness.
- Asparagus. The star of this dish! You will quickly blanch the asparagus before adding it to the quiche to make sure it’s nice and tender.
- Shallots & garlic. To add tons of umami flavor to the quiche.
Asparagus Quiche Tips and Tricks
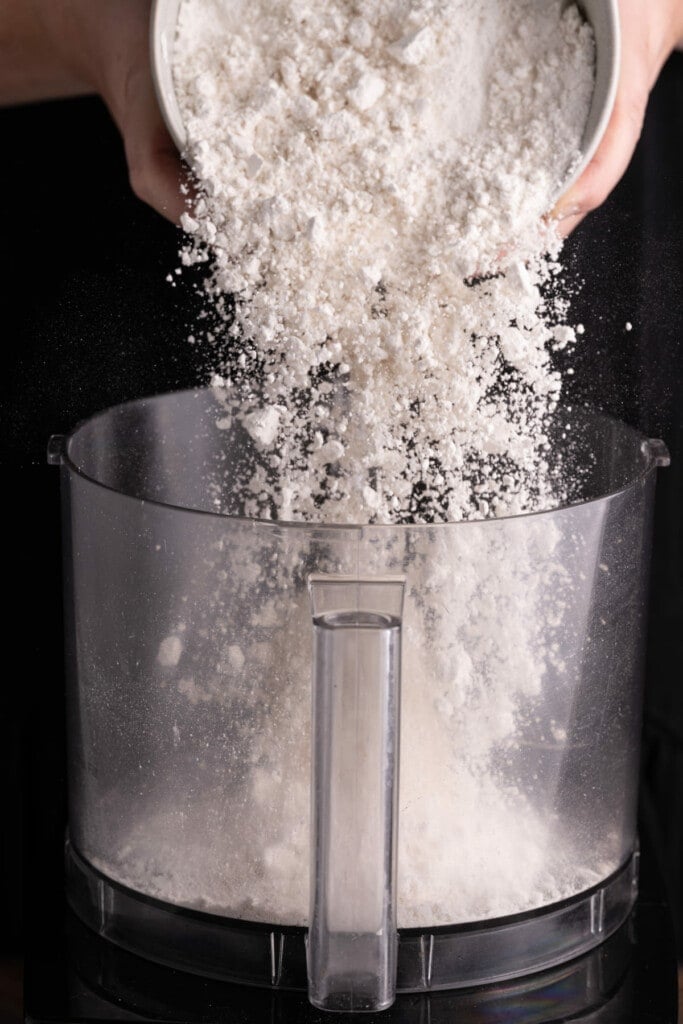
Use a Blender or Food Processor for the Crust
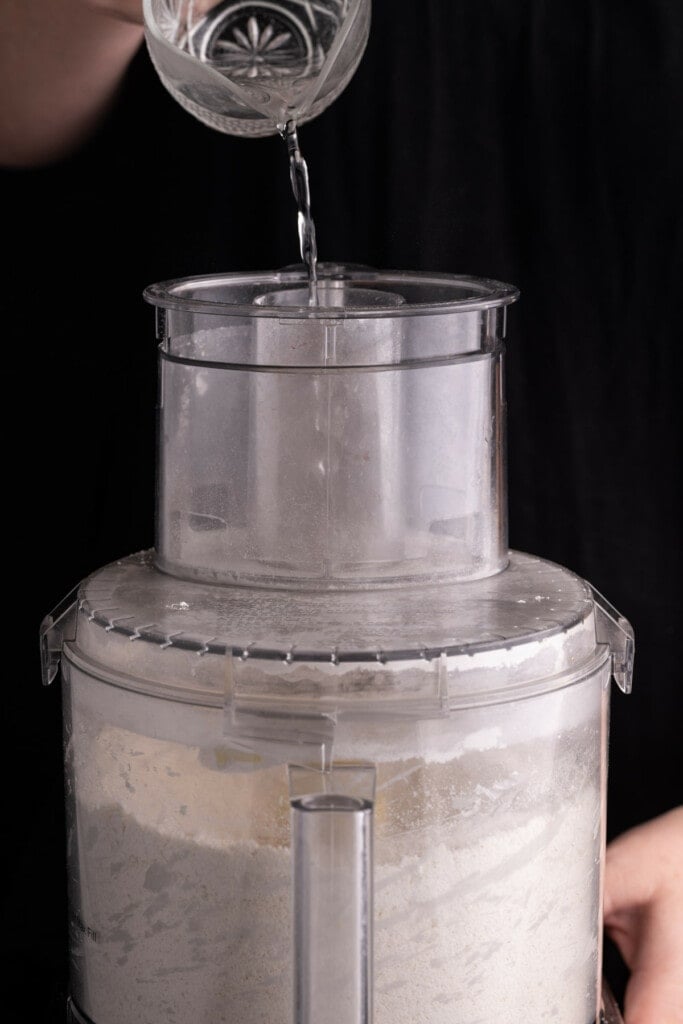
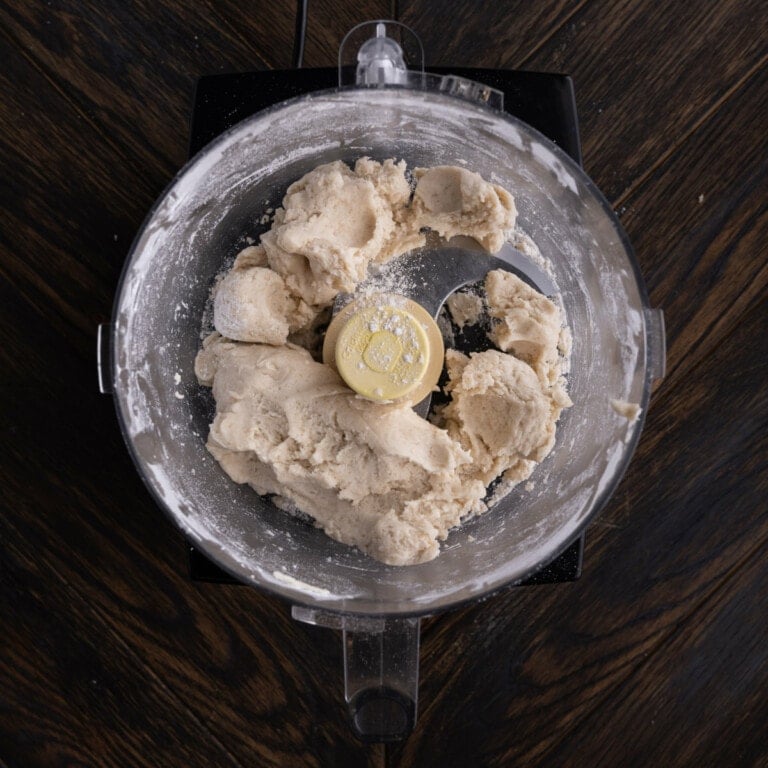
Start by adding the flour, salt, brown sugar and frozen butter to the food processor. Turn it on to high. While it’s on, slowly add the water.
Watch closely as the water helps to bring the dough together. The key here is to not over-blend. Ideally, we want there to be some remaining butter chunks remaining in the dough.
This will make for the most buttery, crumbly quiche crust.
Use Your Hands to Shape Your Quiche Dough
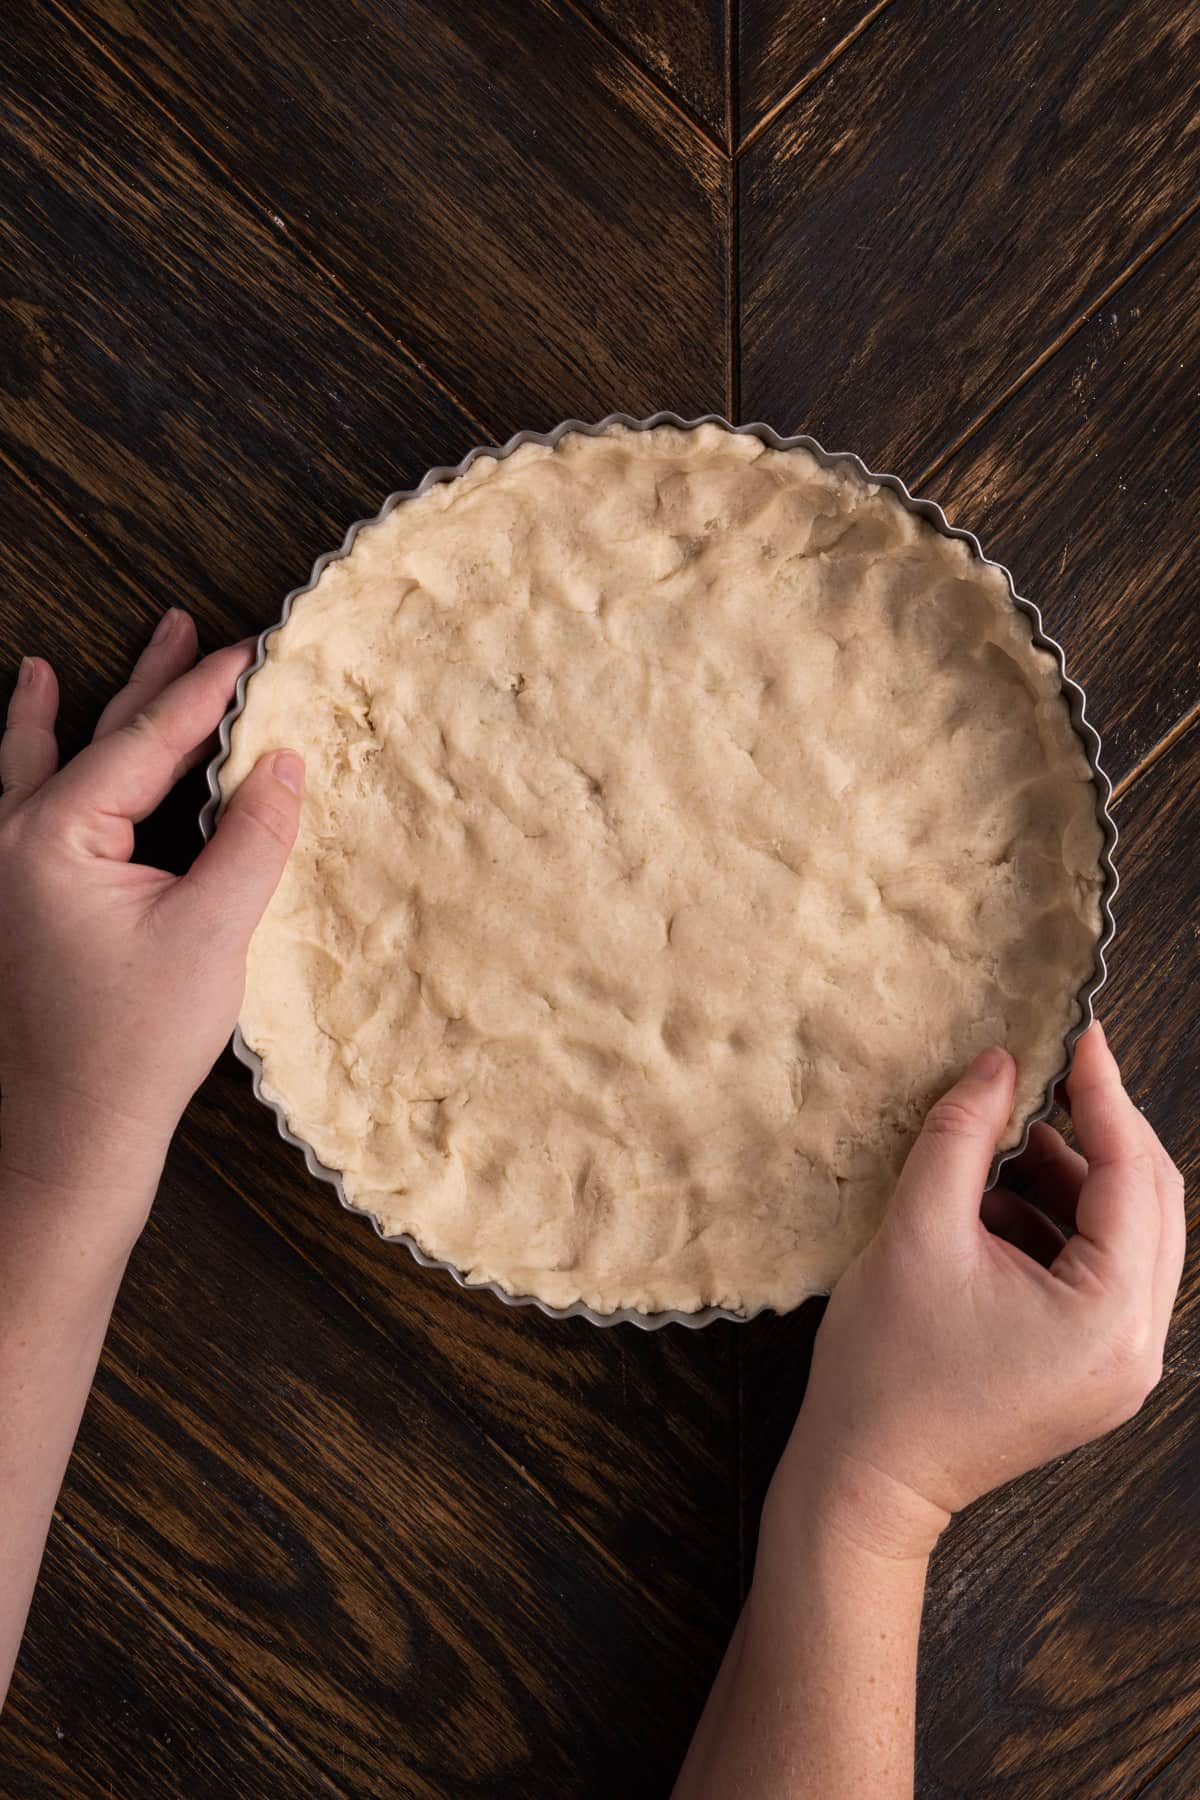
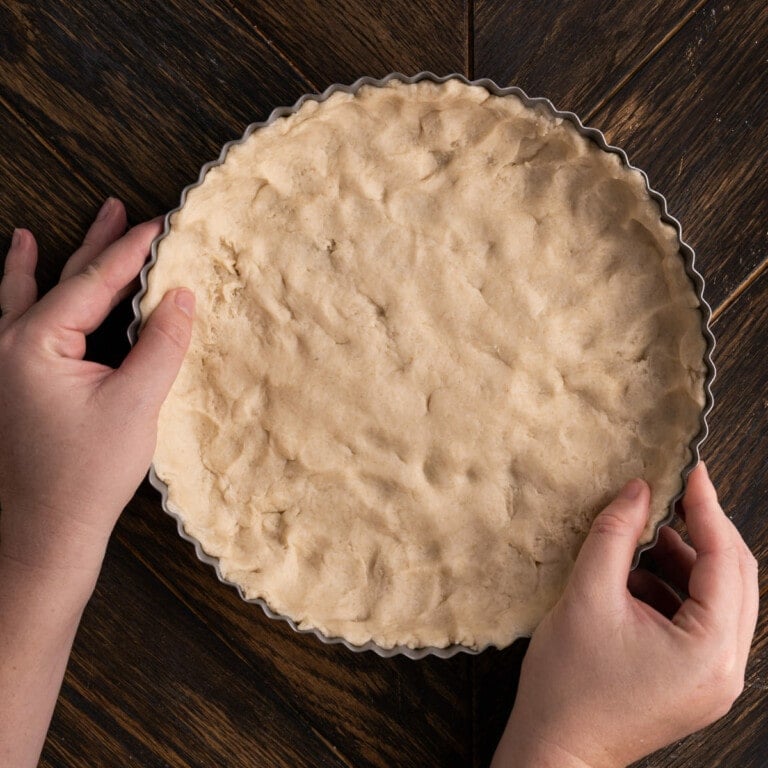
Once your dough comes together, remove the blade from your food processor or blender and turn the dough out into a 9.5-inch quiche, tart, or pie dish.
Using clean hands, start pushing the dough into the dish, spreading it out until it’s in a roughly even layer across the dish. Then, use your thumbs and forefingers to pinch dough up the sides of the dish. This will form your outer edge crust.
Blind Bake Your Crust
Once you’ve shaped your crust, bake it without the filling. This process of pre-baking the crust before adding the filling is also known as “blind baking”.
We do this primarily because the crust needs a longer baking time than the filling. Blind baking also ensures that the filling doesn’t permeate the crust dough and make it soggy.
After removing the crust from the oven, make sure to immediately set the oven temperature to 325°F to allow ample time for the temperature to come down.
Green tip: Look for organic and palm oil-free butter if you can. Buying organic means you are supporting farms that do not use damaging pesticides and fertilizers, and palm oil production is a huge driver behind deforestation.
How To Prep Garlic for a Quiche
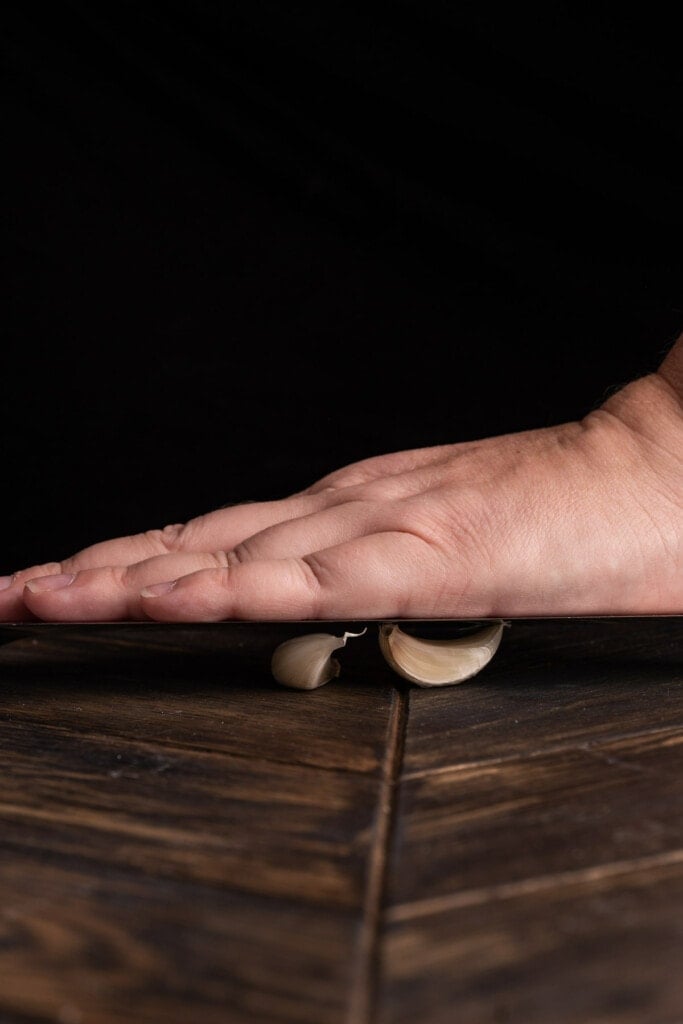
Using fresh minced garlic goes a long way in this spring quiche. In order to mince your garlic, we have to peel it first.
I find the easiest way to peel the outer layer off the garlic is by crushing it first. Lay individual garlic cloves flat on your cutting board and use the flat end of your knife to push down on the garlic until you hear a crunch.
This will split open the outer layer, making it much easier for you to peel it back.
Once you’ve completely peeled your garlic, you can chop it with a sharp knife until it’s in much smaller pieces.
Just continue to chop and dice until the garlic is minced. Simple as that!
How to Store Asparagus Before Use
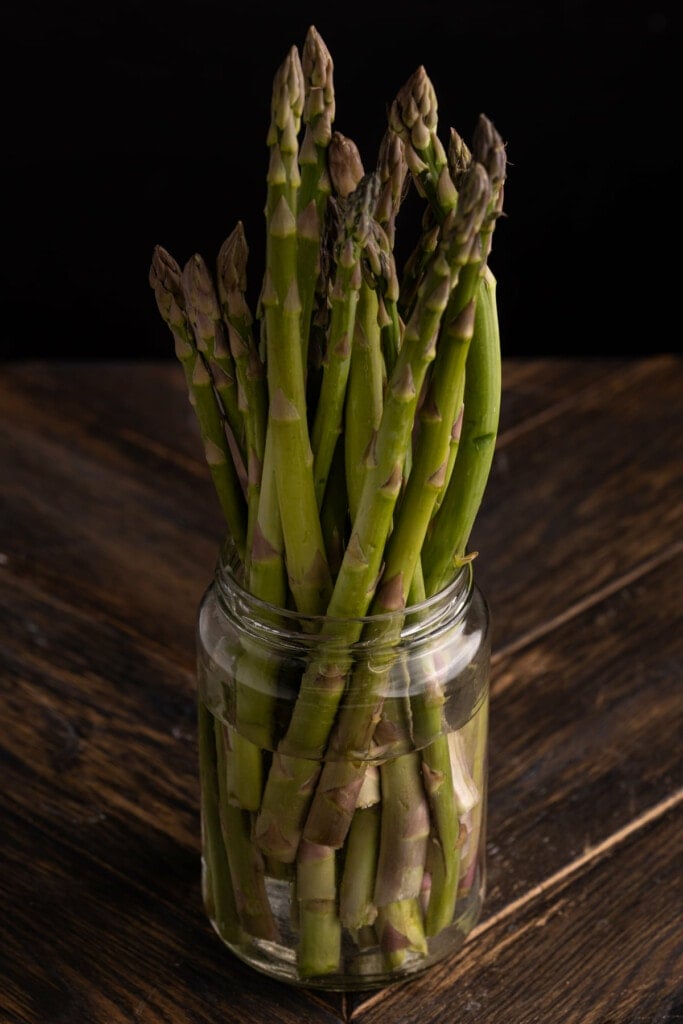
Once you bring your asparagus home, it will stay fresh for up to a week if you store it correctly.
Place the asparagus in a glass jar with their tips facing up. Fill the jar with about 2-3 inches of water so that the ends are fully submerged.
Then, place a reusable storage bag on top and store the whole jar in your refrigerator. This keep-fresh technique also works with white asparagus and purple asparagus!
How to Prep Asparagus for a Quiche
Rinse or soak the asparagus to clean it before blanching it. Asparagus tips have little nooks and crannies, so soaking it is a great way to remove any grit or dirt that may be hiding in the tips.
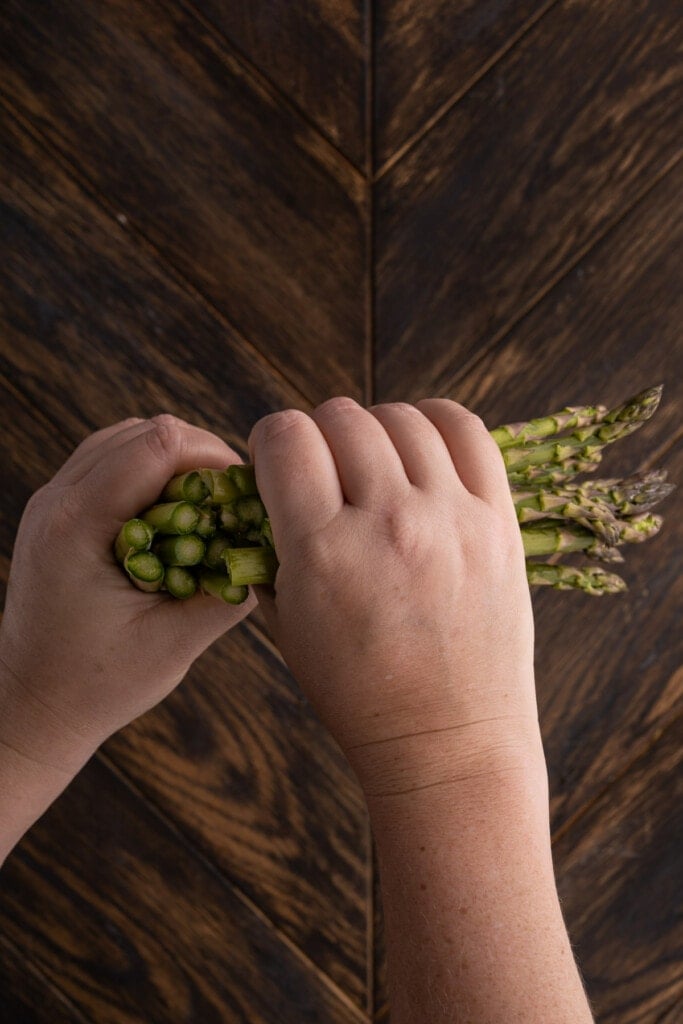
Asparagus is notorious for having those tough-to-chew “woody” ends. For the perfect bite, we have to remove them.
Please note, you don’t have to throw out the asparagus ends! You can easily compost them or save them in the freezer along with your other vegetable scraps to make your own veggie broth.
The easiest way to remove those tough ends is by simply breaking them off. Hold the asparagus in your two clean hands and snap the pieces into two so the asparagus automatically breaks right at the point where the ends start to get woody.
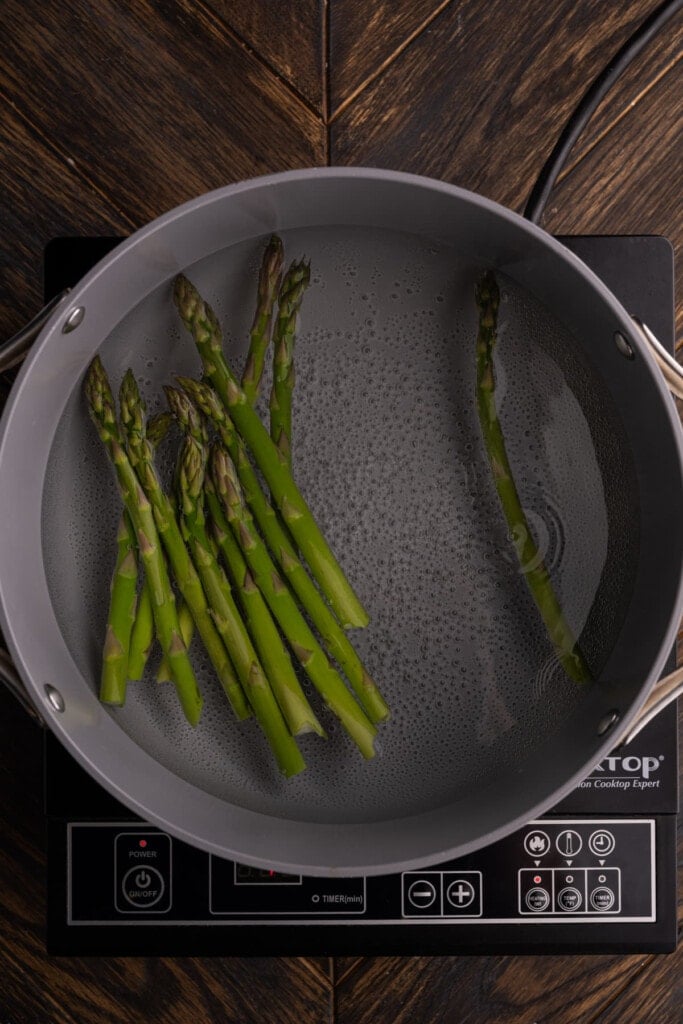
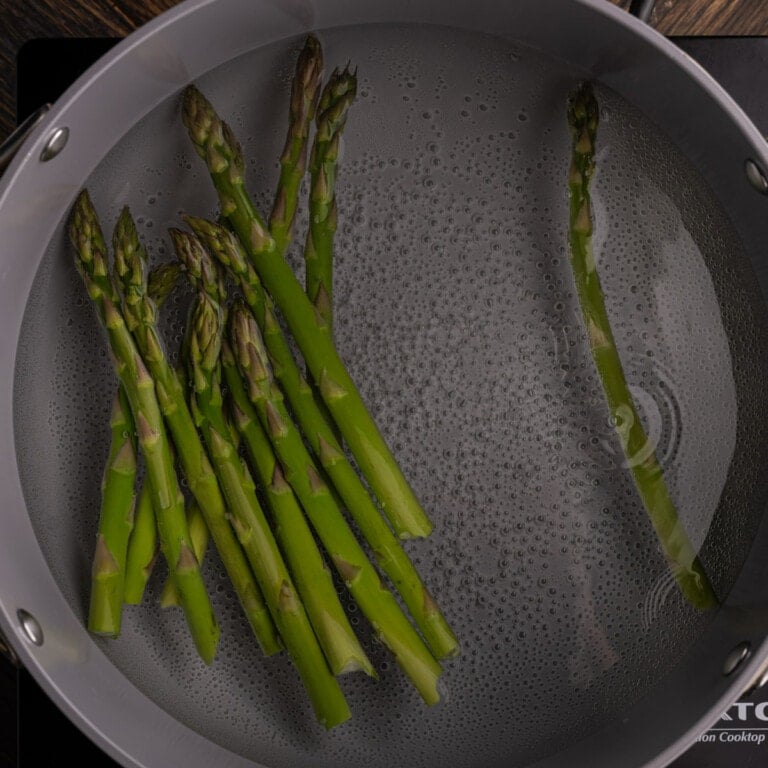
Once you’ve snapped the ends off, it’s time to blanch the asparagus. This will just keep the vibrant color and earthy taste of the asparagus even as it bakes in the quiche.
Blanching asparagus also keeps it crisp yet tender for the best texture in every bite. Bring 10 cups of water to a boil in a large pot.
Once the water has come to a rolling boil, carefully drop the asparagus in. After 5 minutes, remove the asparagus and set it aside to cool and dry so it is ready to add to the quiche once the filling is prepared.
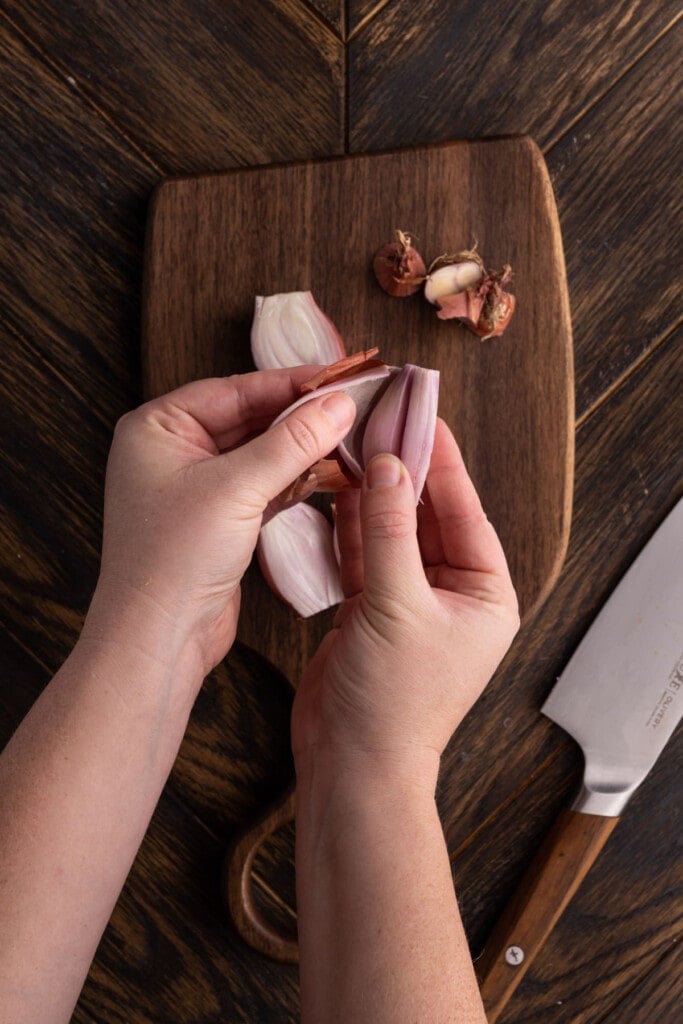
How to Prep Shallots for a Quiche
Just like any other onion, shallots have many layers, making them easy to dice (minus the eye tearing 😆). Start by chopping off both ends of the shallot and slicing it in half long ways.
This will make it easy for you to peel off and discard the outermost layer (again, you can save the ends and peels for veggie broth or compost them!)
Once you’ve peeled the outer layer off, lay the shallot halves flat on your cutting board and start to dice. Once your shallot is cut into smaller pieces, use your hands to separate the layers.
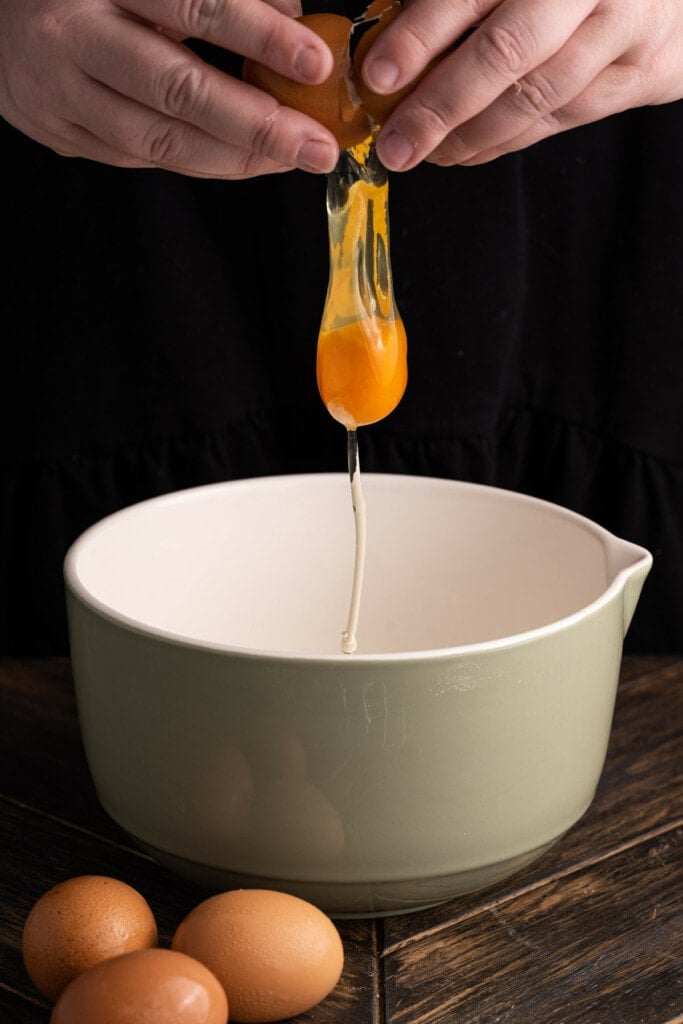
Whisk the Eggs and Milk Together
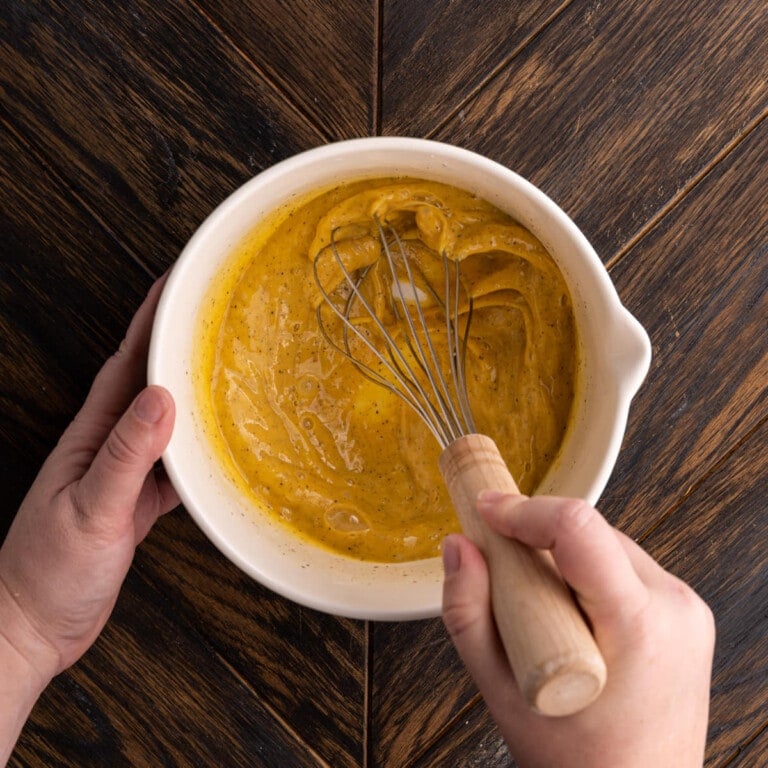
The eggs are the most important ingredient in your quiche filling! Crack the eggs into a large mixing bowl first.
Adding the eggs first will give you a chance to remove any egg shells that may accidentally fall into the bowl. Wondering the greenest way to dispose of your egg shells? Check out this post on Composting Egg Shells.
Green tip: Look for pasture-raised eggs (over free-range or cage-free) to support agriculture that is less reliant on chemicals and fossil fuels.
Once you’ve cracked all your eggs and checked for shells, add the milk, salt, pepper, and nutmeg. Use a whisk to beat the eggs until the whites and yolks are seamlessly integrated and the eggwash is thick and smooth.
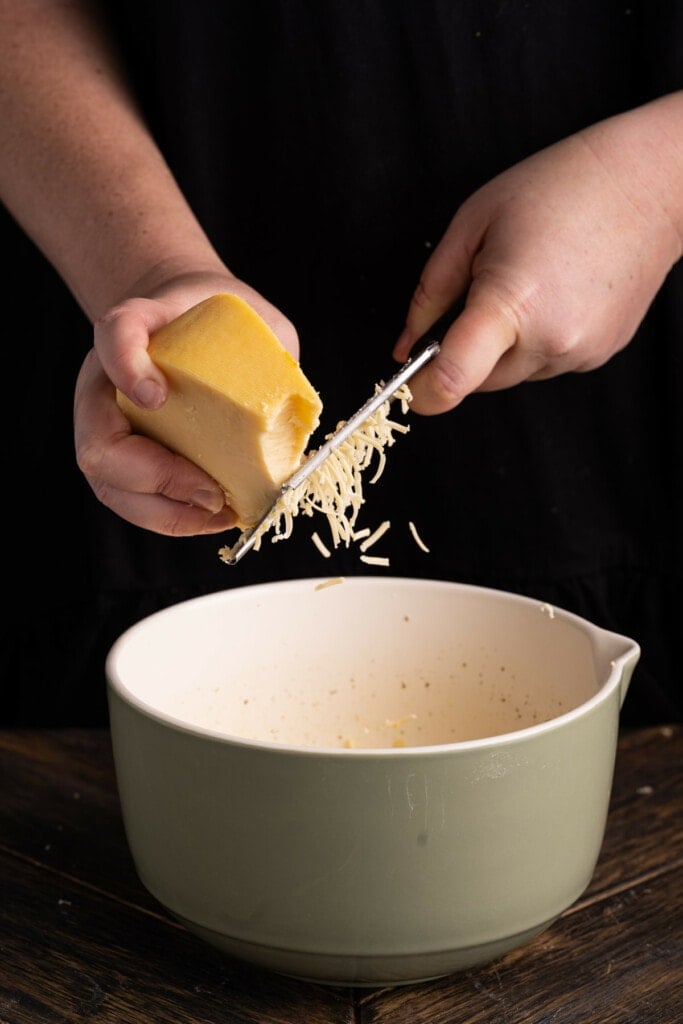
Grate Your Own Cheese for a Creamier Quiche
I know, I know. It’s a whole extra step to grate your own cheese, especially when the grocery store sells perfectly packaged cheese that is already shredded. So why should you take this extra step?
Well, pre-shredded cheese has extra preservatives to keep it from sticking together. And while you may not be able to taste any difference in terms of flavor from the extra preservatives, there is a notable difference in texture.
Free from those excess preservative, freshly hand-shredded blocks of cheese undoubtedly produce a silkier, creamier, cheesier quiche. Not convinced? Read all about it here.
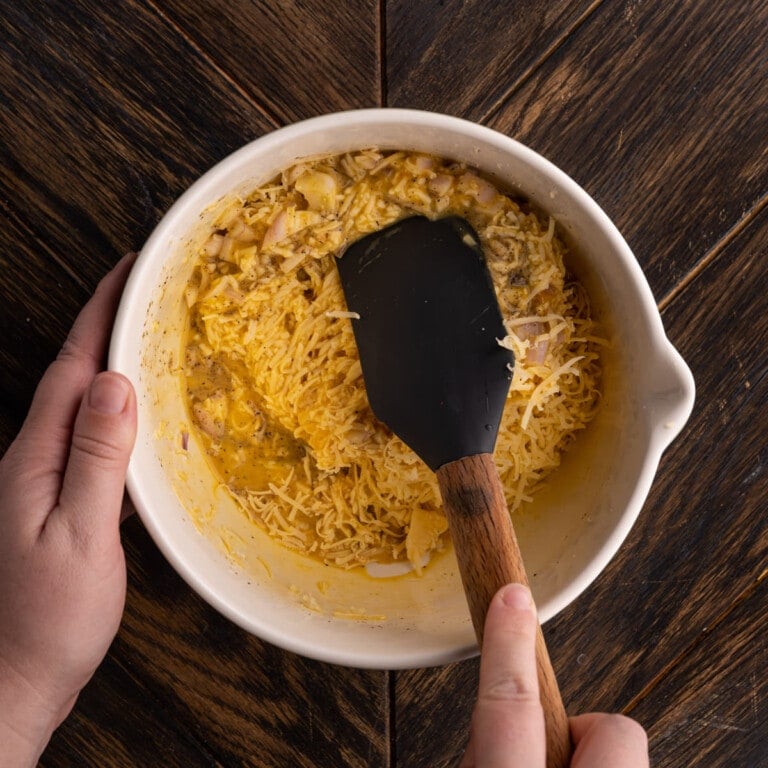
Add the grated cheese, the garlic, and about half of the diced shallots to the egg with the cheese. Then, use a spatula to fold the add-ins into the egg. This will yield a super thick and creamy filling.
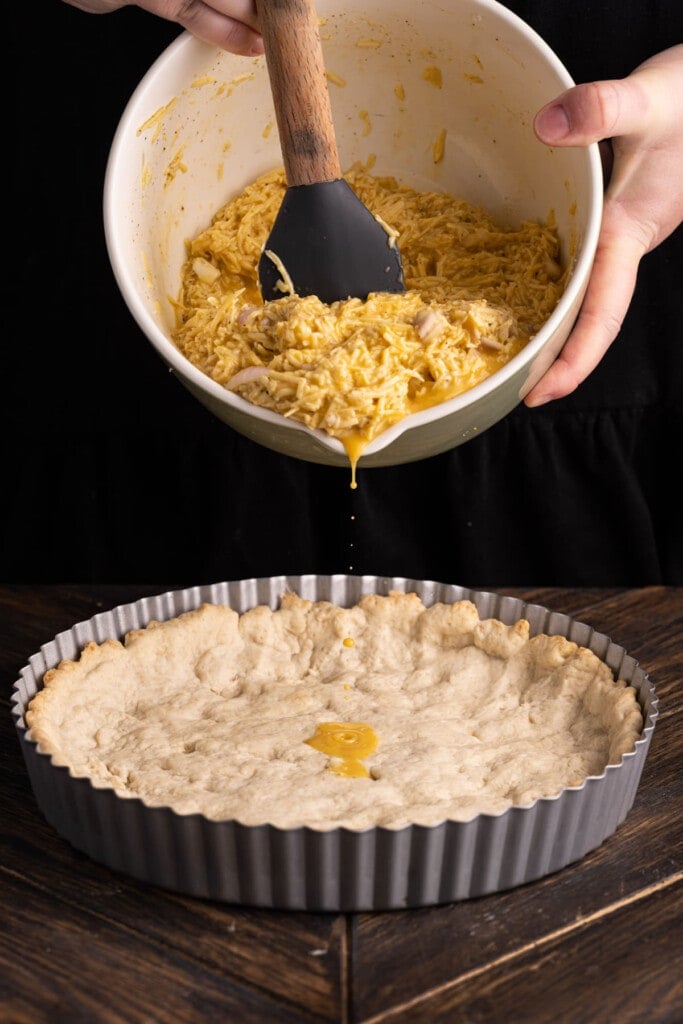
Add the Filling to the Crust
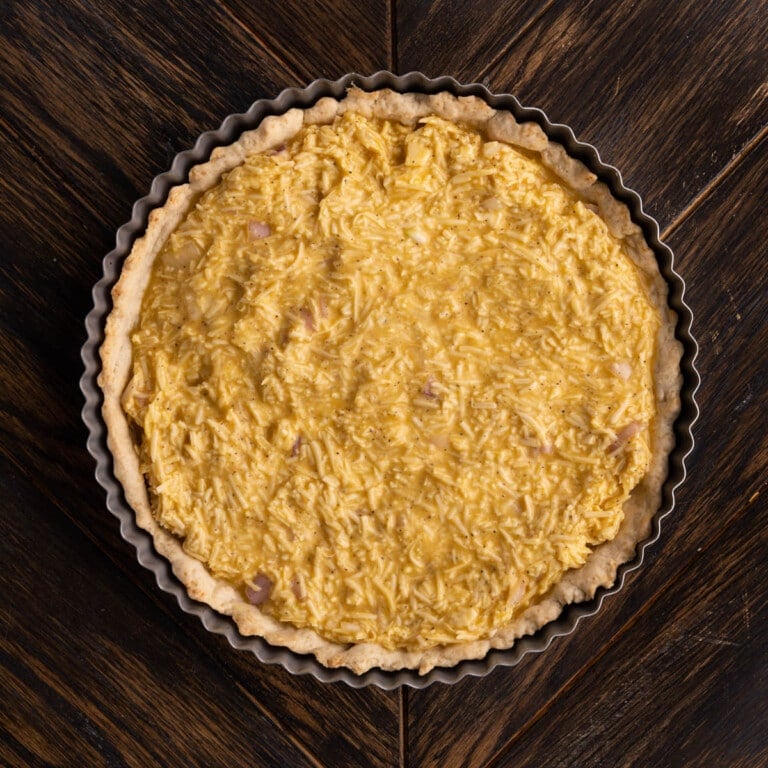
Now it’s time to add that thick filling to the crust. Use your spatula to scrape the filling out of the bowl and into the blind baked crust.
Then, use the spatula to spread the filling evenly throughout the crust.
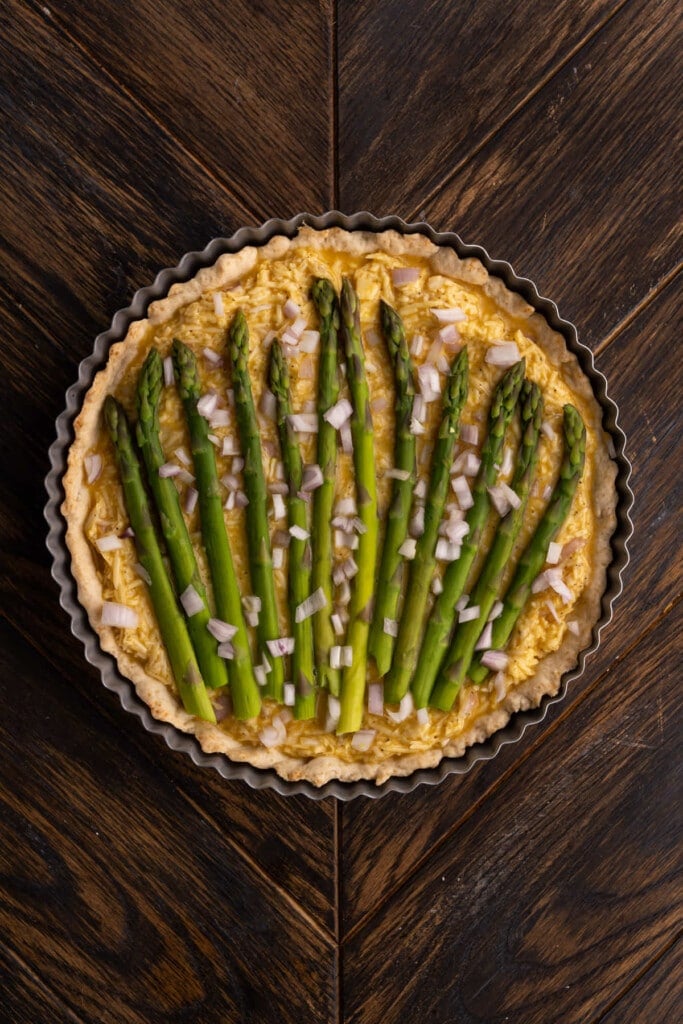
Add Your Blanched Asparagus
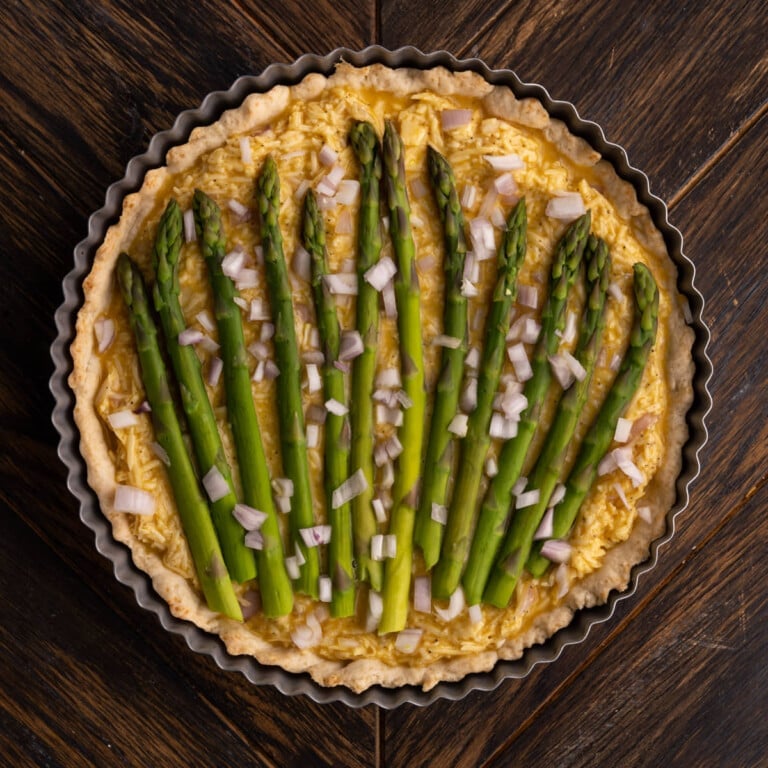
Next, add the blanched asparagus on top in a single layer, leaving a little space in between each stalk.
Then, sprinkle the remaining diced shallots on top and you’re ready for the oven! Bake for 55-60 minutes until the filling is firm and the outer crust edges begin to brown.
What to Serve Quiche With
This quiche is special enough to serve on its own, with its distinct layers of buttery crust, cheesy egg, and crisp asparagus! But if you’re looking for some delicious dishes to serve on the side, here are some of my favorites:
- Vegan Breakfast Sausage Patties
- Fresh fruits
- Banana Carrot Muffins
- Vegetarian Biscuits and Gravy
- Roasted Honey Gold Potatoes
- Pistachio Muffins
- Roasted Carrots and Brussels Sprouts
- Blueberry Banana Oatmeal Muffins
- Roasted Cauliflower and Sweet Potato
How to Store Leftover Quiche
This quiche feeds 8, so you may have leftovers! The great news is it will last covered in the refrigerator for 3-4 days.
You can reheat in the oven at 350°F for 10-15 minutes until heated through. If you want to reheat an individual serving, I still recommend heating in the oven on a baking sheet.
In a pinch, you can cover and microwave an individual portion for 2-3 minutes, until heated through, but this may change the texture slightly.
Green tip: Did you know that of the billions of pounds of food wasted annually, it is estimated that 50% of it happens in our homes? It’s always best to avoid food waste by properly storing and reheating leftovers!
How to Freeze Quiche
You can either freeze the quiche before or after baking. I prefer freezing it after it’s fully cooked because it’s a little easier to manage, and less likely to leak or spill in your freezer.
However, freezing before baking will get you the freshest taste!
To freeze before baking, make sure you wrap it tightly in saran wrap—the tighter the better! You want to keep out as much air as possible to avoid freezer burn. You can freeze it like this for up to 3 months.
The frozen pre-cooked quiche will need to be thawed completely before you bake it. The best way to thaw it is by transferring it to your refrigerator the night before you plan to bake it.
Alternatively, you can opt to use the defrost setting on your microwave, but this is a little bit tricky to get perfectly without the eggs starting to cook in the microwave, so proceed with caution!
To freeze the quiche after it’s fully baked, wrap it or transfer it to a freezer-safe airtight container. You can also slice and freeze it in individual portions.
To reheat frozen (cooked) quiche, place the whole thing or an individual portion in the oven and allow it to sit in the oven while it preheats to 325°F. Then, once oven reaches 325, bake for about 15-20 minutes until thoroughly heated.
Asparagus Quiche Frequently Asked Questions
Should vegetables be cooked before putting in quiche?
Yes, most vegetables should be cooked before putting them into a quiche (with the exception of minced garlic and finely diced shallots, red onion, and chopped herbs).
This is for two weekends. For one, the vegetables will take longer to cook at a low temperature than your egg custard. Secondly, pre-cooking vegetables will help release excess moisture so your custard isn’t runny and watery.
How do you make a quiche without a soggy bottom?
The two tricks to avoiding a soggy bottom are blind baking your crust and pre-cooking your vegetables.
Blind baking the crust means baking the quiche dough before adding your filling. This will firm up the crust, so that none of your filling permeates it. It also allows the crust to pre-bake at a higher temperature and for a longer time, ensuring it is thoroughly cooked.
Pre-cooking your vegetables means they wont add excess moisture to your filling, which can leak into the crust and make it soggy.
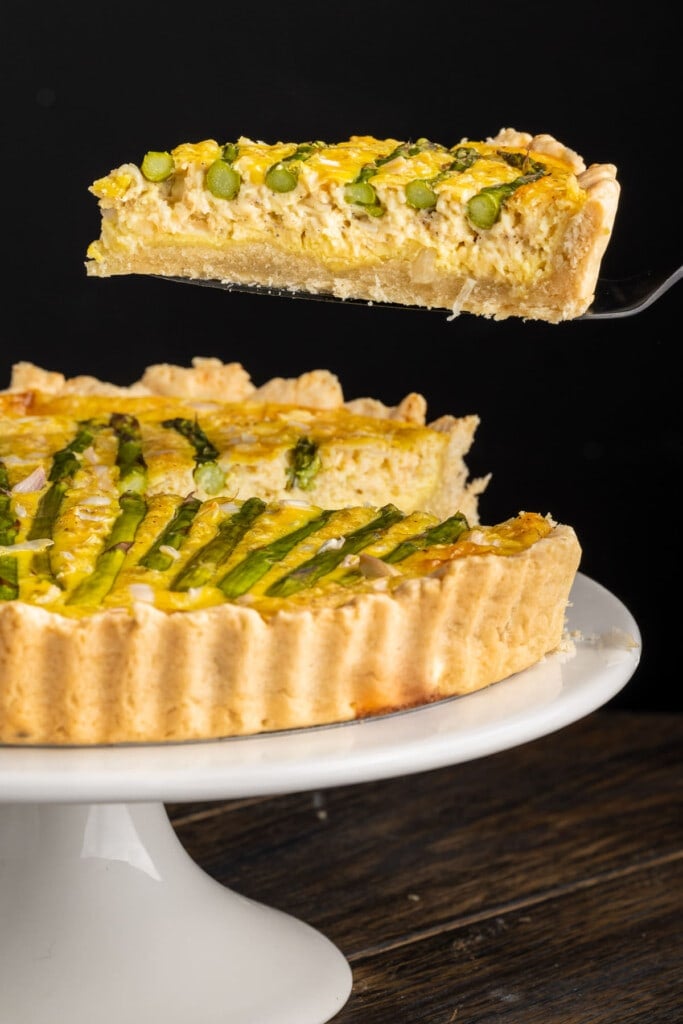
Why You Should Make this Asparagus Quiche
- The textures. Buttery flaky quiche crust with a creamy, cheesy egg filling.
- The flavors. The asparagus and shallots really shine in this recipe, with the Gouda adding a lot of texture and a subtle cheesy flavor,
- It feeds a crowd. This quiche provides 8 servings.
If you’re loving this Asparagus quiche and want more delicious multi-serving brunch recipes, check out this Savory French Toast Casserole and these Cinnamon Rolls with Apple Pie Filling.
Creamy Asparagus Quiche with Gouda Cheese
Print Save RateEquipment
- Blender * or *
Ingredients
Blender Quiche Crust
- 1 ½ cup all-purpose flour
- ½ cup unsalted butter (frozen)
- 1 tablespoon light brown sugar (tightly packed)
- ¼ teaspoon salt
- ¼ cup cold water
Asparagus Quiche Filling
- 2 large shallots
- 3 cloves garlic
- ½ pound asparagus
- 4 large eggs
- ½ cup milk or cream (dairy or unsweetened plant-based)
- ½ teaspoon nutmeg
- ¼ teaspoon salt
- ¼ teaspoon black pepper
- 8 ounces gouda cheese
Instructions
Blender Quiche Crust
- Preheat your oven to 400°F.
- Add the flour, butter (make sure it's cold!), brown sugar and salt to a high-powered blender or food processor and blend on high until butter starts to break down.
- While the blender is on, add the cold water and watch as your dough comes together. As soon as your dough is formed, turn the blender off.

- Remove the blade and turn the dough into a 9.5-inch quiche, tart, or pie dish.
- Use clean hands to press the dough into the dish, moving outward and up the side of the dish, keeping the thickness as even as possible around the dish. Use your thumb and forefinger to pinch the dough up the sides of the dish to form an outer crust as well.
- Bake without the filling for 10-15 minutes until the crust is firm.
Asparagus Quiche Filling
- Bring oven temperature down to 325°F and bring 10 cups of water to a rolling boil in a large pot.
- Prep your vegetables by peeling and mincing your garlic, peeling and dicing your shallots, and snapping the rough ends off of your asparagus.
- Once your large pot of water is boiling, carefully lower the asparagus into the boiling water and blanch for 5 minutes until tender. Remove the asparagus from the water and set aside to cool and dry.
- In a large mixing bowl, whisk together eggs, milk, salt, pepper, and nutmeg until smooth.
- Add the garlic and about half of the diced shallot. Grate the cheese into the mixture and fold with a spatula to combine.
- Add the filling to the crust and use your spatula to spread it out so you have an even layer throughout.
- Place the asparagus on top and sprinkle on the remaining shallot.
- Bake for 55-60 minutes until filling is firm and the edges of the crust are flakey. Enjoy!

Pro Tips
- Asparagus tips and shallot and garlic ends and peels can be composted or used to make your own vegetable broth!
- Find out more about how to compost egg shells!
- For a quicker quiche, you can easily buy pre-made pie crust and use it in place of the homemade quiche crust.
- For another delicious quiche recipe, check out this Apple & Cheddar Quiche.
Share This Recipe


2 thoughts on “Creamy Asparagus Quiche with Gouda Cheese”
Can I freeze this before baking?
If I bake it first, can I freeze it and reheat li at a later date.?
Hi Elizabeth! Absolutely yes. You can either freeze before or after baking. I prefer freezing after because it’s a little easier to manage, and less likely to leak or spill in your freeze, but that’s totally up to you!
To freeze before baking, make sure you wrap it tightly in saran wrap, the tighter the better! You want to keep out as much air as possible to avoid freezer burn. You can freeze it for up to 3 months. It needs to be thawed completely before baking. You can do so by transferring it to your refrigerator the night before. You can also use a defrost setting on your microwave but this is a little bit tricky to get perfectly without the eggs starting to cook in the microwave.
To freeze after it’s baked, again make sure to wrap it. You can also slice and freeze in individual portions. To reheat frozen (cooked) quiche, place the whole thing or an individual portion in the oven and allow it to sit in the oven while it preheats to 325°F. Then, once oven reaches 325, bake for about 15-20 minutes until thoroughly heated.