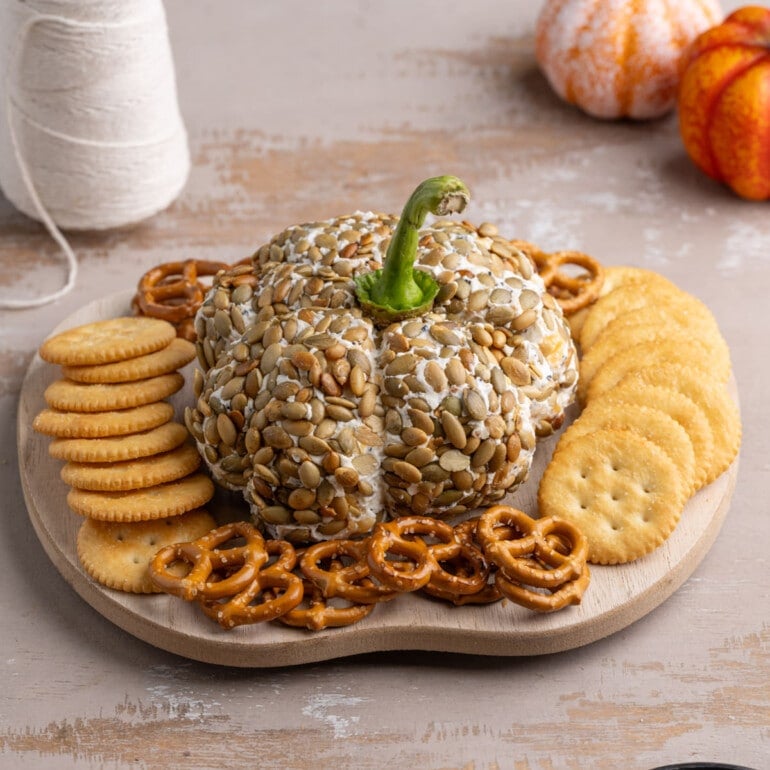
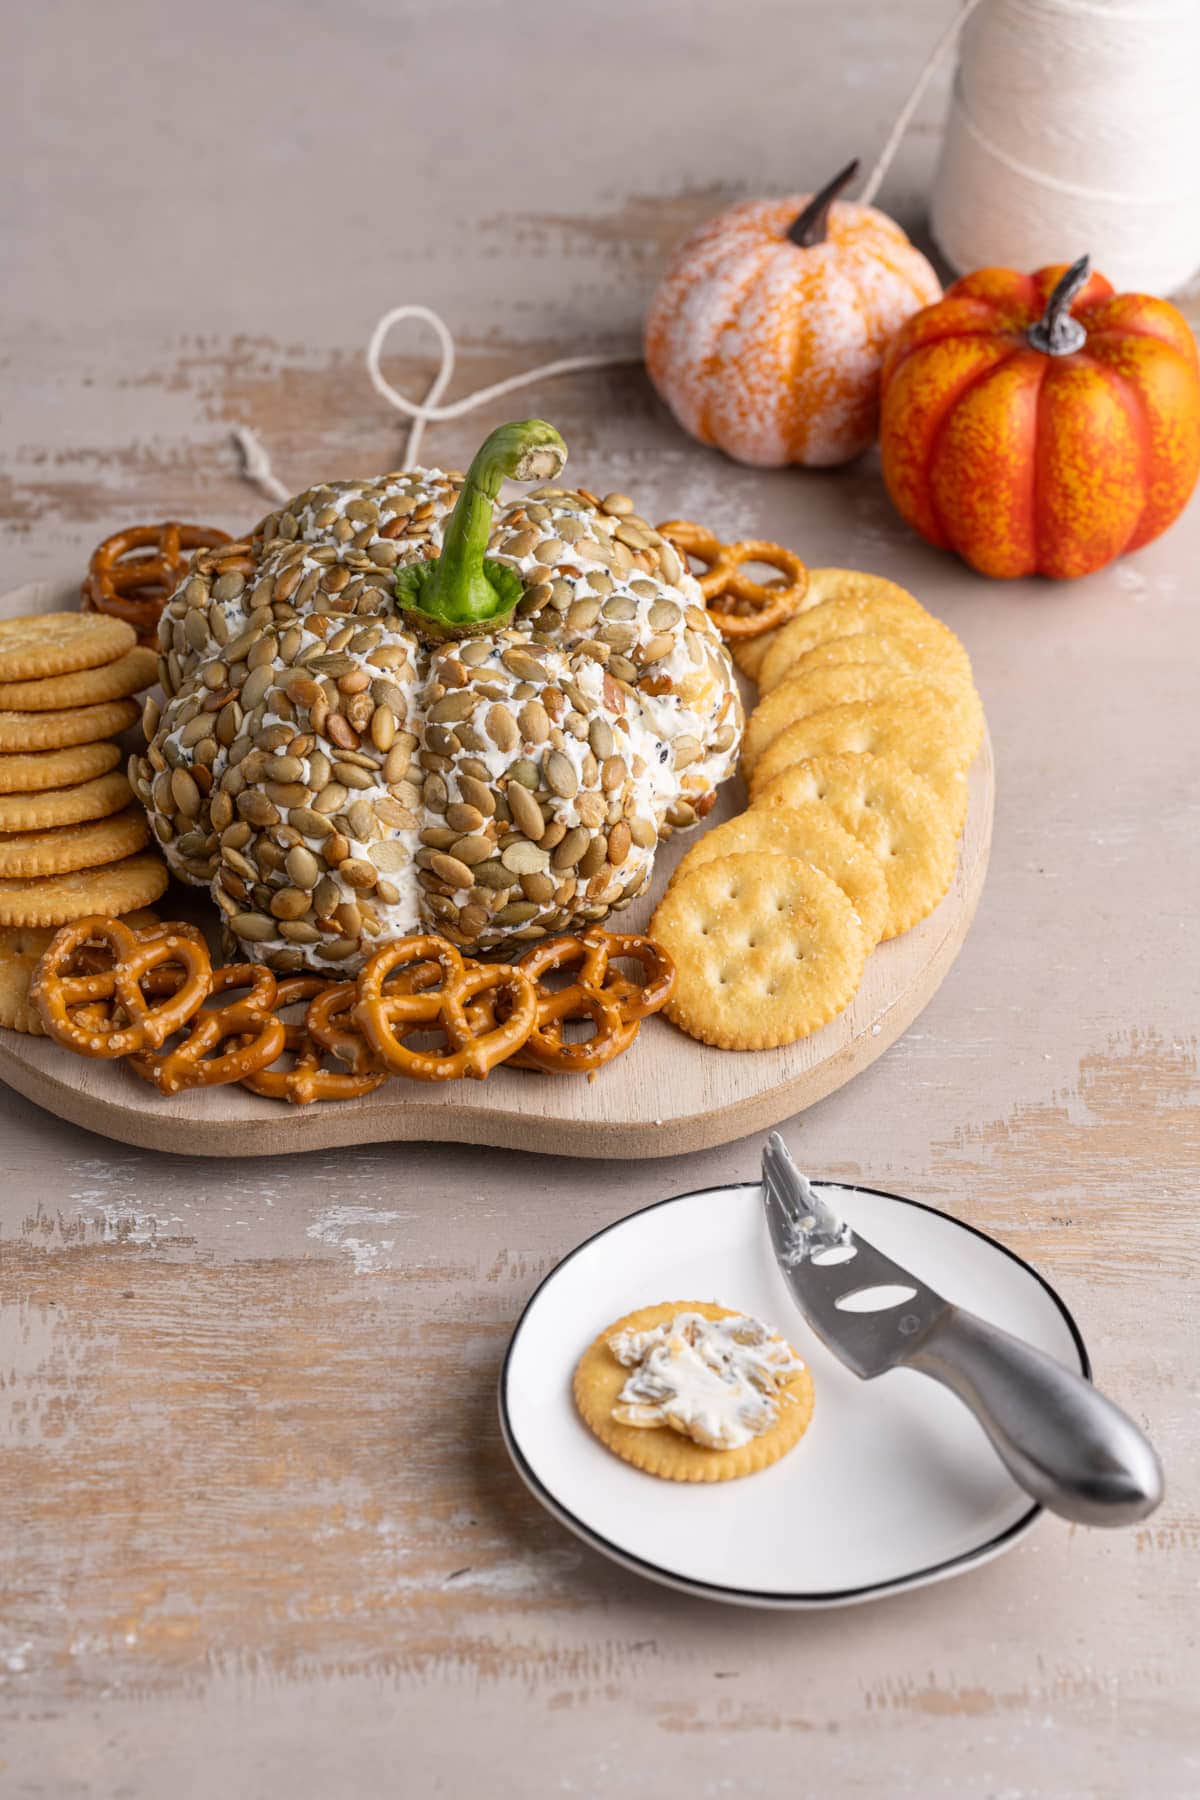
Looking for a fun and festive Fall treat for entertaining? This 4-Ingredient Cream Cheese Pumpkin is adorable, delicious, and totally shareable for a crowd.
Plus, it only requires 4 ingredients, making this easy dip recipe my go-to for Fall get togethers.
In this simple appetizer recipe, you will learn how to make a delicious cheese ball out of cream cheese, cheddar cheese, and Everything but the Bagel Seasoning.
You’ll also learn the easiest technique for coating it in pumpkin seeds, shaping your cheese ball like a pumpkin, and my favorite serving ideas.
I’ll also give you my best storage tips for leftovers so you can enjoy this to the very last bite and help to avoid food waste!
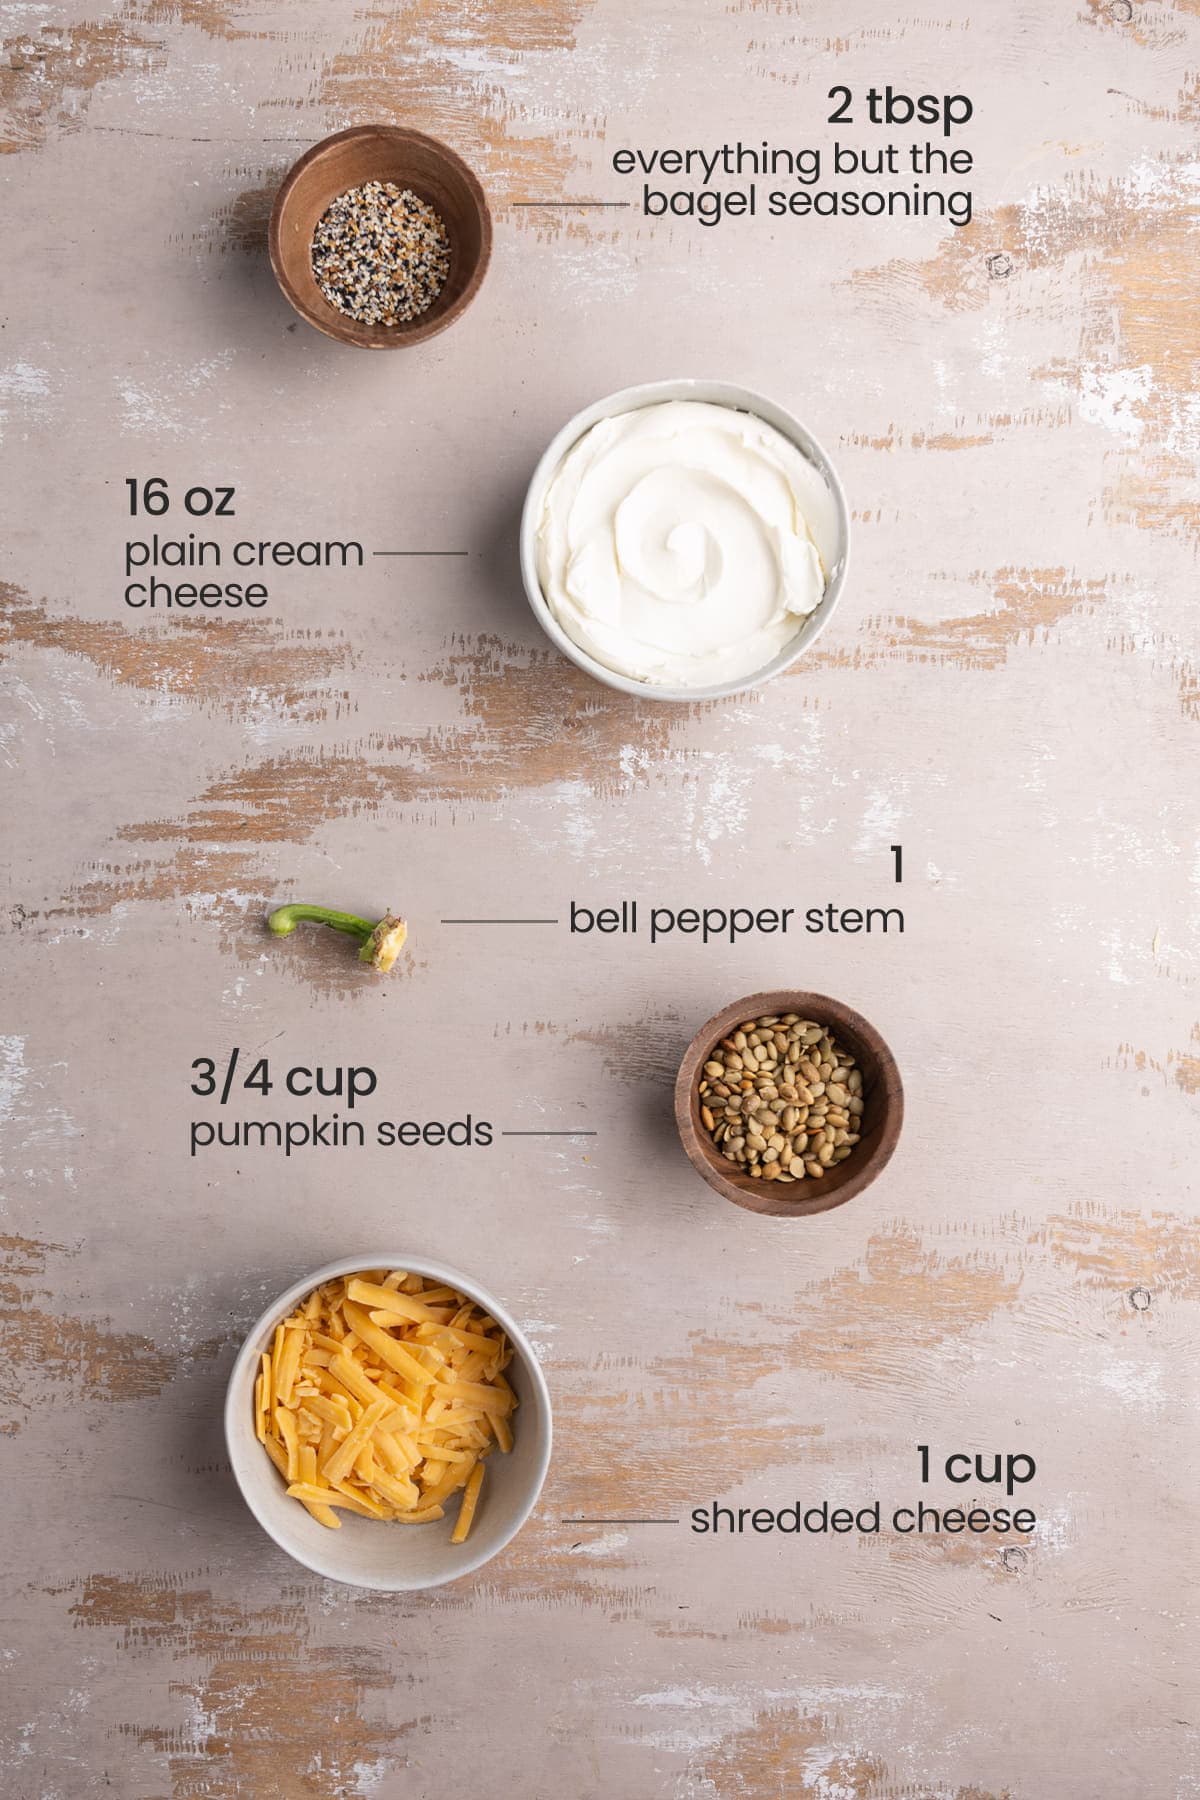
Cheese Pumpkin Ingredients
Here’s everything you need:
- Cream cheese. A block is best. You can use regular, reduced fat, or a combination of both.
- Cheddar cheese. You can shred your own or buy it pre-shredded for the quickest and easiest preparation.
- Everything but the bagel seasoning. A classic pairing with cream cheese, everything but the bagel seasoning adds tons of flavor to this pumpkin cheese ball appetizer.
- Pumpkin seeds. You can roast them and salt them yourself if you have some from carving your pumpkin, or you can buy them shelled, roasted and salted. This just gives the cheese pumpkin a nice crunch, gorgeous appearance, and nutty pumpkin taste.
- Optional for decoration- bell pepper stem. I used a stem from a red bell pepper to represent the stem on the pumpkin cheese ball, but you can also use a cinnamon stick, an actual stem from a mini pumpkin, or you can just opt to leave this off altogether. The pumpkin shape will be representative of a pumpkin enough, even without the stem.
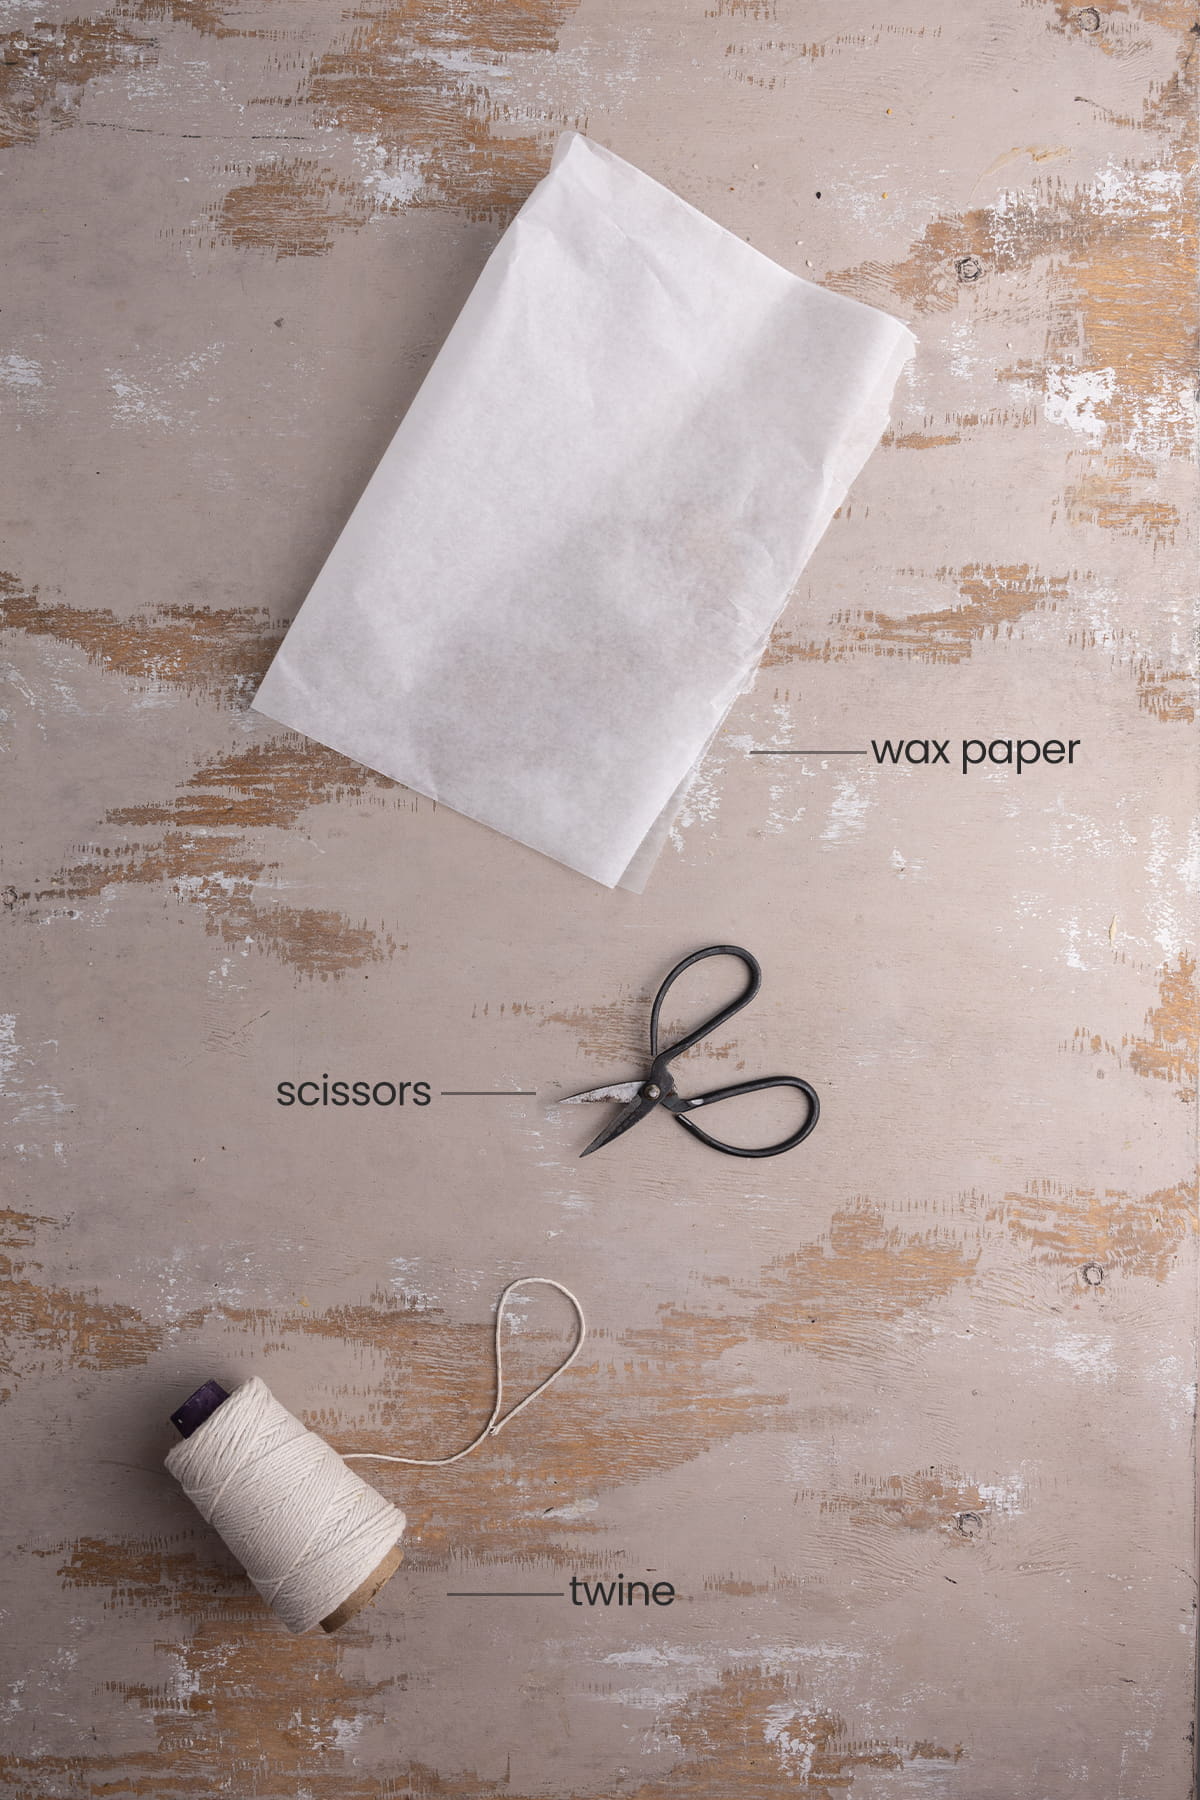
Cheese Pumpkin Equipment
- Wax paper. I like using wax paper in this recipe to help shape the pumpkin, but if you don’t have any on hand you can use saran wrap or parchment paper.
- Twine. I’m using butcher’s twine, but any yarn or thicker string will do. Even a thin ribbon will work here.
- Scissors. You’ll need scissors to cut the twine away from your cheese pumpkin once it’s shaped.
Cream Cheese Pumpkin Tips and Tricks
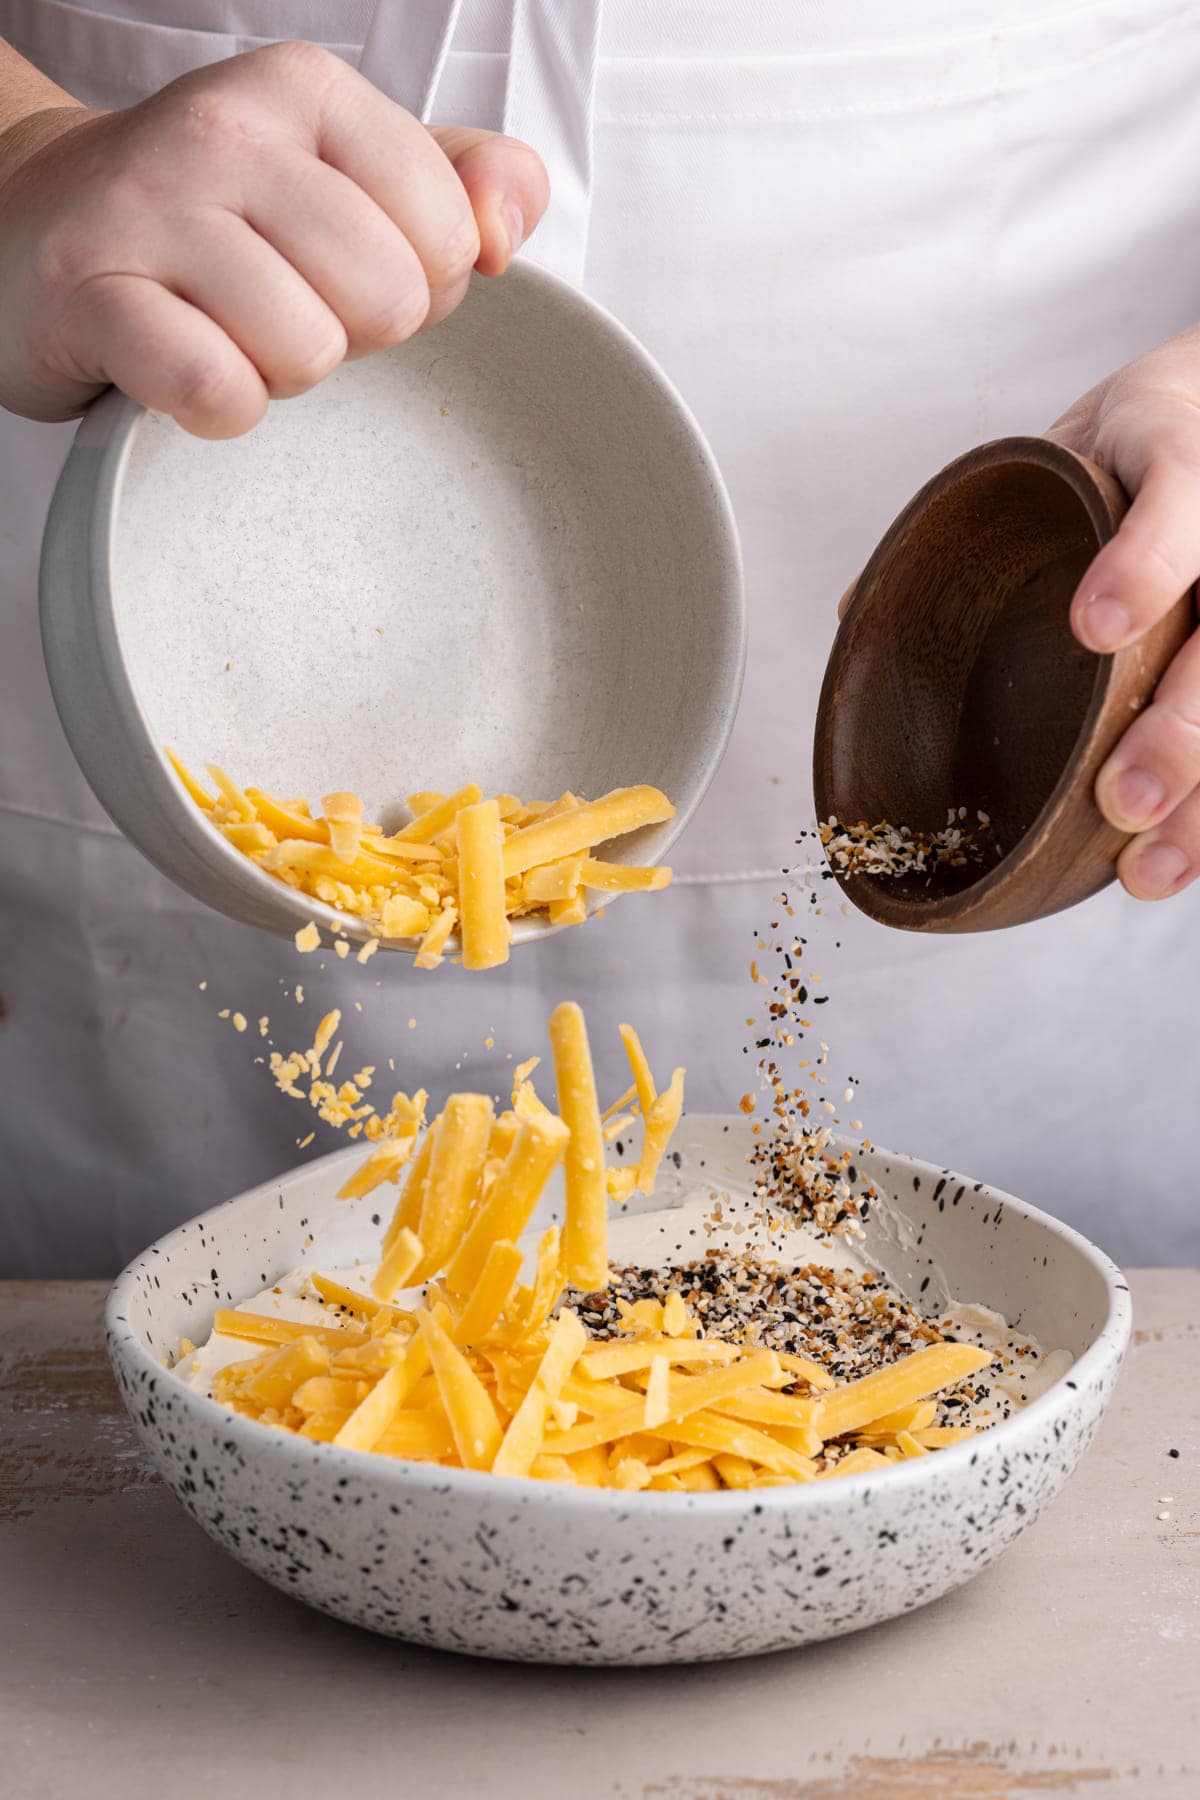
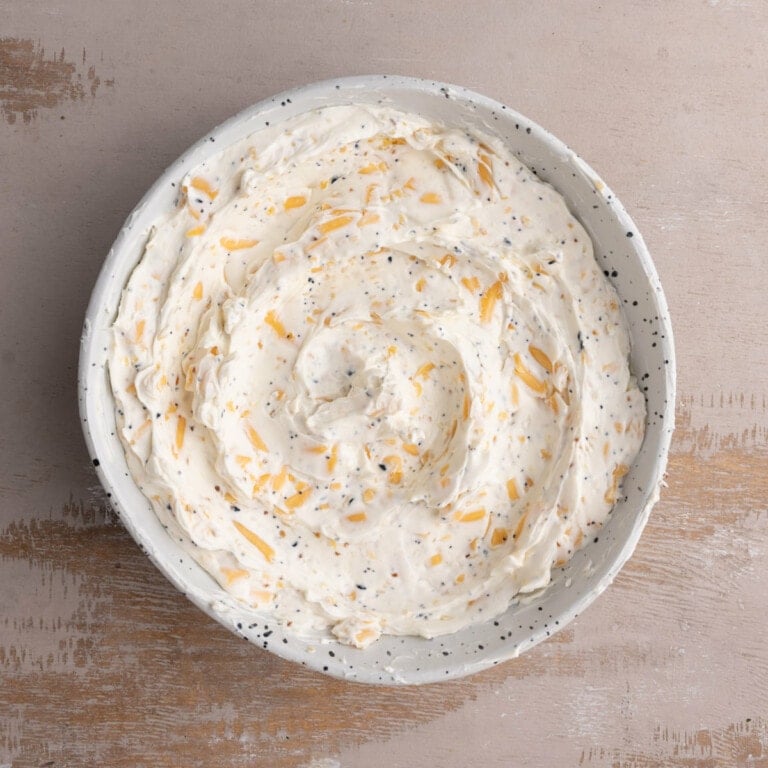
Mix Your Cheese and Seasoning Together First
The key to success in this cream cheese pumpkin recipe is making sure your cream cheese is softened. It makes it so much easier to mix and shape!
Set your cream cheese out on the counter about 30 minutes before you start making this recipe to allow it to come to room temperature naturally.
Once your cream cheese is nice and soft, add it to a bowl with the cheddar cheese and everything but the bagel seasoning. Mix to combine until the cheddar and seasoning is equally distributed throughout the cream cheese.
Use Wax Paper to Shape Your Seasoned Cream Cheese
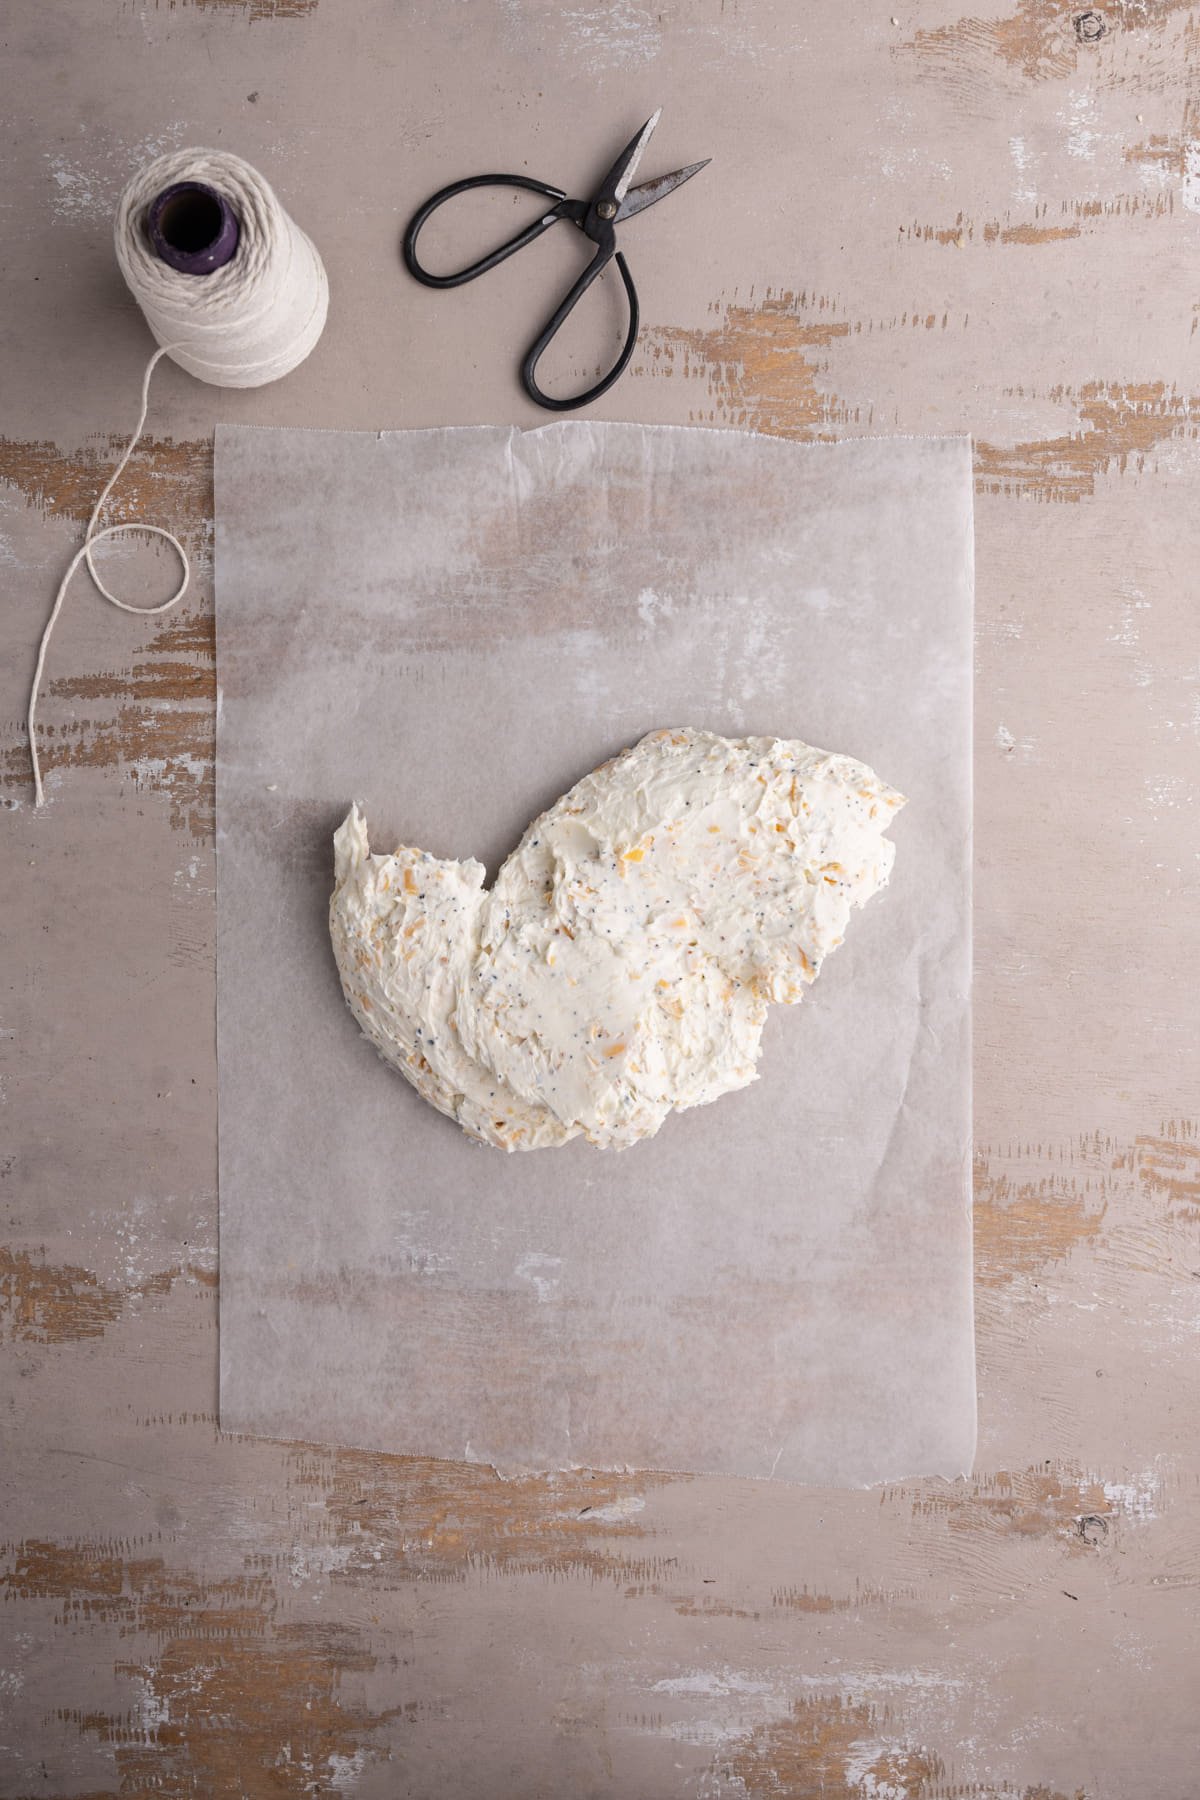
Once everything is mixed together, turn it out onto a piece of wax paper. Alternatively, you can use saran wrap or even parchment paper.
Add the cream cheese mixture to the center of your paper and then use two hands to fold the sides of the paper up and around the cream cheese to form a sphere.
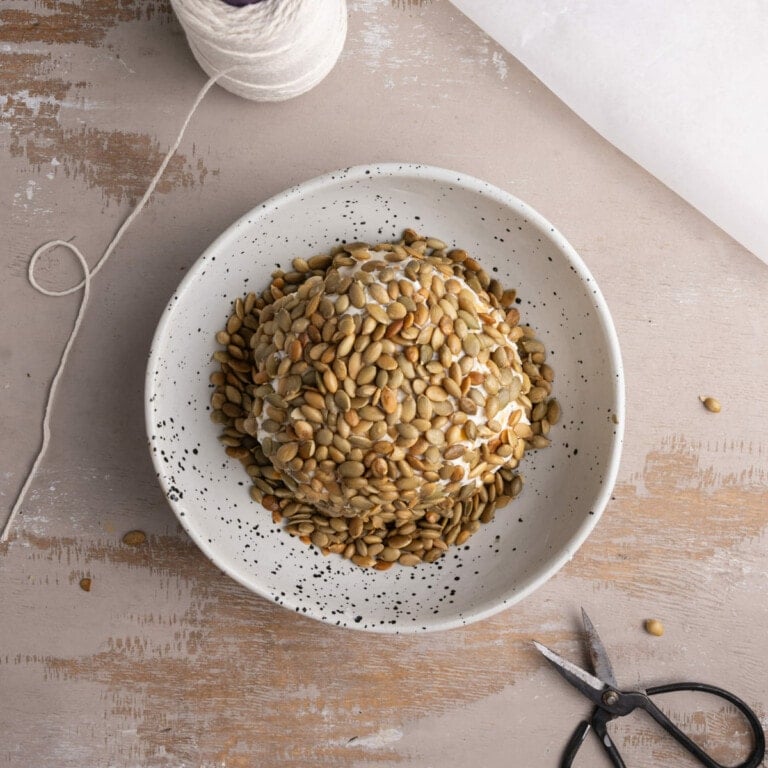
Cover the Cheese Pumpkin in Seeds
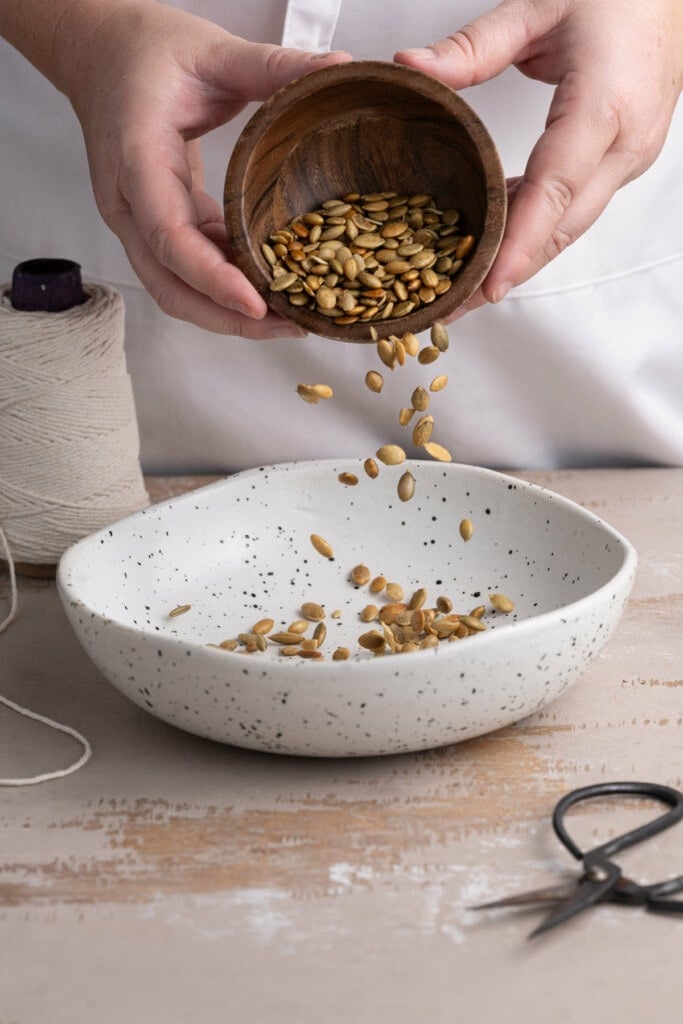
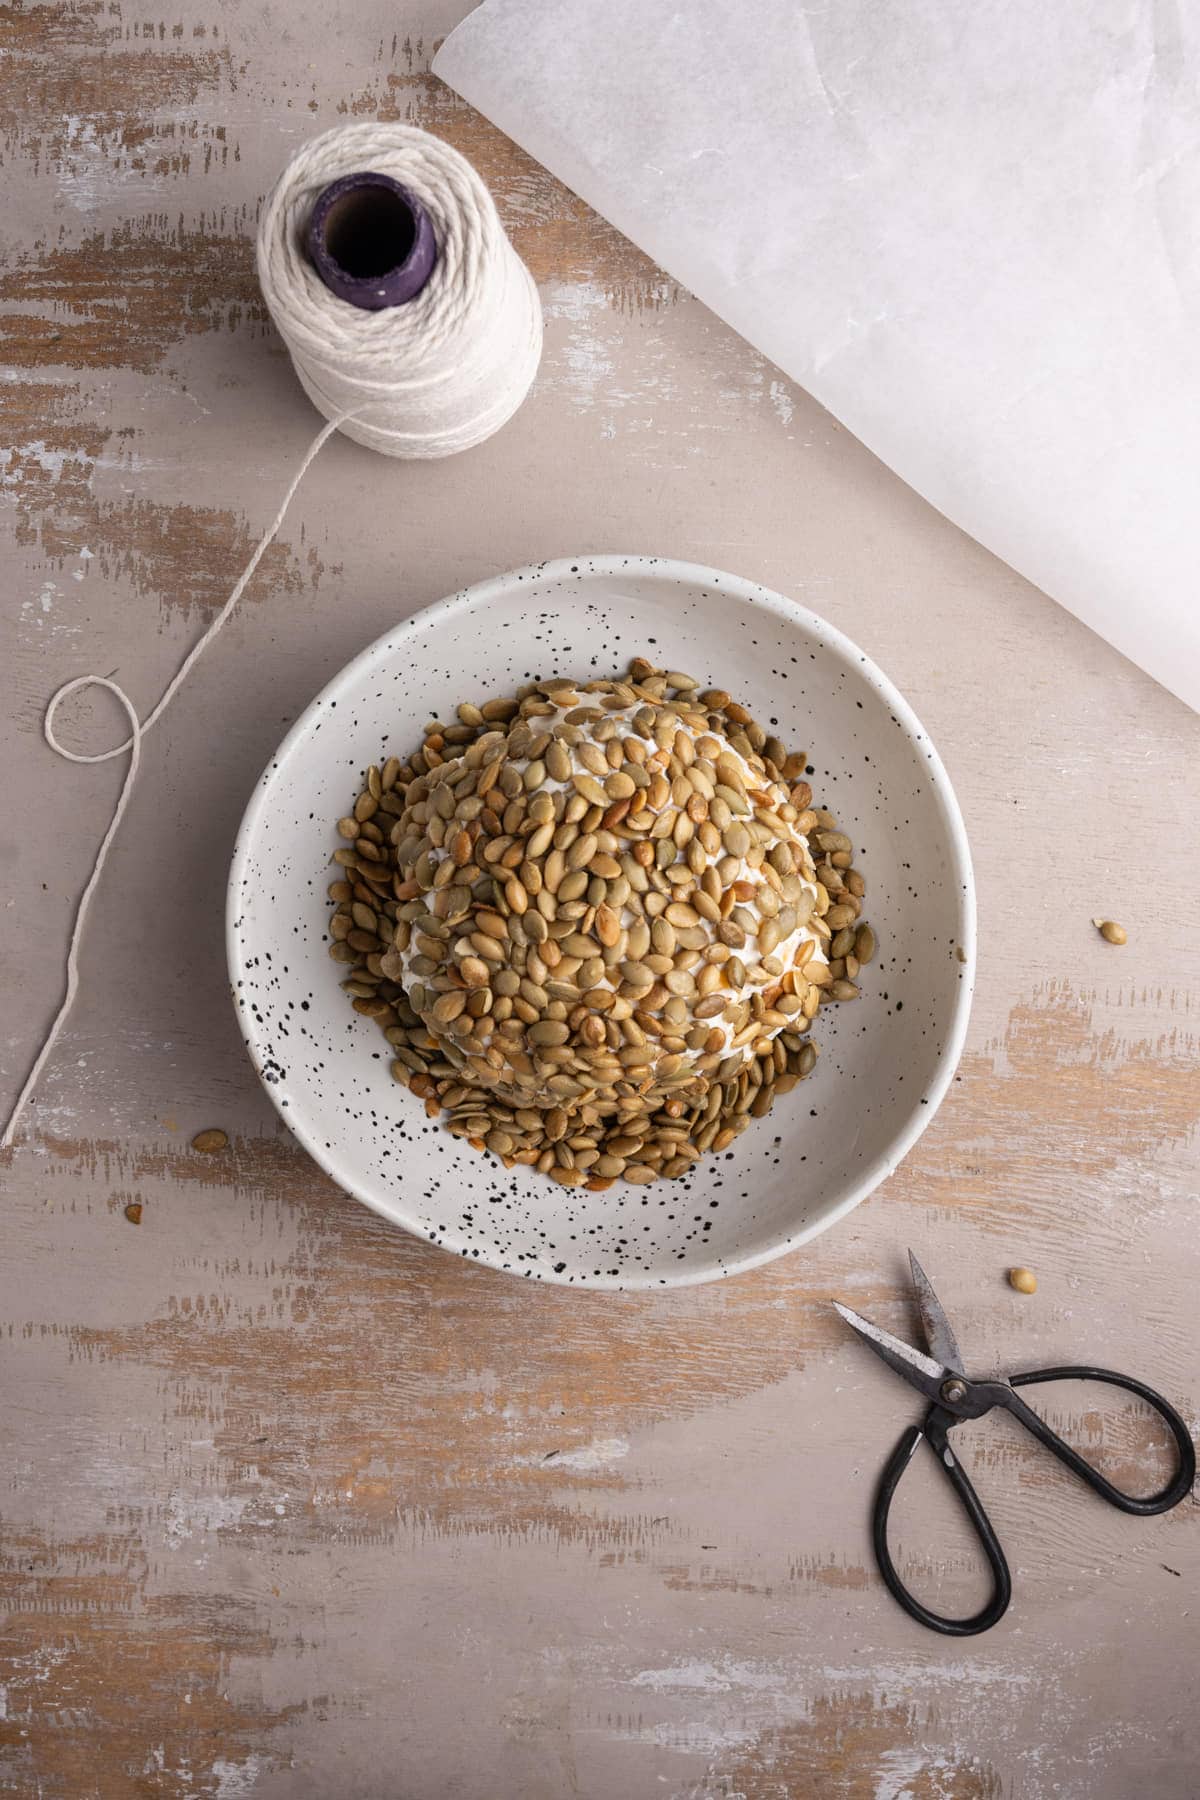
Add half of the pumpkin seeds to a shallow bowl. Then, take your cream cheese ball and drop it on top of the seeds. Pour the rest on top and lightly press, so that the cheese ball is completely coated in pumpkin seeds.
This will give it a nice crunchy exterior with tons of flavor, and will also make it easier to shape and work with.

How to Shape Your Cream Cheese into a Pumpkin
Shaping your cream cheese ball into a pumpkin is actually quite easy. Explaining how to do it in writing, well, I’m going to try my best!! I’ve included a series of images below so you can follow along visually, too.
Before we dive in, here’s my best tip for each step. Make sure you are puling the string nice and tight so that it is actually indenting the cream cheese.
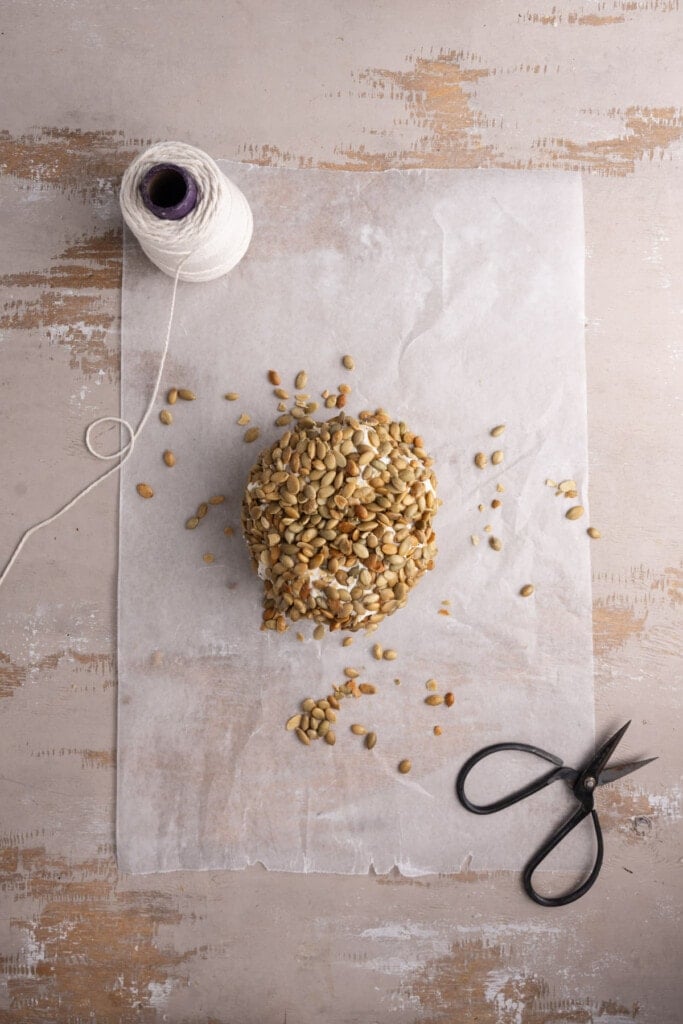
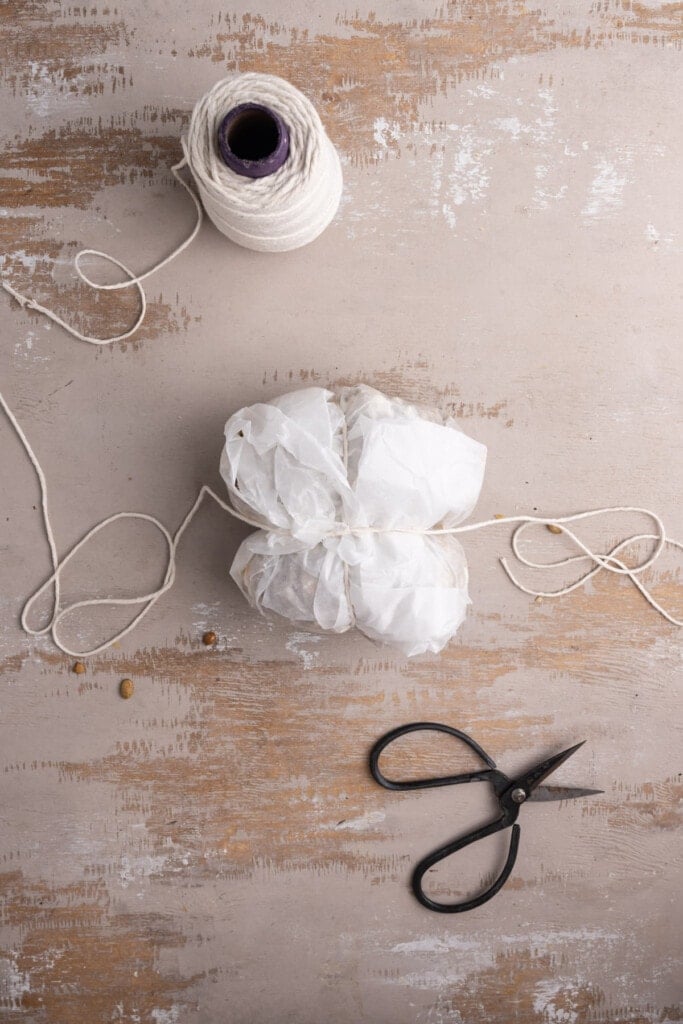
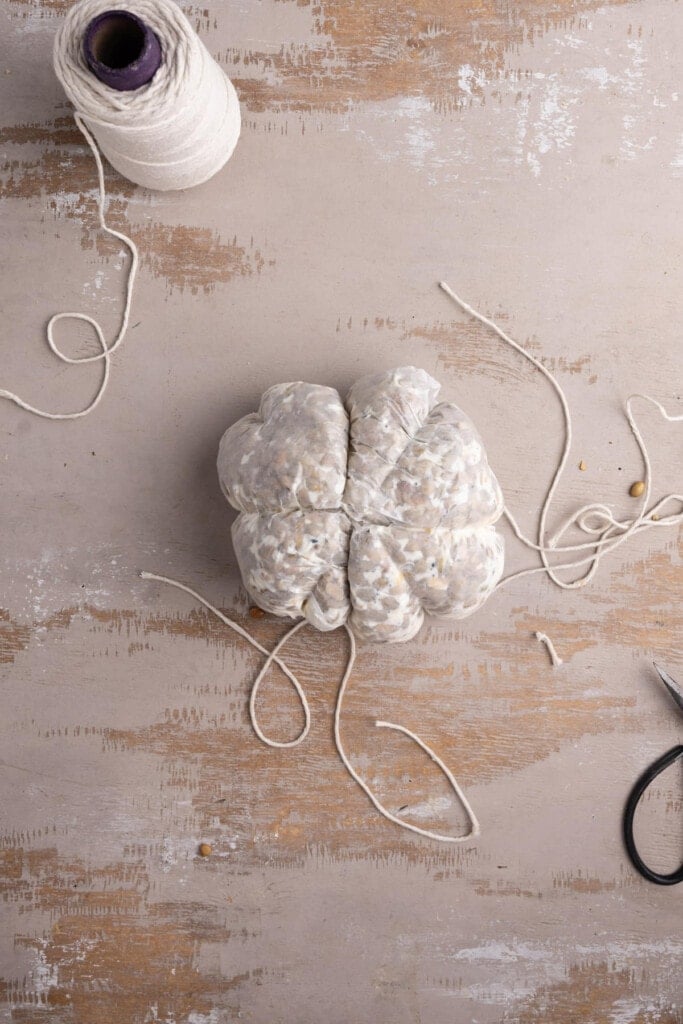
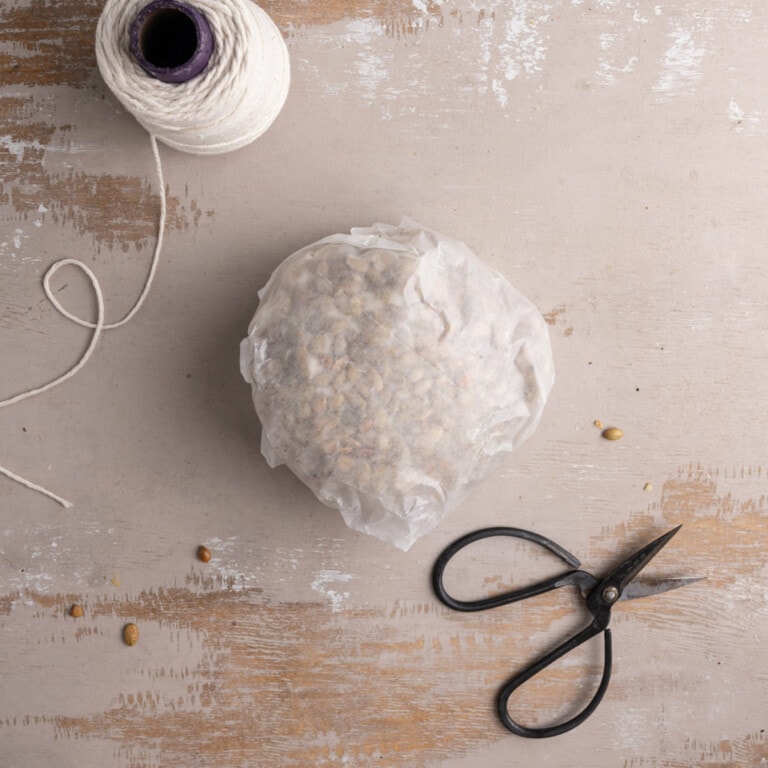
Step 1: Add the pumpkin seed-coated cream cheese ball to a clean piece of wax paper and wrap it up completely.
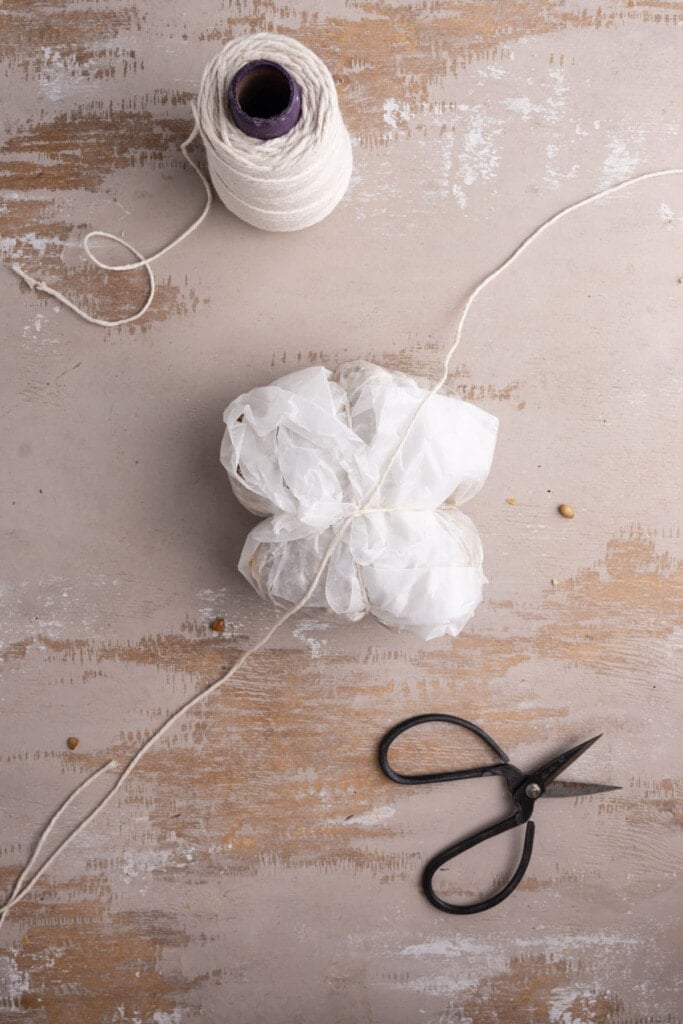
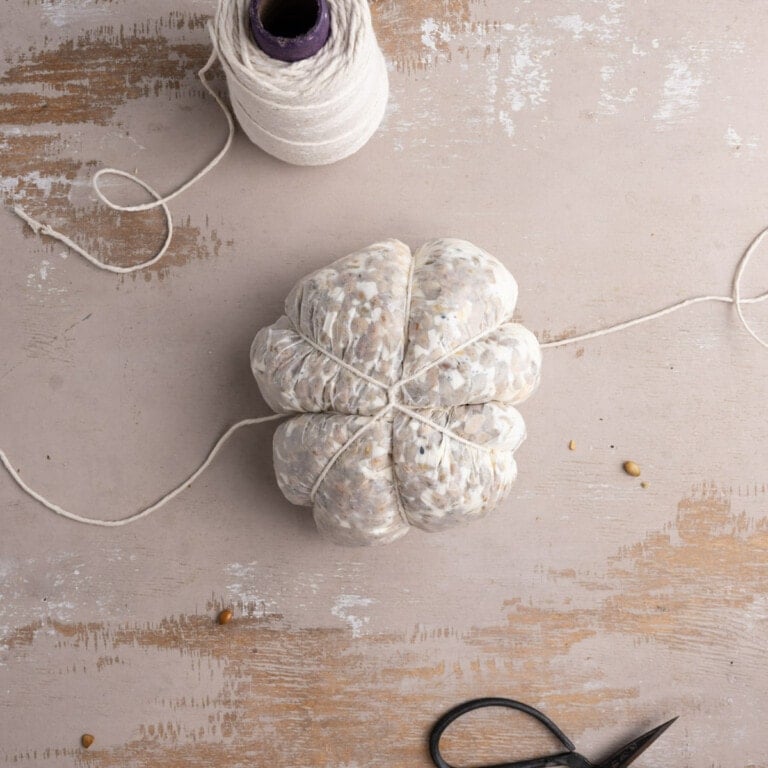
Step 2: The first knot you make around your pumpkin is just like wrapping a gift. Wrap the string around it horizontally, knot the two pieces of string together (think: the first step of tying your shoelaces), and then wrap the string around vertically.
Flip the ball over and tie a little knot.
Step 3: Then, orient the two pieces of string diagonally, so that they are halfway between the vertical and horizontal string.
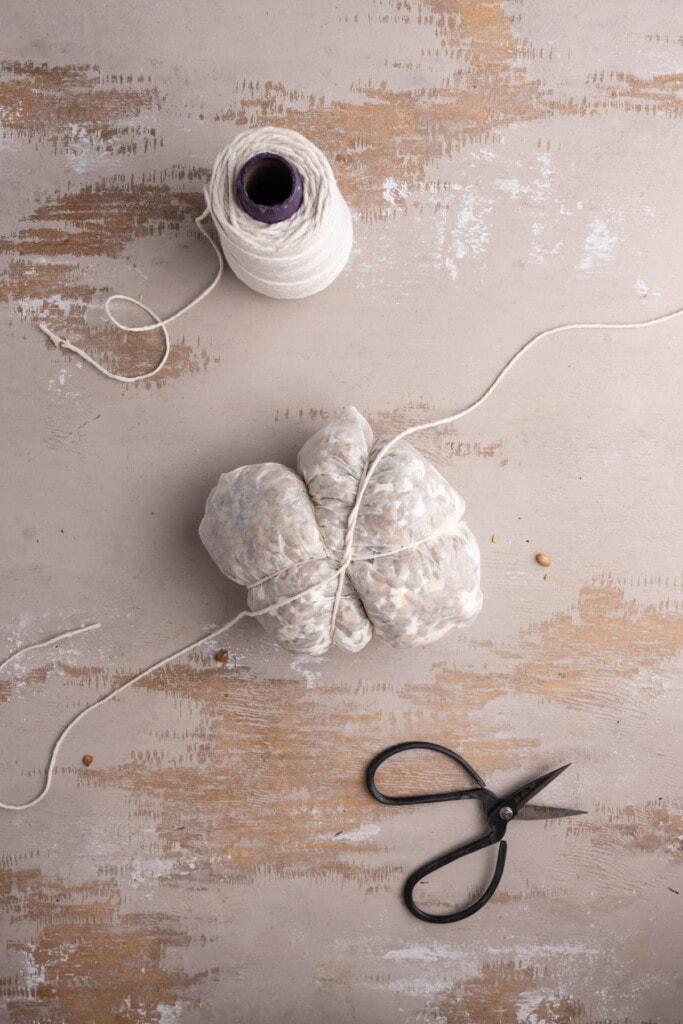
Step 4: Flip the cream cheese, pull the string tight, and knot the strings.
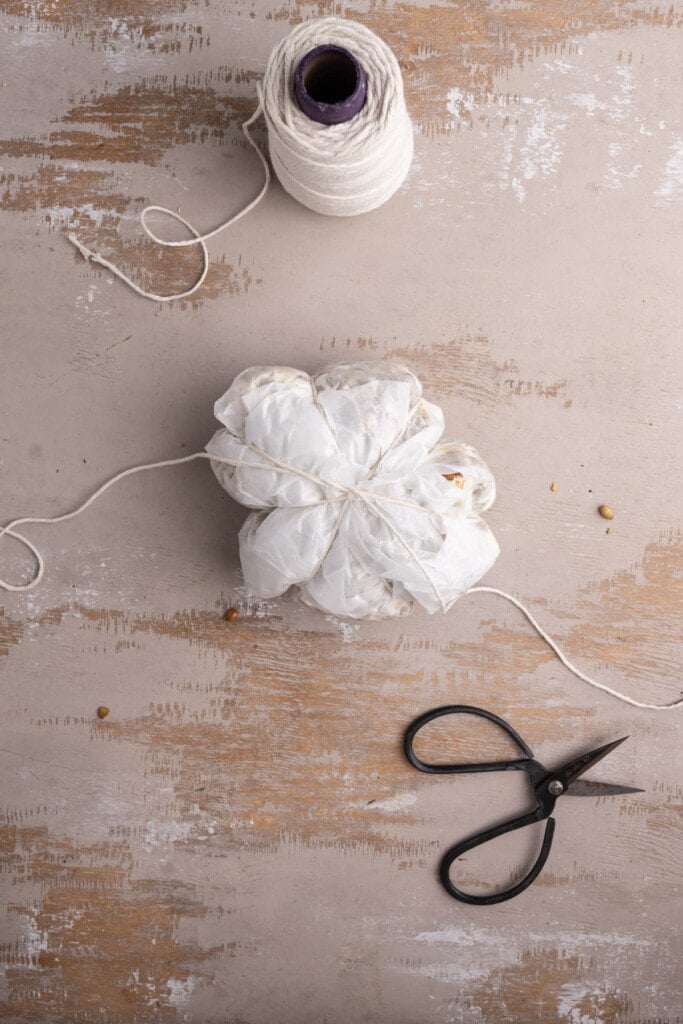
Step 5: Now, orient the strings on the other diagonal. Flip again, pull tight, and tie the knot.
Step 6: Cut the string away with the scissors so you are left with a pumpkin shape.
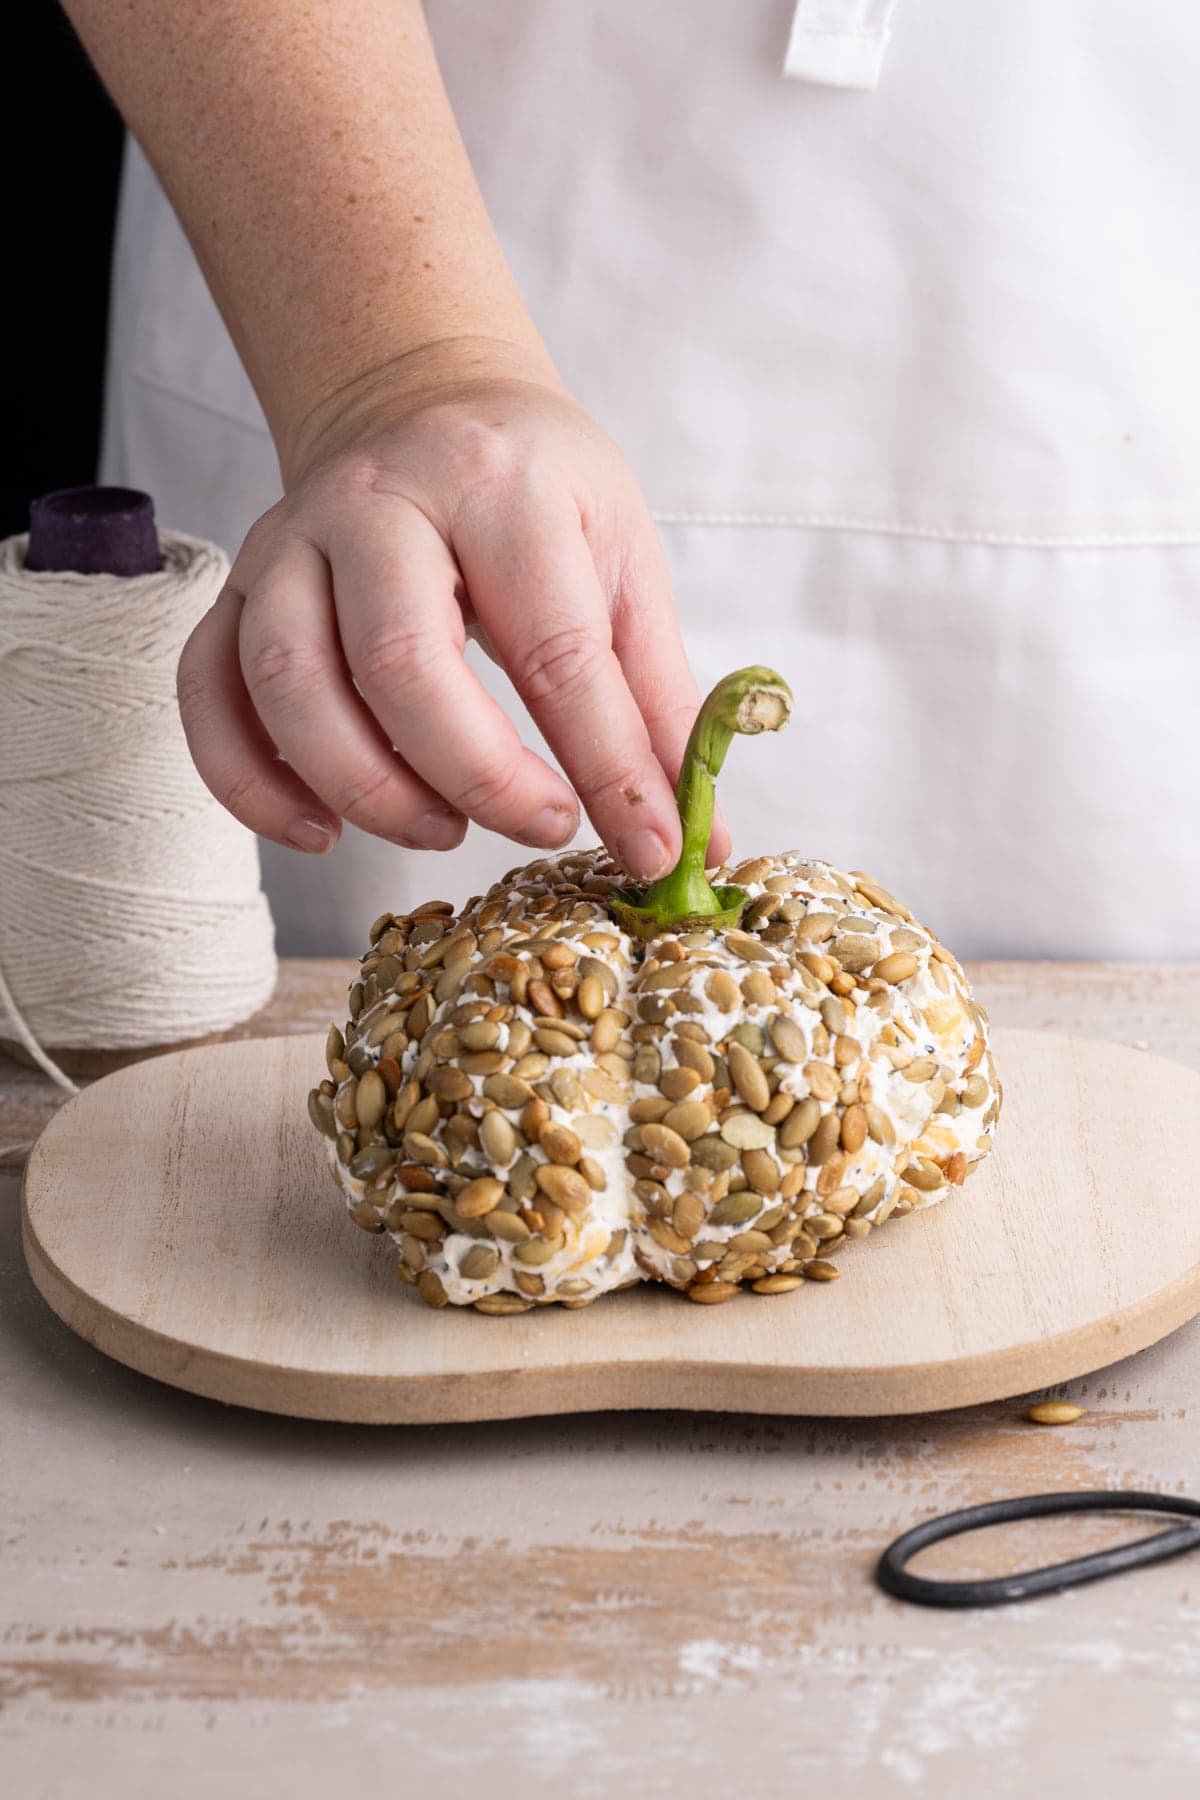
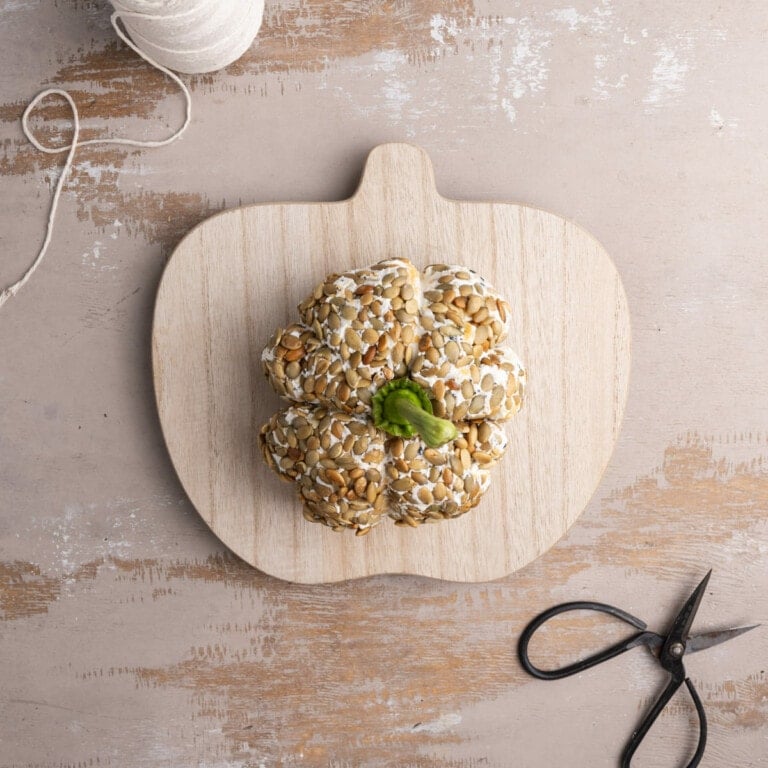
Use a Bell Pepper Stem for Decor
To complete the pumpkin design, I like to use a stem from a bell pepper. Just stick it into the top of the cream cheese. It should easily stay in place.
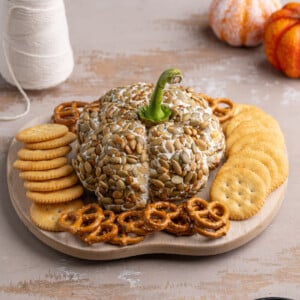
Serving Your Pumpkin Cream Cheese Ball
This cheese pumpkin has a long list of options to serve it with! It’s versatile and makes for a great dip or spread for the following:
- Crackers
- Pretzels
- Potato chips
- Tortilla chips
- Bagel chips
- Carrots
- Celery
- Bell pepper
- Pita bread
- Crostini
- Naan bread
- Cucumbers
- Radishes
- Snow peas (or snap peas)
- Broccoli
I recommend serving it with an open work blade knife (aka a soft cheese knife).

How to Properly Store Leftover Cream Cheese Pumpkin
If you have leftovers of this pumpkin cheese ball they will last in the refrigerator for about 2 weeks. Make sure to cover it or store it in an airtight container.
You can also freeze this for up to two months. Allow it to thaw overnight in the refrigerator before serving.
Quick tip: Since this cheese pumpkin has a two week shelf life, you can absolutely make it ahead of time! Store it in the refrigerator and let it come to room temperature before serving by setting it out on the counter about 30 minutes ahead of time.
Why You Should Make this 4-Ingredient Cream Cheese Pumpkin
- It’s festive!
- It’s great for entertaining.
- It’s simple.
If you’re loving this 4-Ingredient Cream Cheese Pumpkin and want more Fall appetizers, check out this Sweet Potato Hummus and Whipped Ricotta Crostini.
4-Ingredient Cream Cheese Pumpkin
Print Save RateIngredients
- 16 ounces plain cream cheese (16 oz = 2 blocks)
- 1 cup shredded cheddar cheese
- 2 tablespoons Everything but the bagel seasoning
- ¾ cup shelled, roasted, and salted pumpkin seeds
- stem of one bell pepper (optional for pumpkin stem)
Instructions
- Take your cream cheese out of the refrigerator about 30-45 minutes before starting to allow it to soften.
- In a medium mixing bowl, combine the cream cheese, cheddar cheese, and everything but the bagel seasoning.

- Turn the cream cheese mixture out onto a large piece of wax paper. Then wrap the wax paper around the cream cheese and use your hands to shape it into a ball.
- Add half of the pumpkin seeds to a shallow bowl and place the cream cheese ball on top. Then press the rest of the pumpkin seeds into the tops and sides of the cream cheese ball, so that it is completely coated with seeds on all sides.
- Add the seed-coated cream cheese ball to a second piece of wax paper and wrap it completely.
- Use butcher's twine to tightly tie around the ball, making little indentations around 10 equal parts to imitate the shape of a pumpkin. For detailed step-by-step instructions with pictures, please refer to the blog post.
- Cut away the twine and turn the pumpkin out onto a serving plate.
- Stick the stem of a bell pepper in the top (optional to represent pumpkin stem).
- Serve with your favorite snacks or veggies and a soft cheese knife. Enjoy!


Pro Tips
- Block cream cheese works best in this recipe. You can use regular, reduced fat, or a combination of both.
- If you don’t have a bell pepper stem, you can use a cinnamon stick, an actual stem from a mini pumpkin, or you can just opt to leave it off altogether. The pumpkin shape will be representative of a pumpkin enough, even without the stem.
- This appetizer is great for entertaining and for Thanksgiving! For more Thanksgiving recipe ideas, check out my list of 40+ Exciting Thanksgiving recipes!
Share This Recipe