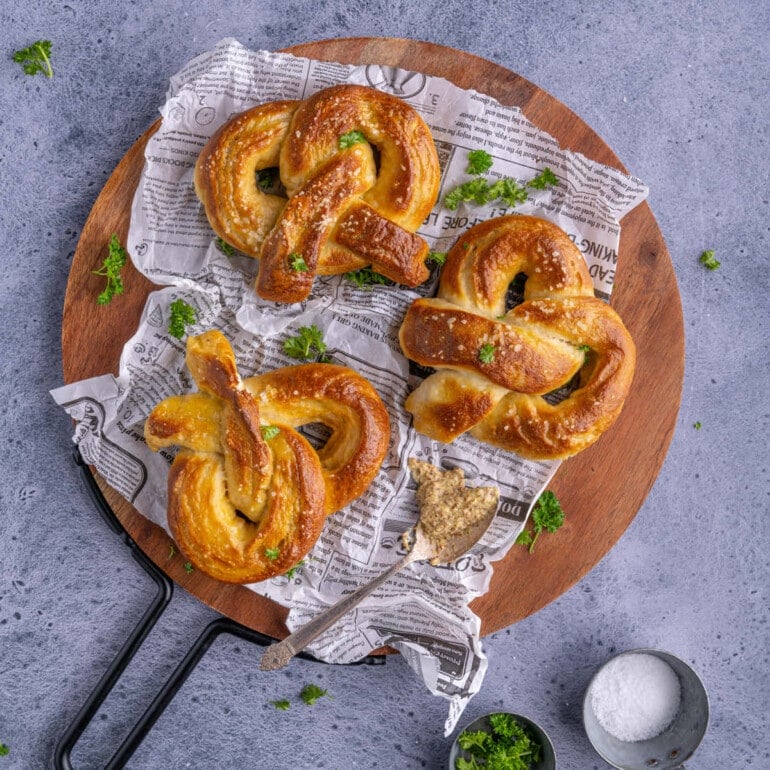
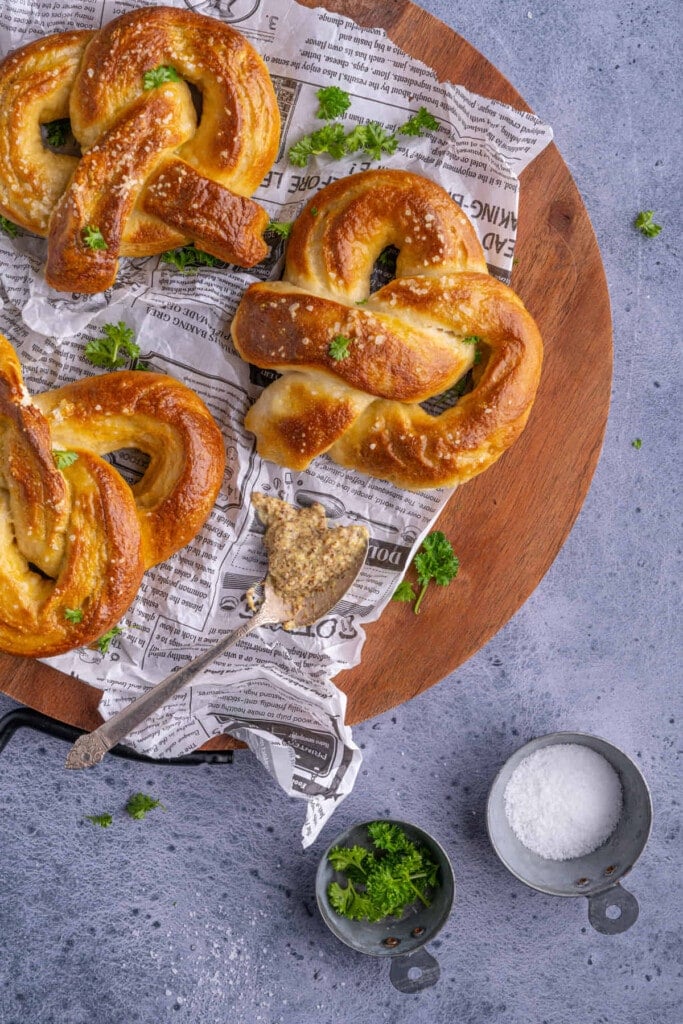
You know that amazing buttery smell coming from the food court in the mall? It’s coming from the pretzel stand! And your house can smell like that, too, with these Homemade German Soft Pretzels.
I know, pretzels seem intimidating to make, but if you have the time and a little bit of patience, you can totally do it!
These pretzels are out of this world with this Beer Cheese Dip or Vegan Spinach Artichoke Dip! Such a classic pairing!! But they also taste amazing with mustard or honestly, you can just nosh them on their own.

Homemade German Soft Pretzels Ingredients
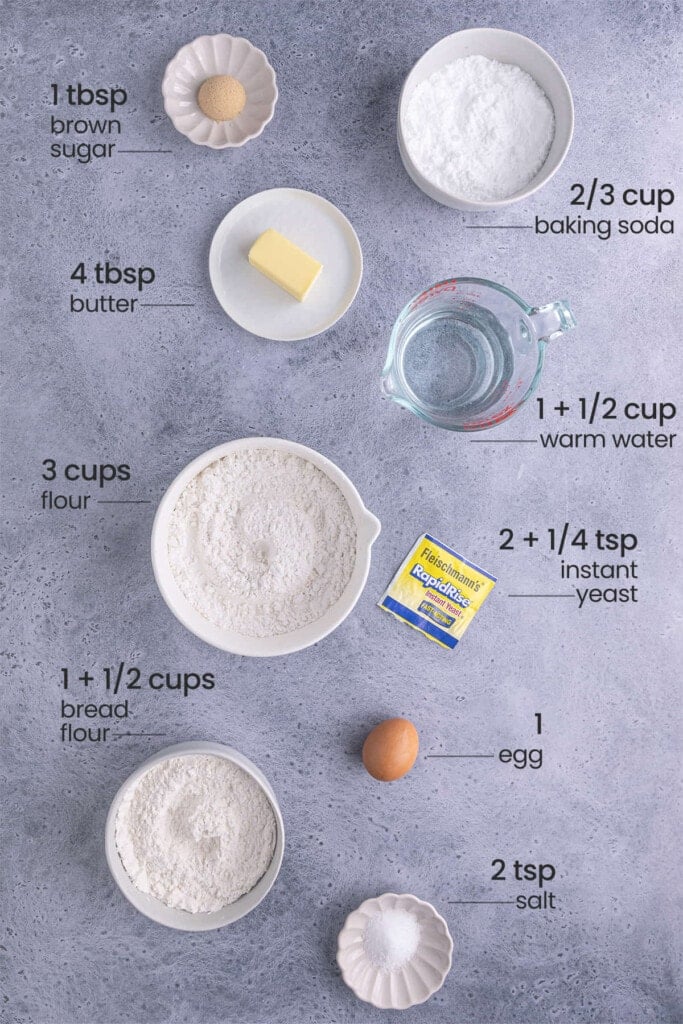
Here’s everything you need:
- Instant yeast.
- Brown sugar & warm water.
- Unsalted butter.
- All-purpose flour & bread flour.
- Salt.
- Egg.
- Olive oil.
Homemade German Soft Pretzels Tips and Tricks
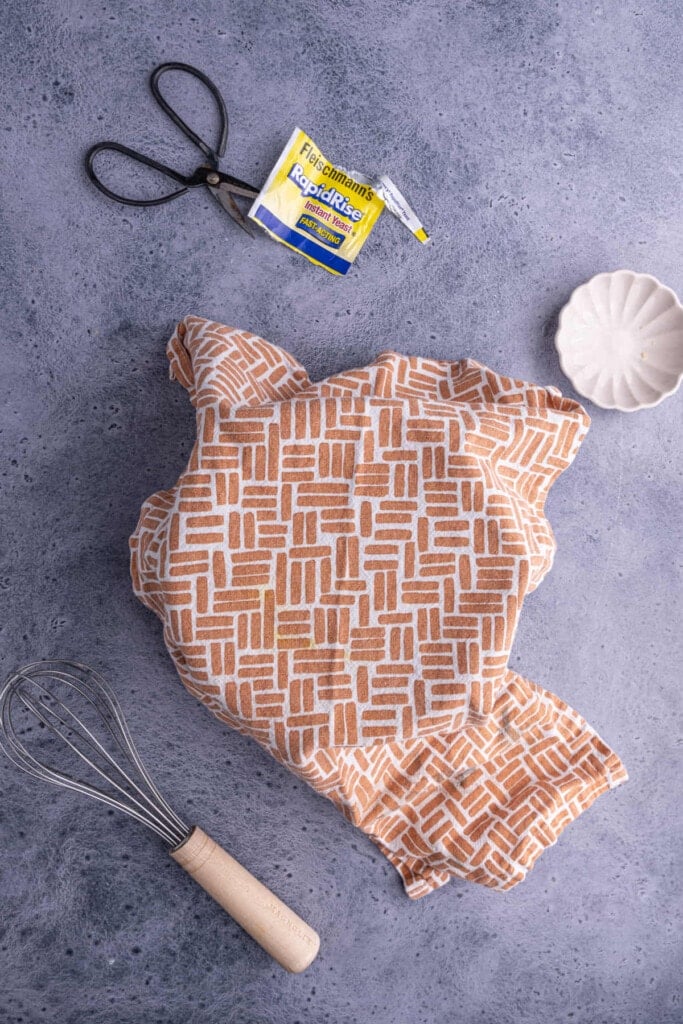
Start by Activating Your Yeast
The first step to making your homemade soft pretzels is activating your instant yeast. I know yeast can be intimidating, but I promise this is truly a simple process. Just make sure your yeast is not expired, as you really want it to work quickly to help the dough rise.
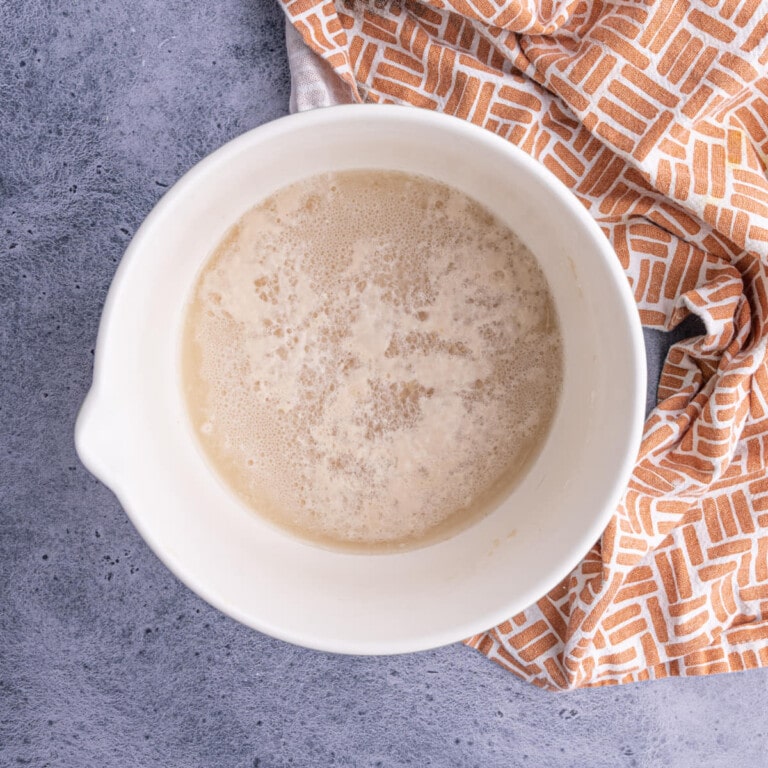
Add the yeast packet to a small mixing bowl with the warm water and brown sugar and whisk to combine.
The water does not have to be boiling. We’re aiming for somewhere around 90°F, but it doesn’t have to be perfect. Generally, hot water from the tap is fine. Or you can microwave room temp water for 45 seconds.
Then, cover the yeast mixture with a clean kitchen towel and set it aside while you mix together the rest of your dough ingredients. After about 5 minutes, the yeast will activate and start to appear foamy on top. That’s when you know it’s ready to add to your pretzel dough.
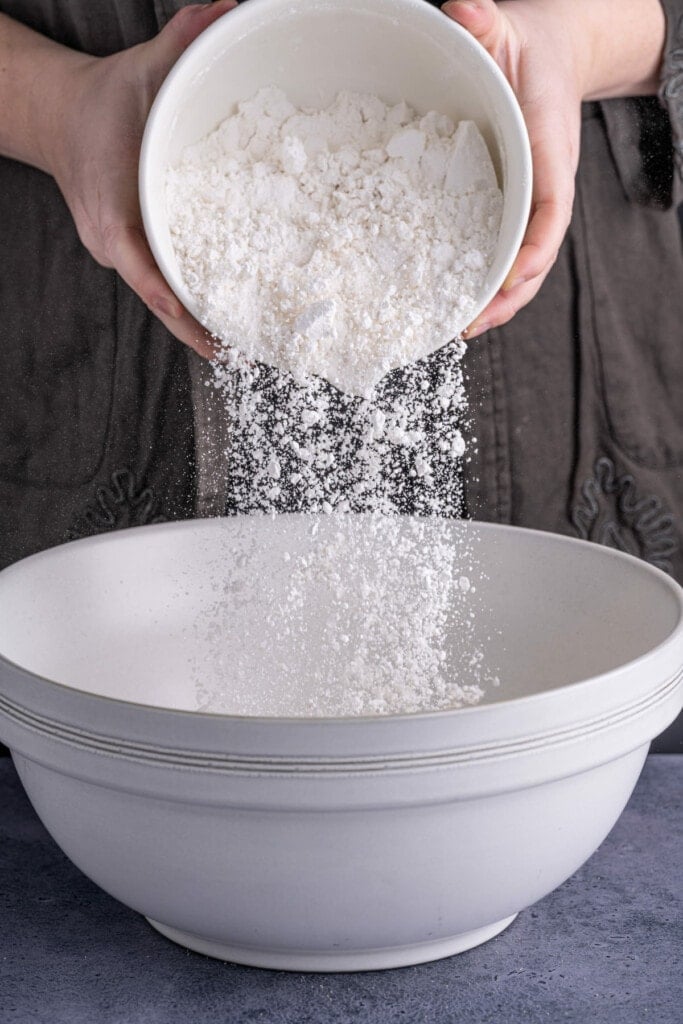
Use a Combination of All-Purpose and Bread Flour
To get that distinctive bread-y, chewy, bite, it’s best to use a combination of both all-purpose and bread flour.
Bread flour has more protein than all-purpose flour, causing it to form more gluten. That extra hit of gluten is what gives these pretzels that chewy texture you expect from a homemade soft pretzel.
However, using all bread flour makes these pretzels a little too chewy and hard to sink your teeth into. The use of both here provides the perfect balance and overall best texture.
That being said, in a pinch, you can certainly use all-purpose flour only. Your pretzels will have a slightly more cakey texture, but they will still have that infamous crispy exterior and distinct pretzel taste.
Add both flours, the melted butter, and the salt to a large mixing bowl. Once your yeast mixture is activated, add that, too. Use your hands to work the dough together.
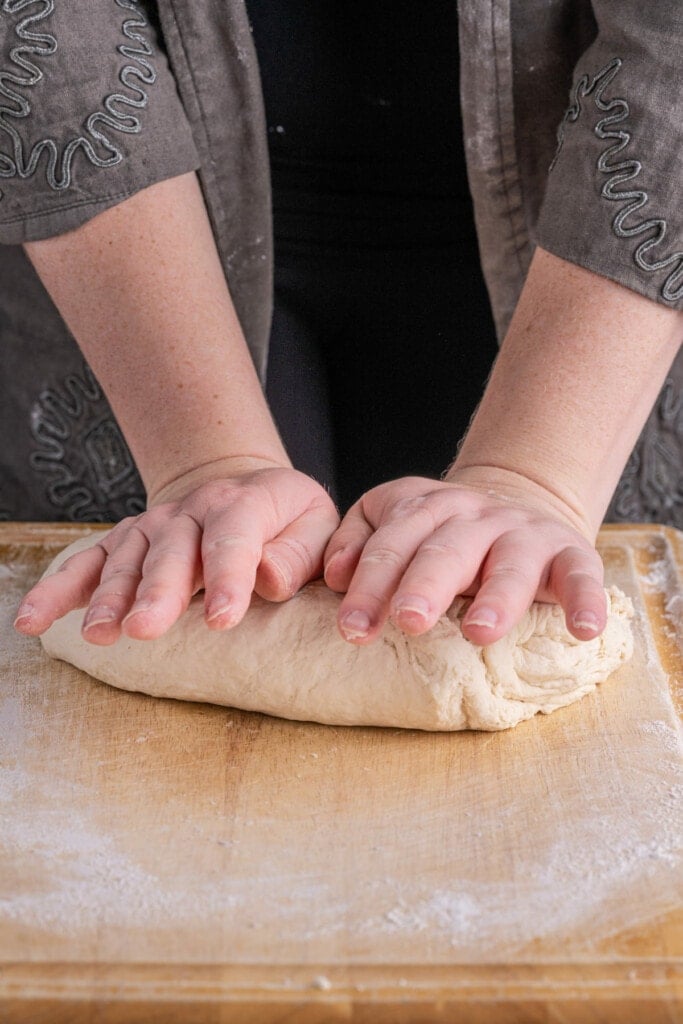
Knead the Pretzel Dough
When you first mix your flour, salt, butter, and yeast mixture, the dough will be very sticky. Use your hands to bring it together in the bowl as best you can.
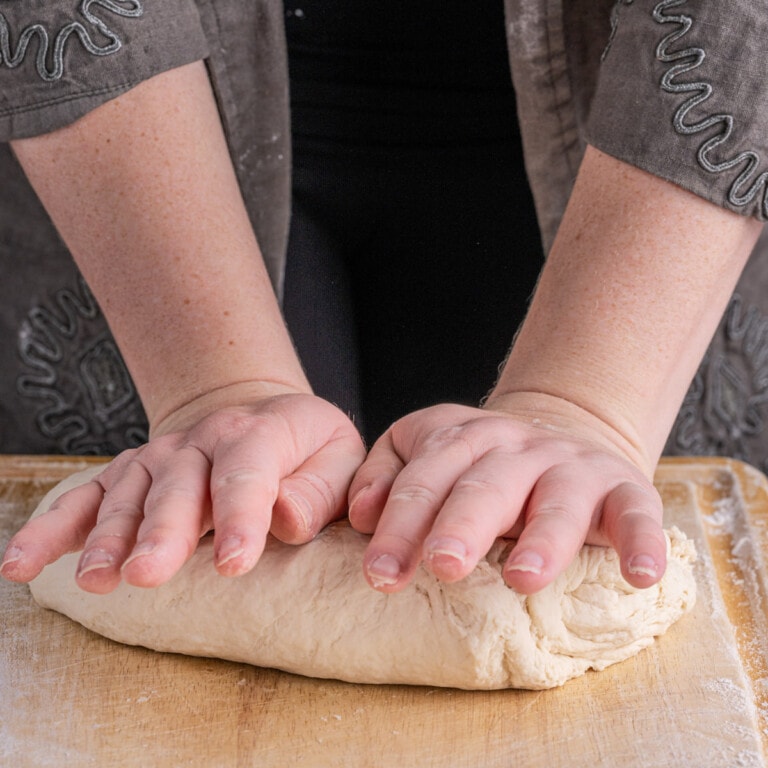
Then, add flour to a clean surface and turn your dough out onto it. Knead your dough for at least 8 minutes. As you continue to work your dough, it will become less sticky and easier to work with.
To knead, simply stand behind the dough, and use two hands to fold the dough over itself, pushing down with your body weight to work the dough together.
Continue to add flour at your discretion, to avoid the dough sticking to your surface.
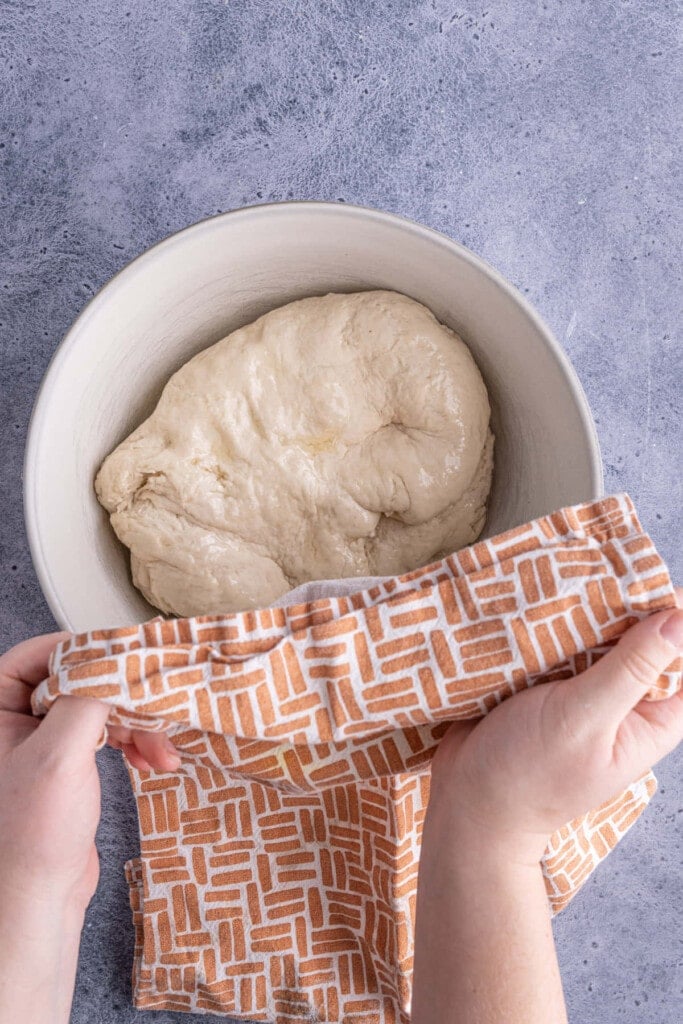
Allow Your Pretzel Dough to Rise
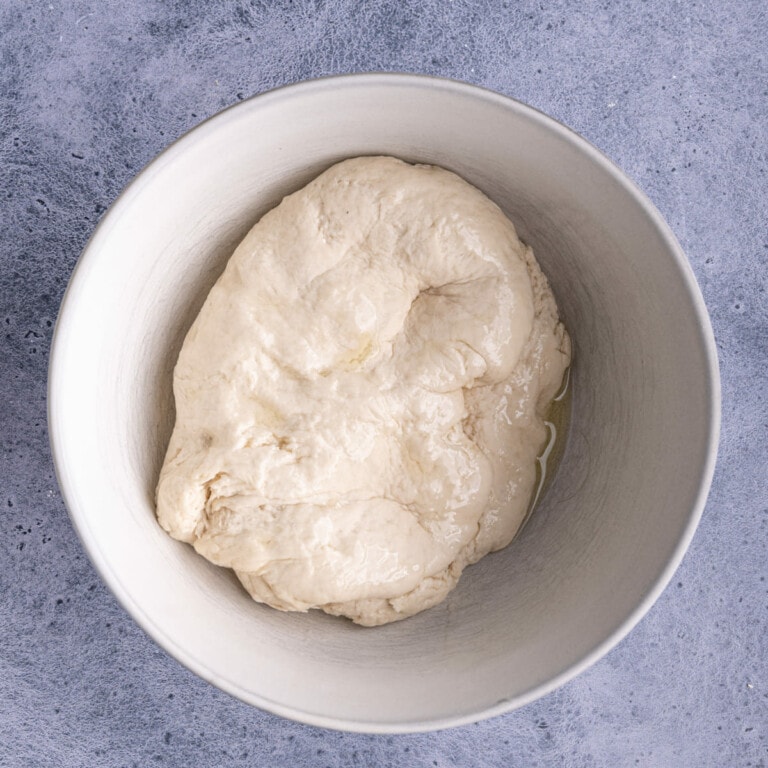
Next, it’s time to place your kneaded dough back into the large mixing bowl to rise.
Pour olive oil on the sides and bottom of the bowl. Place the dough in the bowl, add a little olive oil on top, and cover with a clean kitchen towel.
With instant yeast, you’ll get a rise pretty quickly! Allow it to rise at room temperature for 1 hour until it doubles in size.
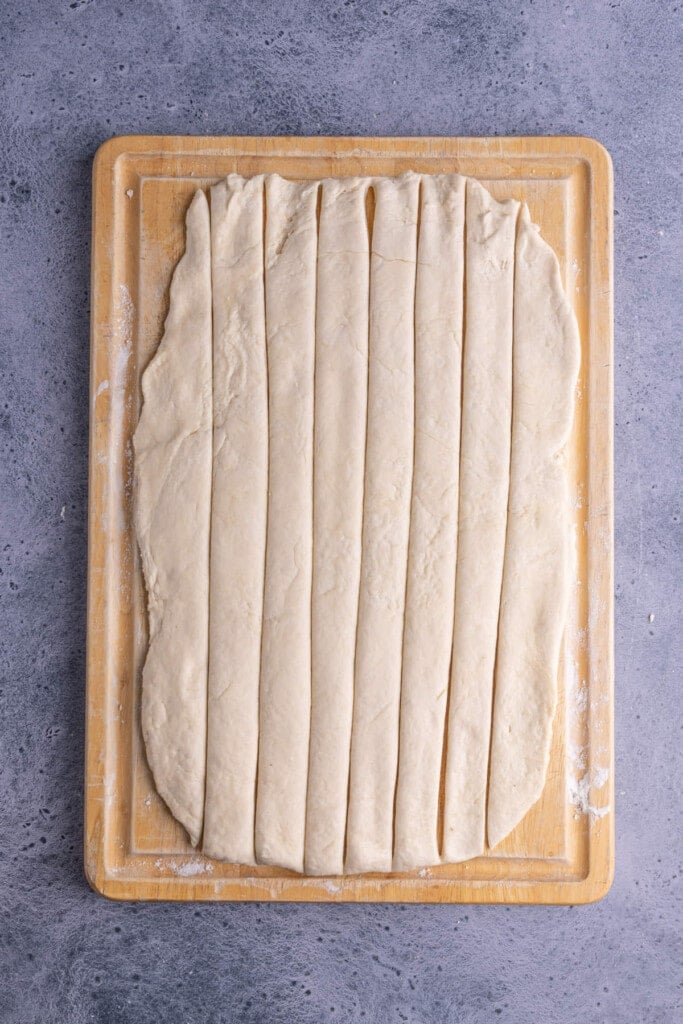
Roll Out and Slice the Dough
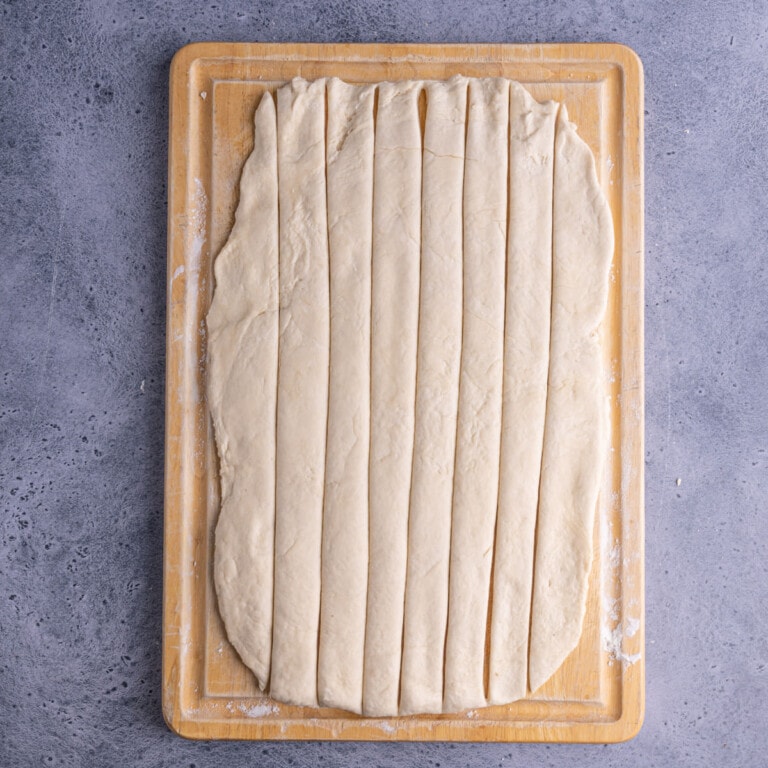
Once your dough has doubled in size, add more flour to your surface. Turn the dough out onto your floured surface once again and add some flour to your rolling pin.
Use your rolling pin to roll out your dough into a rectangular shape, roughly 9″ by 12″. It doesn’t have to be perfect, but it’s best to keep the dough as even in thickness as possible.
Use a pizza slicer on sharp knife to slice your dough lengthwise into 8 equal, thin slices.
How to Shape Homemade German Soft Pretzels
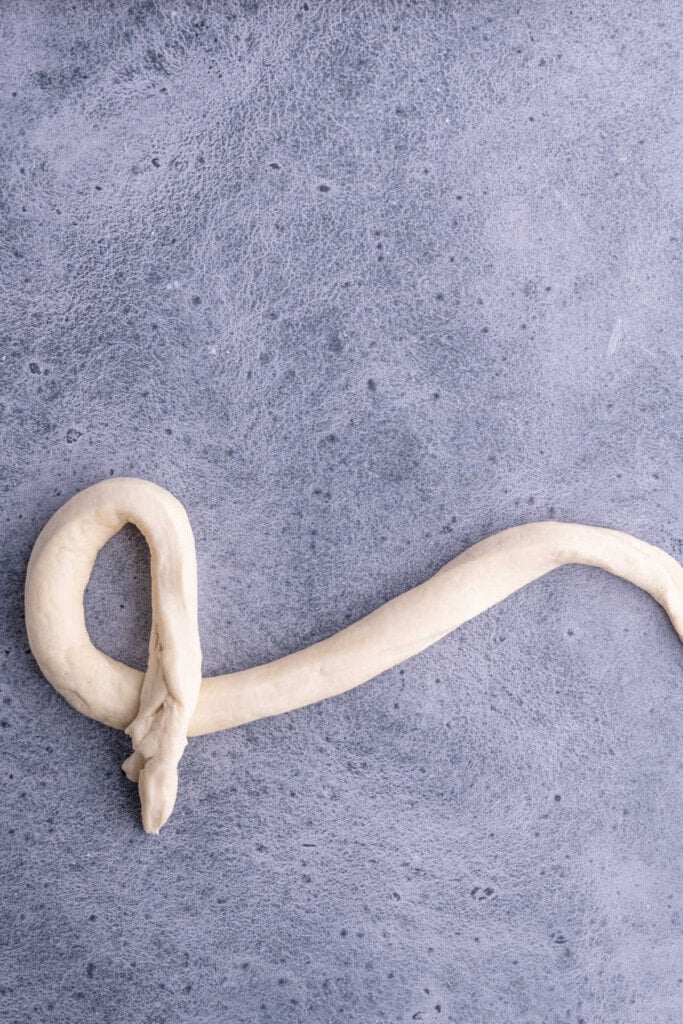
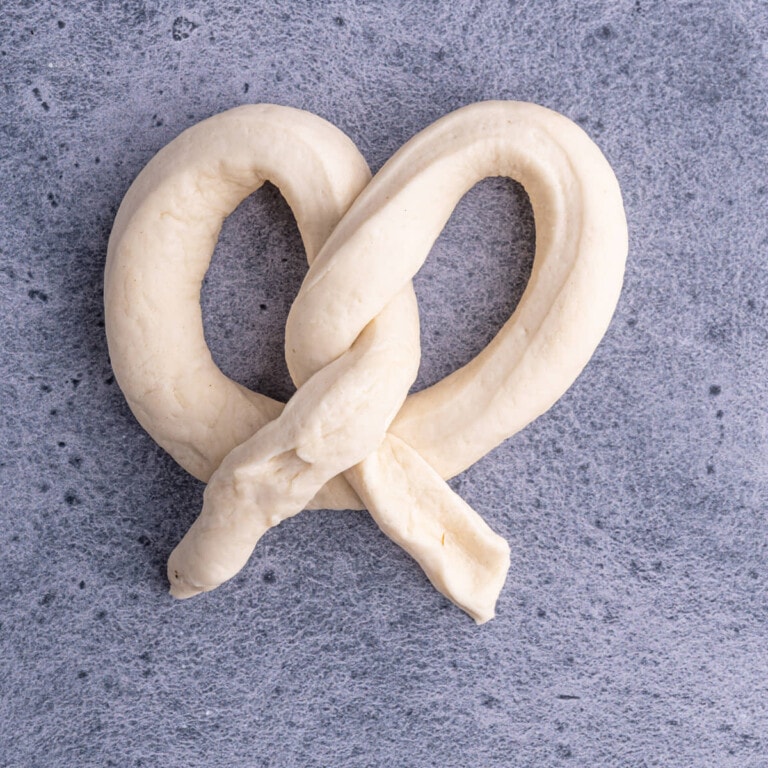
Once you’ve sliced your dough, work with one slice at a time to shape your pretzels. Take one slice and roll it between your hands and the table until it’s a cylinder. Then, use the following simple steps to shape your pretzels.
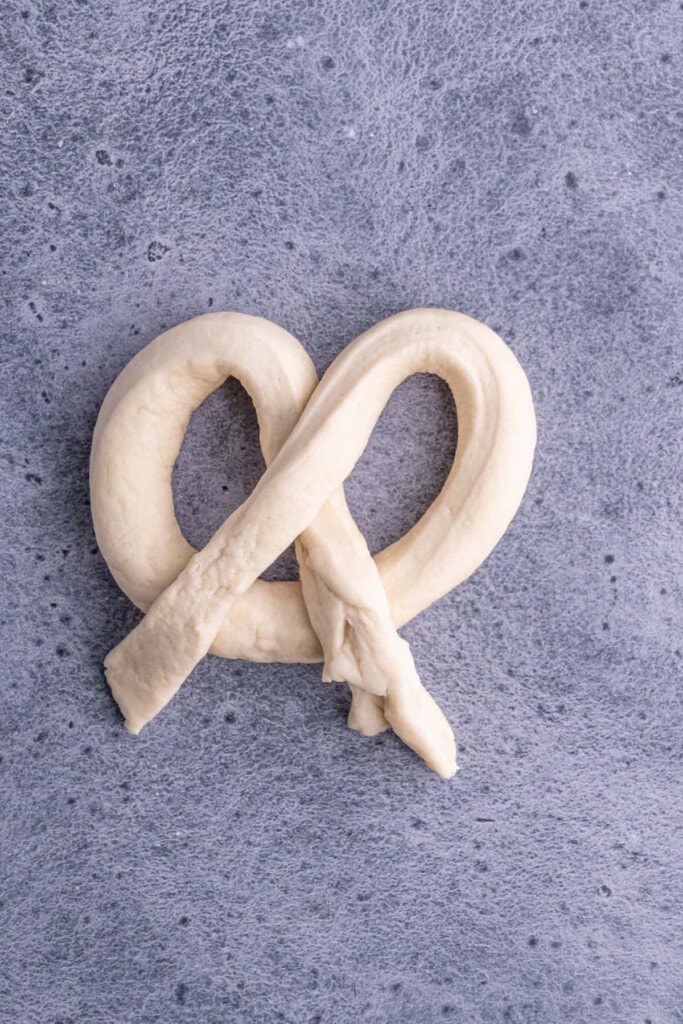
Step 1
Take one end of the dough and curl it over at the half way point.
Step 2
Do the same with the other end so it starts to resemble a pretzel.
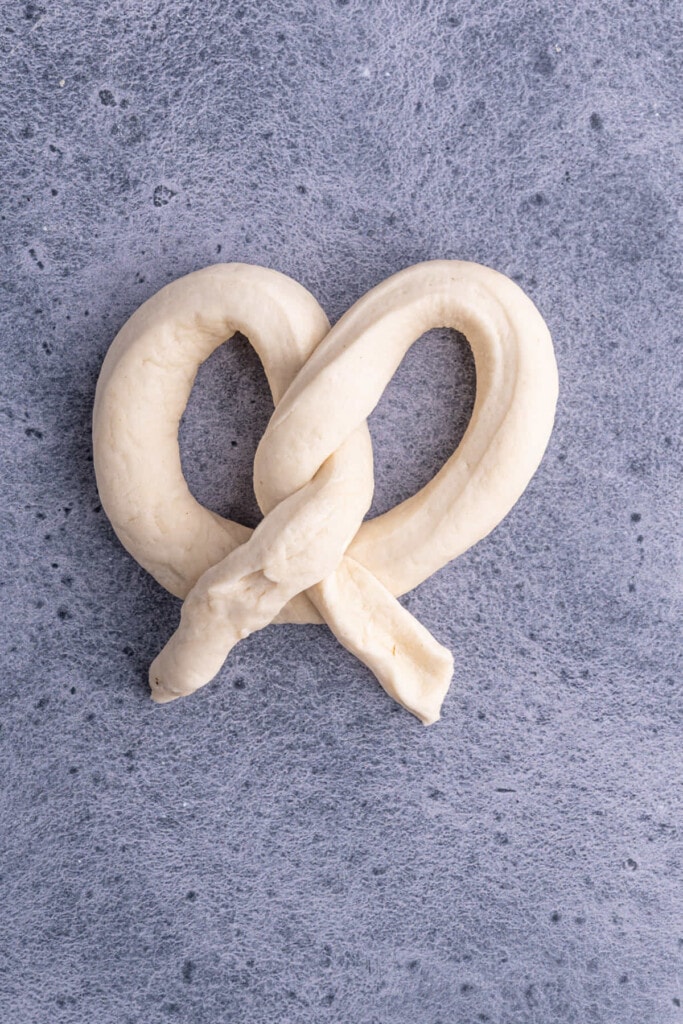
Step 3
Twist the two pieces that meet at the center so that the pretzel keeps its shape in the bath. At this point, you should recognize it as a classic pretzel! See below for a step-by-step photo guide!
The Pretzel Bath
The pretzel bath is what turns this ordinary dough into pretzel dough! You simply add 2/3 cup of baking soda to 10 cups of boiling water. Each pretzel will relax in the bath for 3 minutes before setting out to dry.
Aside from shaping your pretzels, inserting and removing your pretzels into the bath is the trickiest part of the process. The water is boiling hot, and the excess baking soda can cause irritation to sensitive skin.
Make sure you feel comfortable with the tools you are using to drop them in and take them out. I use a large sieve and it works great! There’s always the option to wear food service gloves as well.
I generally only bathe two pretzels at a time for this reason, but you can do as many as you’re comfortable with. Just make sure you leave enough space in between each pretzel so they don’t stick together.
Add Your Egg Wash and Salt
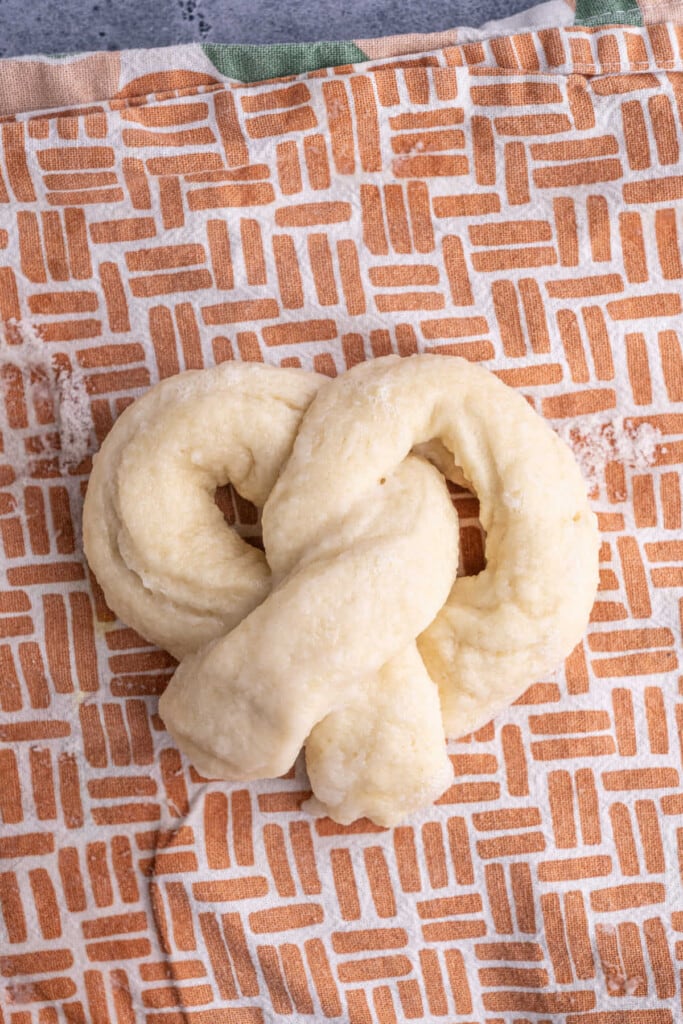
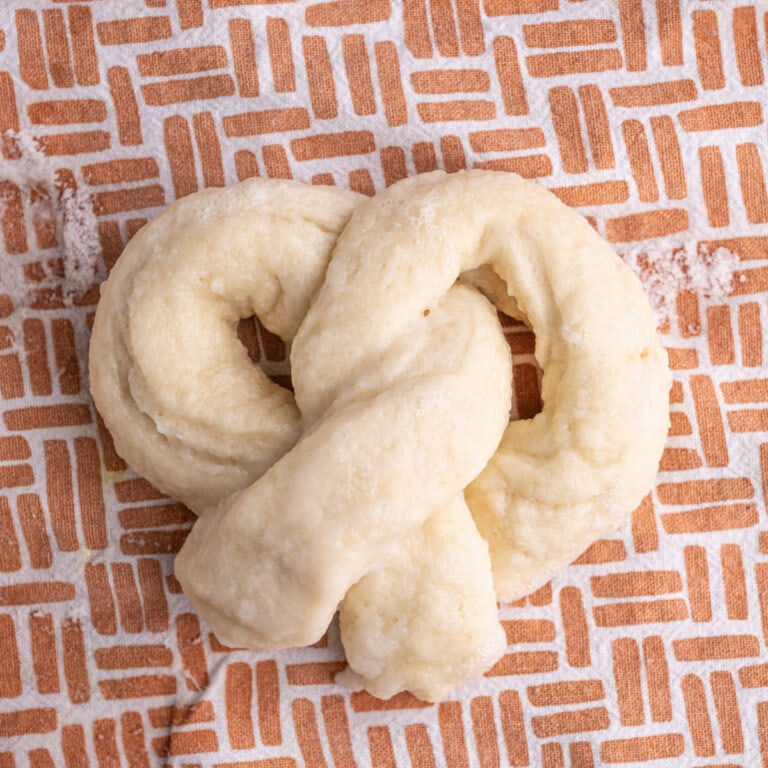
Once you’ve removed your pretzels from the pretzel bath, set them on a clean kitchen towel or a heat safe surface or cooling rack and give them a couple of minutes to dry.
Crack your egg into a small bowl and use a fork or whisk to vigorously stir until the yolk and egg whites are combined.
Green tip: Look for pasture-raised eggs (over free-range or cage-free) to support agriculture that is less reliant on chemicals and fossil fuels.
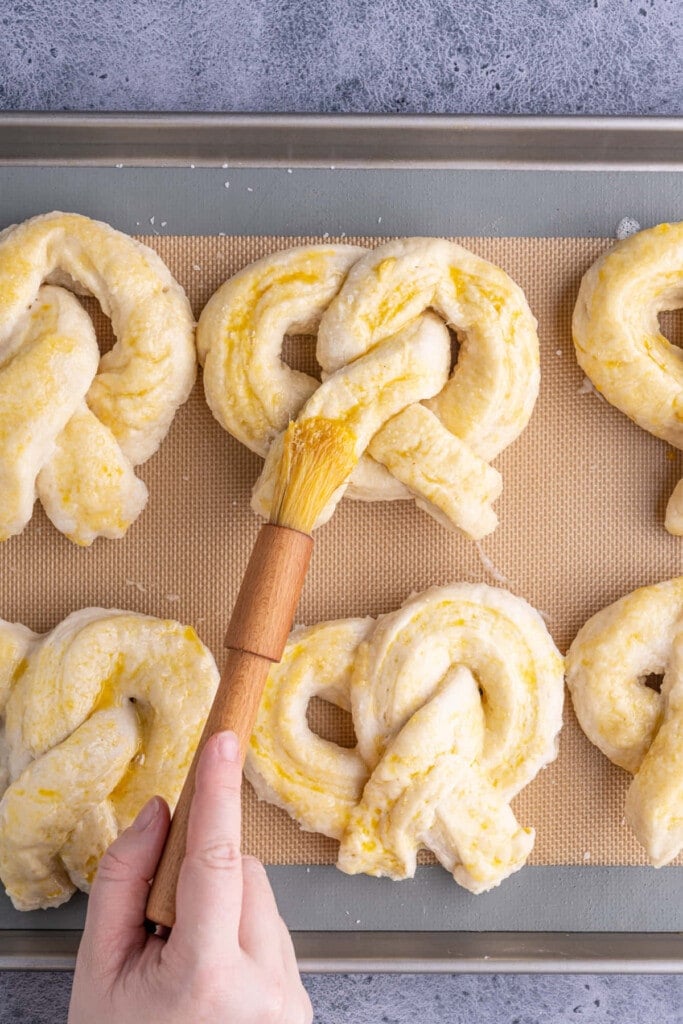
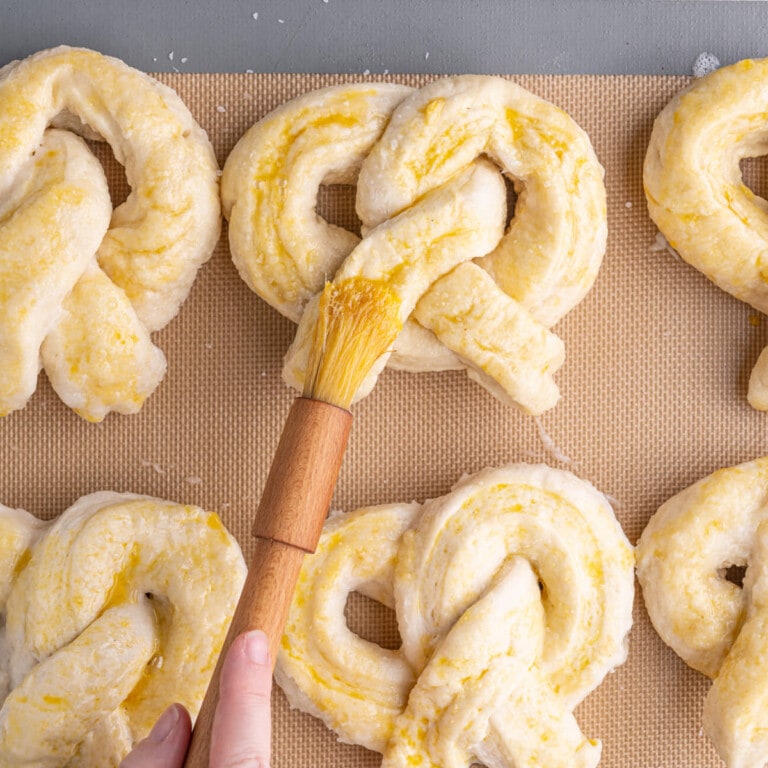
Once your pretzels have had a chance to dry a bit, transfer them to a large baking sheet. Line it with a reusable baking mat or parchment paper so the pretzels don’t stick.
Then, use a pastry brush to add a thin. even layer of egg wash onto the top of each pretzel. Sprinkle course sea salt on top and bake for 14-16 minutes until the top starts to turn golden brown.
Storing and Prepping Soft Pretzels
And just when you thought it can’t get better—these pretzels freeze really well. You can stash them away and just reheat them when you’re having a pretzel craving! They will also stay fresh if they are covered at room temperature for 2 days.
The best way to freeze is to individually wrap them in saran wrap and store them in a freezer bag. They will keep fresh for just about 1 month.
Reheating is best in the oven or toaster oven at 375°F. From room temperature, you really only need about 2 minutes, and from frozen 5-7 minutes!
Green tip: Did you know that of the billions of pounds of food wasted annually, it is estimated that 50% of it happens in our homes? Avoid unnecessary food waste by properly storing, reheating, and enjoying leftovers!
Homemade Giant Soft Pretzel Shortcut
The best thing about this Homemade German Soft Pretzel recipe is that it teaches you the “pretzel bath” technique, which will allow you to make pretzels using any type of dough.
Yes, even store-bought. If you want to save time and don’t want to bother with yeast, buy a pre-packaged pizza crust or crescent dough, and follow steps 10-14. This totally still counts as homemade!
Homemade Soft Pretzels Frequently Asked Questions
What makes German Pretzels so good?
The distinct taste of German pretzels comes from the pretzel bath! Boiling the pretzel dough in a mixture of water and baking soda is what gets that crispy, brown outer layer.
Why You Should Make these German Soft Pretzels
- The texture! Chewy and doughy on the inside, crispy on the outside.
- It’s fun. Between the kneading, shaping, and dunking in the pretzel bath, this recipe is hands on and a lot of fun!
- Nothing beats homemade. All the nostalgia of the ballpark/mall/Oktoberfest pretzels but made in your own kitchen!
If you’re loving these German Soft Pretzels and want more delicious, carb-filled appetizer ideas, check out this Pesto Butter Garlic Bread and this Whipped Ricotta Crostini.

Homemade German Soft Pretzels
Print Save RateEquipment
- Pastry Brush (optional)
- Pizza Cutter (optional)
Ingredients
- 1 ½ cups warm water
- 1 tablespoon light brown sugar
- 2 ¼ teaspoons instant yeast (2 ¼ tsp = 1 packet)
- 2 teaspoons salt + coarse salt for topping
- 4 tablespoons unsalted butter
- 3 cups all-purpose or whole wheat flour (+ extra to flour surface for kneading)
- 1 ½ cups bread flour
- 2 tablespoons olive oil
- ⅔ cup baking soda
- 1 large egg
Instructions
- In a mixing bowl, add warm water (no need for boiling, you can just use warm water from the sink or microwave room temperature water for 45 seconds), sugar, and yeast and whisk to combine. Cover with a clean kitchen towel to sit for 5 minutes until foamy.

- In a microwave-safe bowl, heat butter in 20-second intervals until completely melted. Add your melted butter to a large mixing bowl with both flours and salt.
- Add the foamy yeast to the flour mixture and use clean hands to work the dough together until combined. It may be a bit sticky and crumbly, but that’s okay!
- Add flour to a clean surface and turn dough out onto the floured surface. Knead for 6-8 minutes until dough forms.
- Pour olive oil on the sides and bottom of a large bowl. Place the dough in the bowl, add a little olive oil on top, and cover with a clean kitchen towel. Allow to rise at room temperature for 1 hour until it doubles in size.
- Start your “pretzel bath” by boiling 10 cups of water with your baking soda. It’s also time to preheat your oven to 450°F.
- Use a floured rolling pin to roll your dough out into a rectangular shape, roughly 9 x 12 inches.
- Use a pizza cutter or sharp knife to slice your dough longways, so you're left with 8 roughly even-sized strips.
- Roll each piece against the table with your hands, until they are cylindrical and about 20 inches long.
- Now it’s time to shape your pretzels. See above for detailed instructions.
- By now, your pretzel bath should be boiling. Give it a couple of stirs to make sure the baking soda is completely integrated into the water.
- Slowly lower a pretzel into the bath using a large sieve. Keep pretzel in the bath for 3 minutes, remove, and set aside to dry. Repeat for all of your pretzels. You can do 1 or 2 at a time, but no more than 2.
- Make your egg wash by whisking egg. Once all your pretzels are dry, line them up on a baking sheet lined with parchment paper, brush with egg wash, and crack on course salt.
- Bake your pretzels for 14-16 minutes until golden brown and a little crispy on the outside. Serve with mustard or beer cheese. Yum!
Pro Tips
- The pretzel bath technique is really what makes these pretzels, so you can shape them however you want, use another dough recipe, or even use store-bought dough. Just make sure if your shape is smaller, you bake them for less time.
- These will keep well for up to ten days in the fridge. Just reheat in the oven at 425 for 5 minutes directly on the oven rack.
- To freeze them, allow them to cool completely and either wrap with saran wrap or put in individual freezer bags. To reheat, you can either pull them out of the freezer and allow to defrost in the fridge up to 24 hours before, or you can put frozen pretzels directly into the oven on oven rack and bake at 425 for 10 minutes.
- You can use all-purpose flour or whole wheat flour. I love both ways! The whole wheat flour produces a darker, more hearty pretzel as pictured above. All-purpose flour will yield a lighter and airier pretzel.
Share This Recipe


3 thoughts on “Homemade German Soft Pretzels”
Yum. I will be happy to eat as many of these pretzels as you can bring with you when you visit.
Kudo’s to you for making those!! You need patience making those pretzels, but I’m sure they are delicious!!