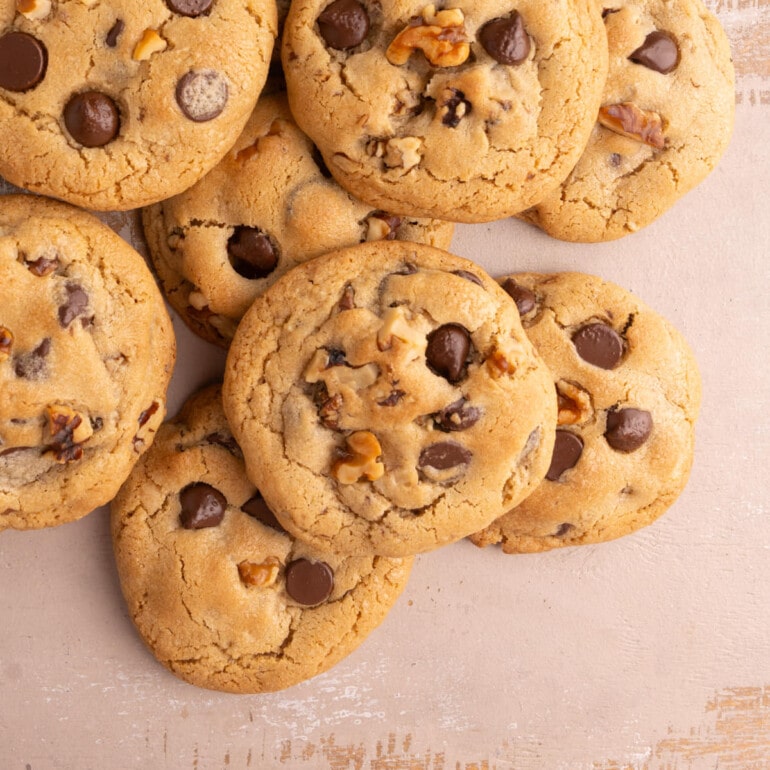
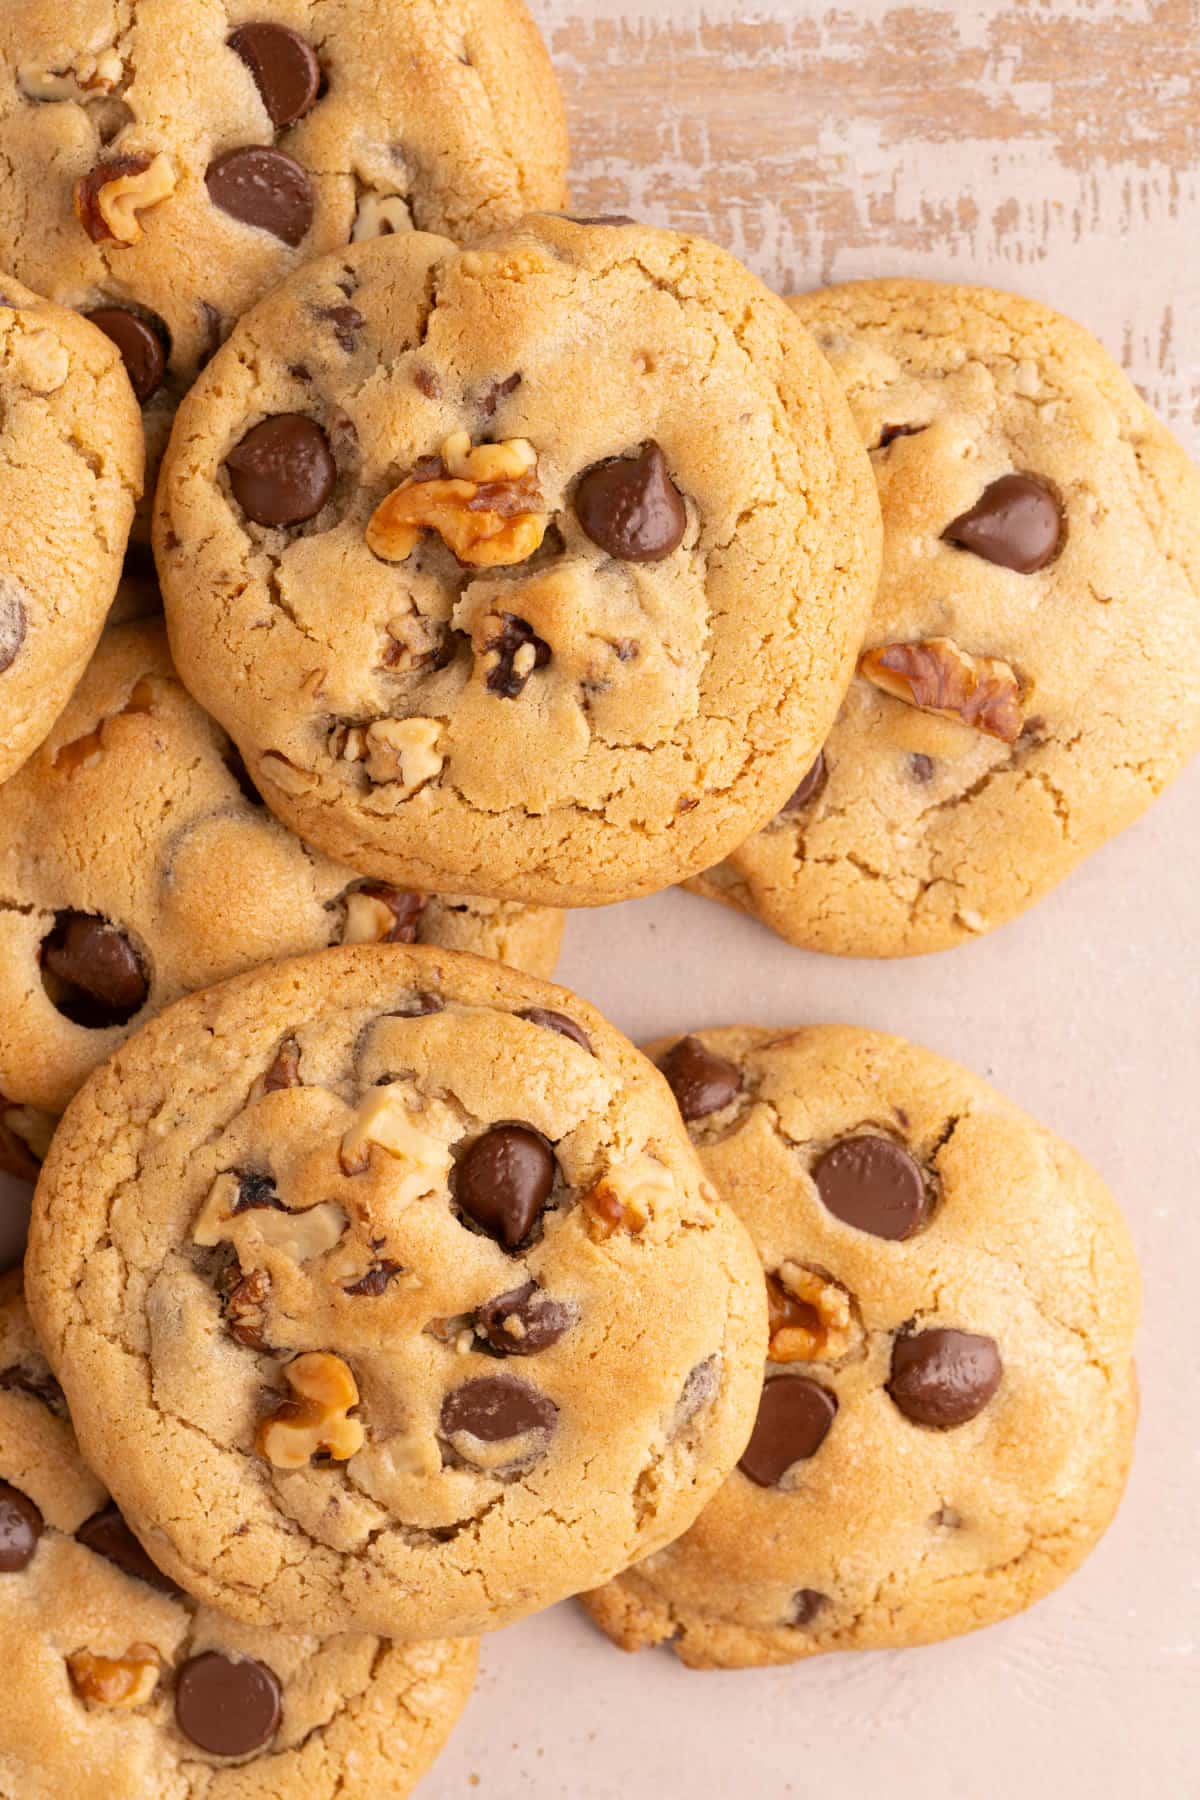
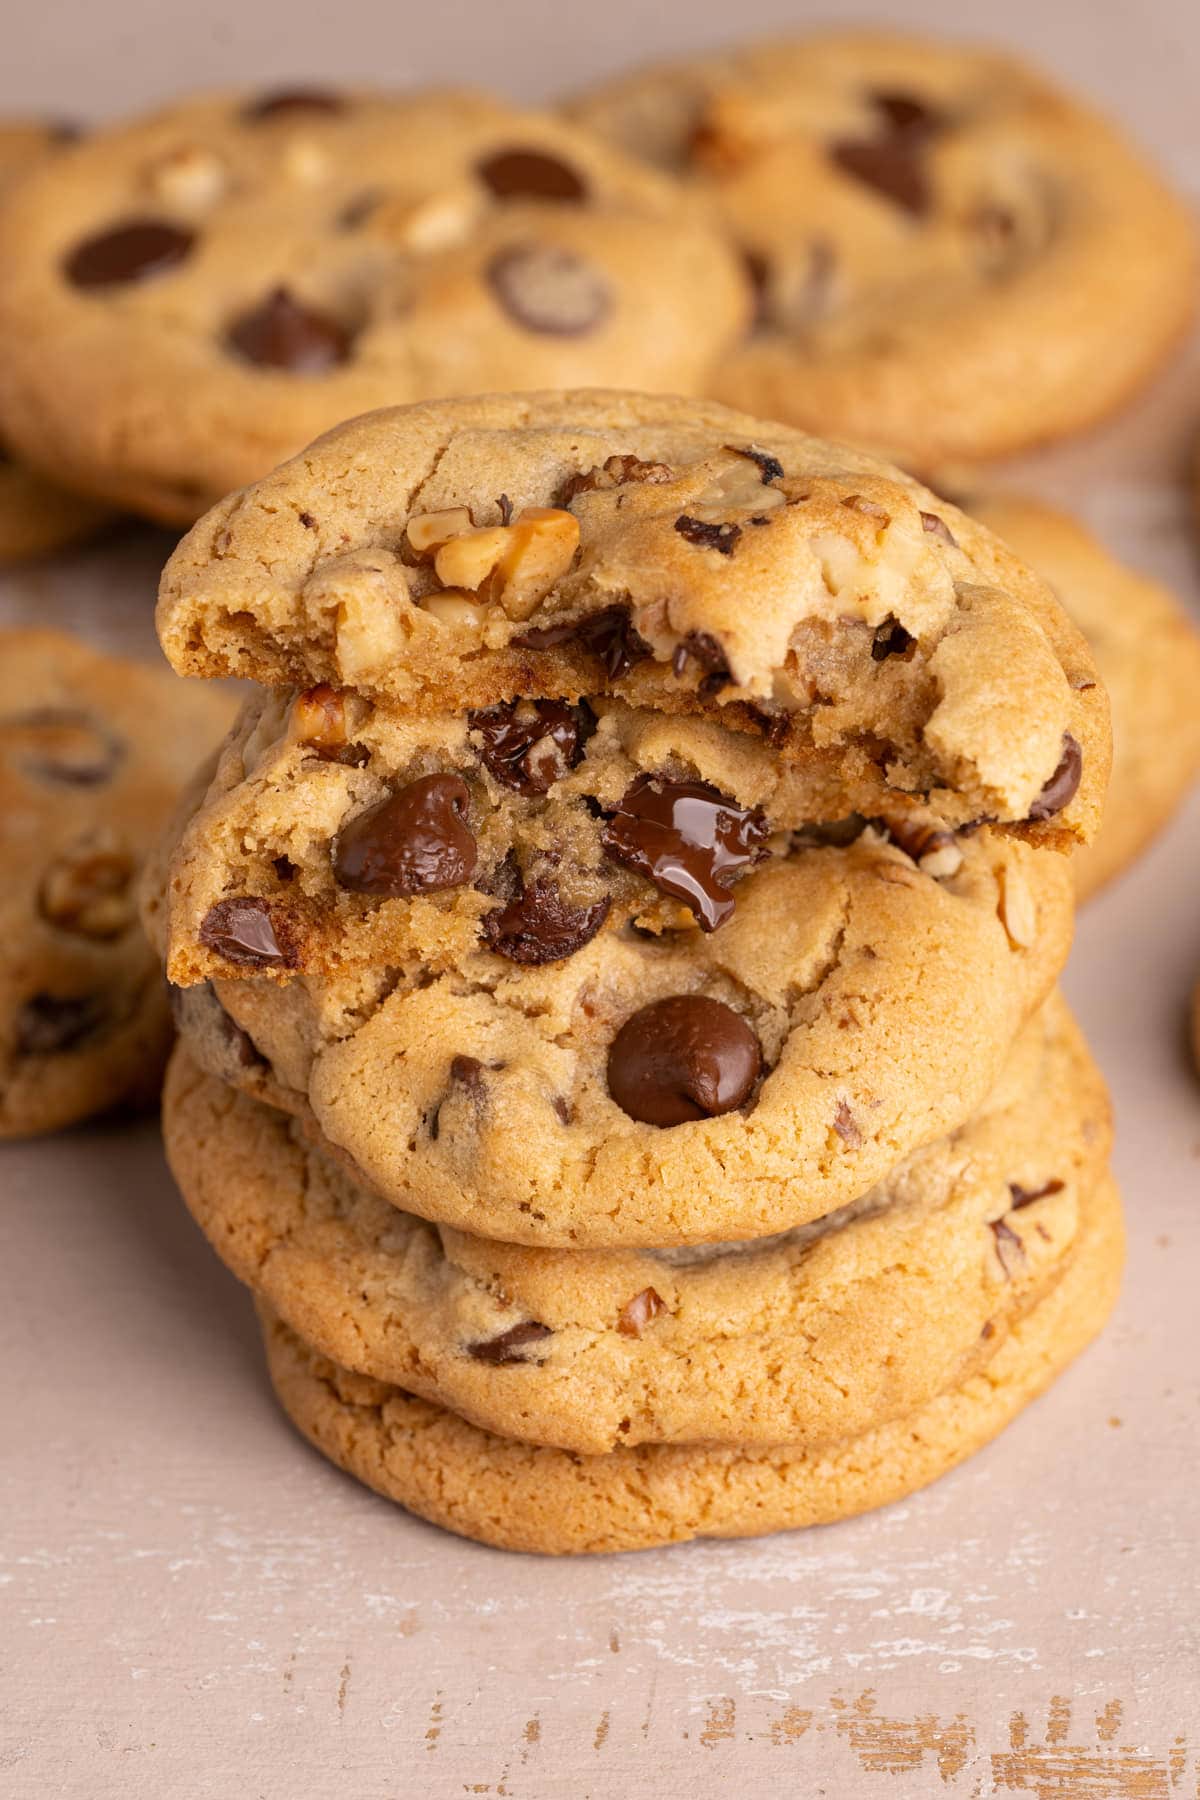
No better way to satisfy your sweet tooth than sinking your teeth into a warm cookie straight out of the oven! These Chewy Chocolate Chip Walnut Cookies give you a soft, melt-in-your-mouth texture, with a distinct nutty crunch and pools of delicious melty chocolate.
Plus, this homemade chocolate chip cookie recipe with nuts is easy to make — even for beginner bakers! This cookie recipe requires just one bowl, no chilling time, and just 9 ingredients to whip up.
In this recipe, you’ll learn my best tricks and techniques for chewy cookie dough, how to store your cookies, and even how to freeze the dough! Let’s dive in!
I absolutely love that this recipe requires only one bowl to mix up! As a busy mom and environmental scientist, One-Bowl baking is hands down my favorite! Less clean-up means I’m saving on both time and water. Thats a win, win for me!
Green tip: Speaking of cleanup, if you have a dishwasher-use it! Comparing dishwashing to handwashing, using an efficient dishwasher uses 1/6th the amount of water to get your dishes clean!
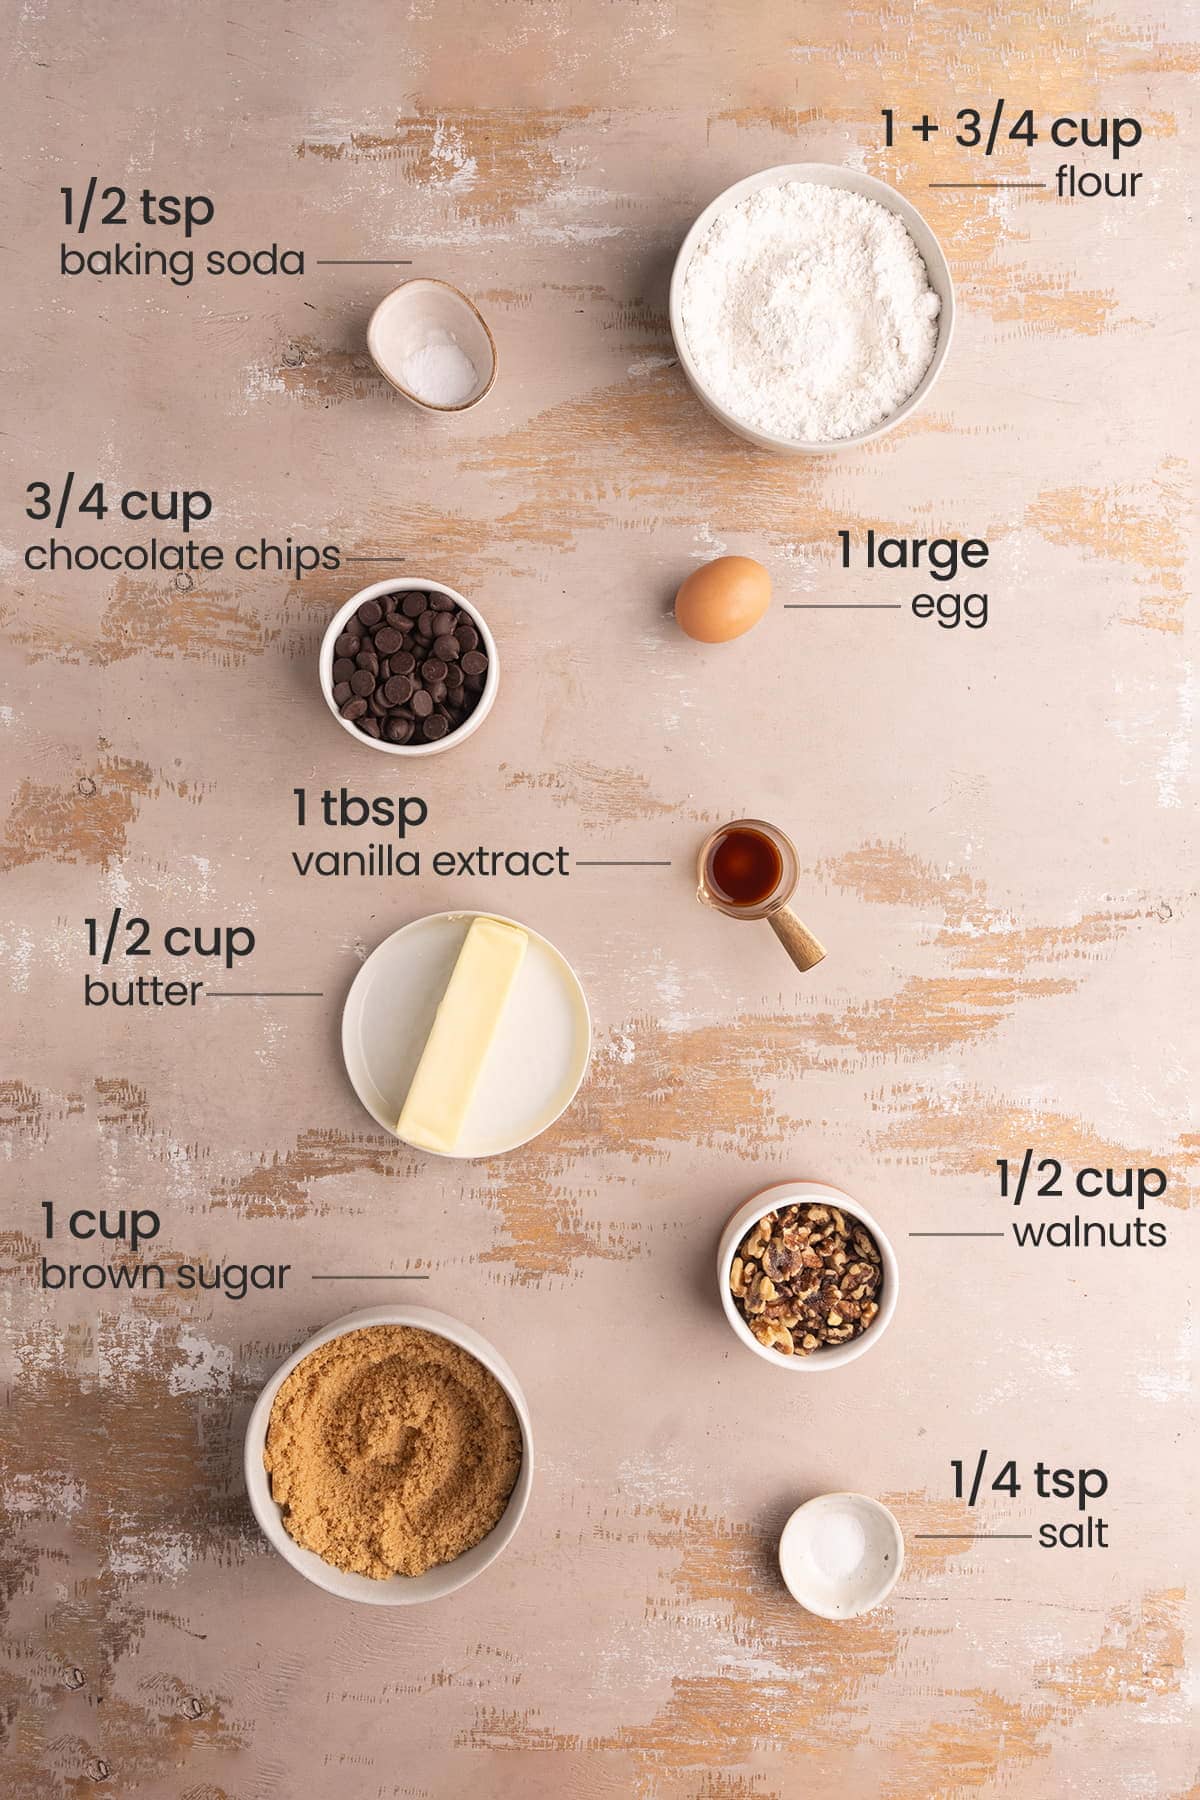
Chocolate Chip Walnut Cookies Ingredients
Here’s everything you need:
- Unsalted butter. Unsalted butter allows you to control the amount of salt being added to your cookies. Make sure your butter is softened in order to get the perfect consistency in your dough.
- Light brown sugar. This cookie recipe uses only brown sugar to give it more of that caramelly flavor that you look for in a classic chocolate chip cookie recipe.
- Vanilla extract. For a flavor boost.
- Egg. To bind your cookies together and work with the baking powder to give them a little lift.
- All-purpose flour. The base of your cookie dough.
- Salt. To enhance all of the other flavors.
- Baking soda. To help the cookies rise.
- Walnuts. For a distinct nuttiness and crunch.
- Chocolate chips. You can use semi-sweet or dark chocolate chips. I used dark!
Walnut Chocolate Chip Cookies Tips and Tricks
Set Yourself Up for Baking Success
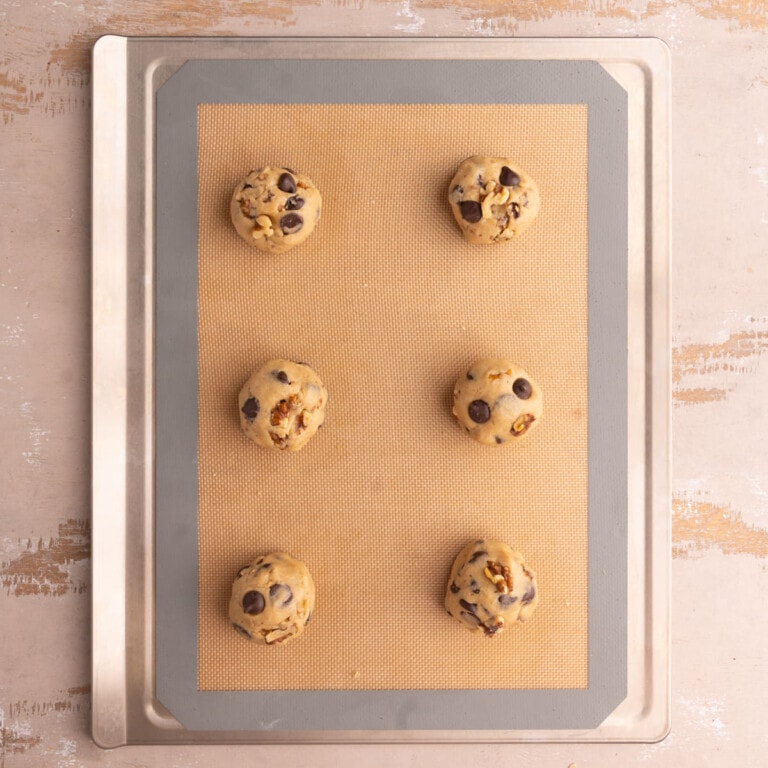
Start by pre-heating your oven to 375°F and lining your cookie sheet.
Green tip: Consider using reusable baking mats for a more sustainable option!
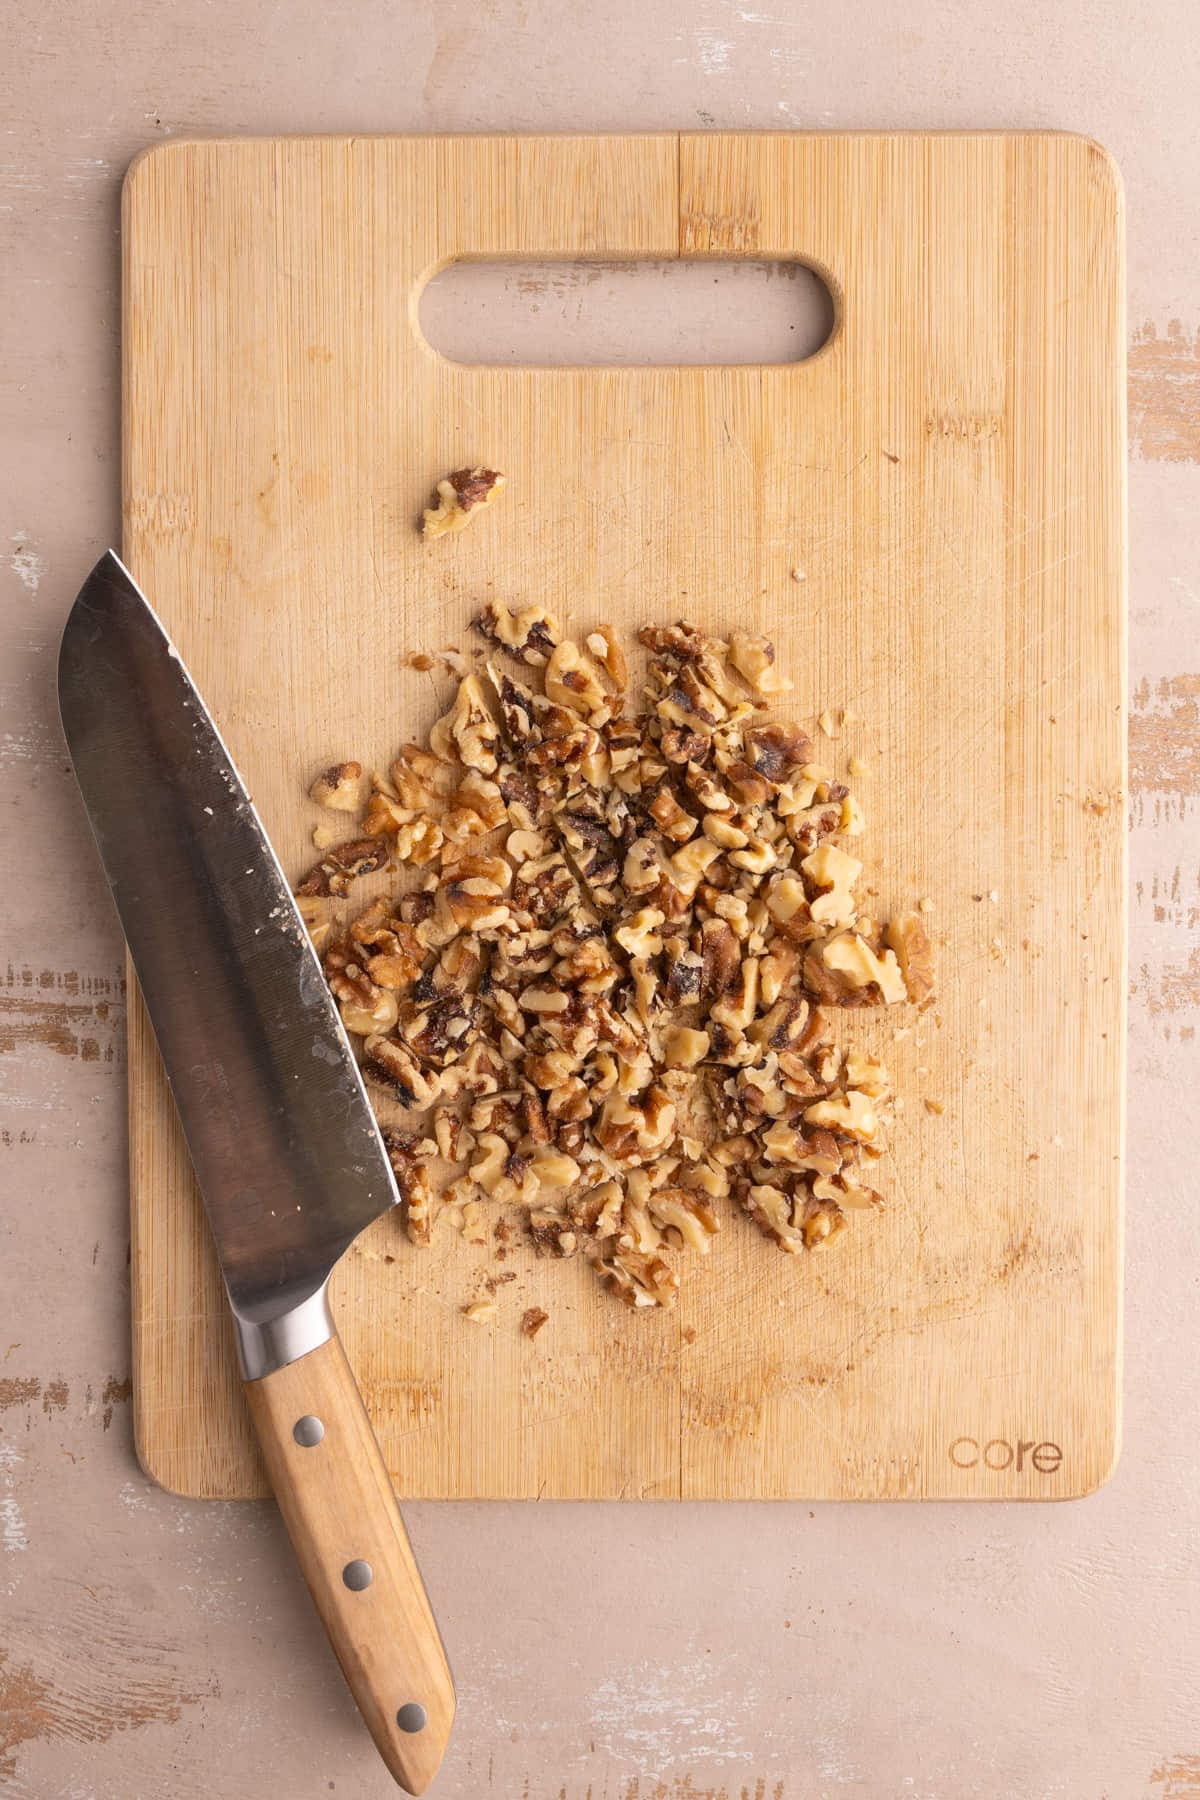
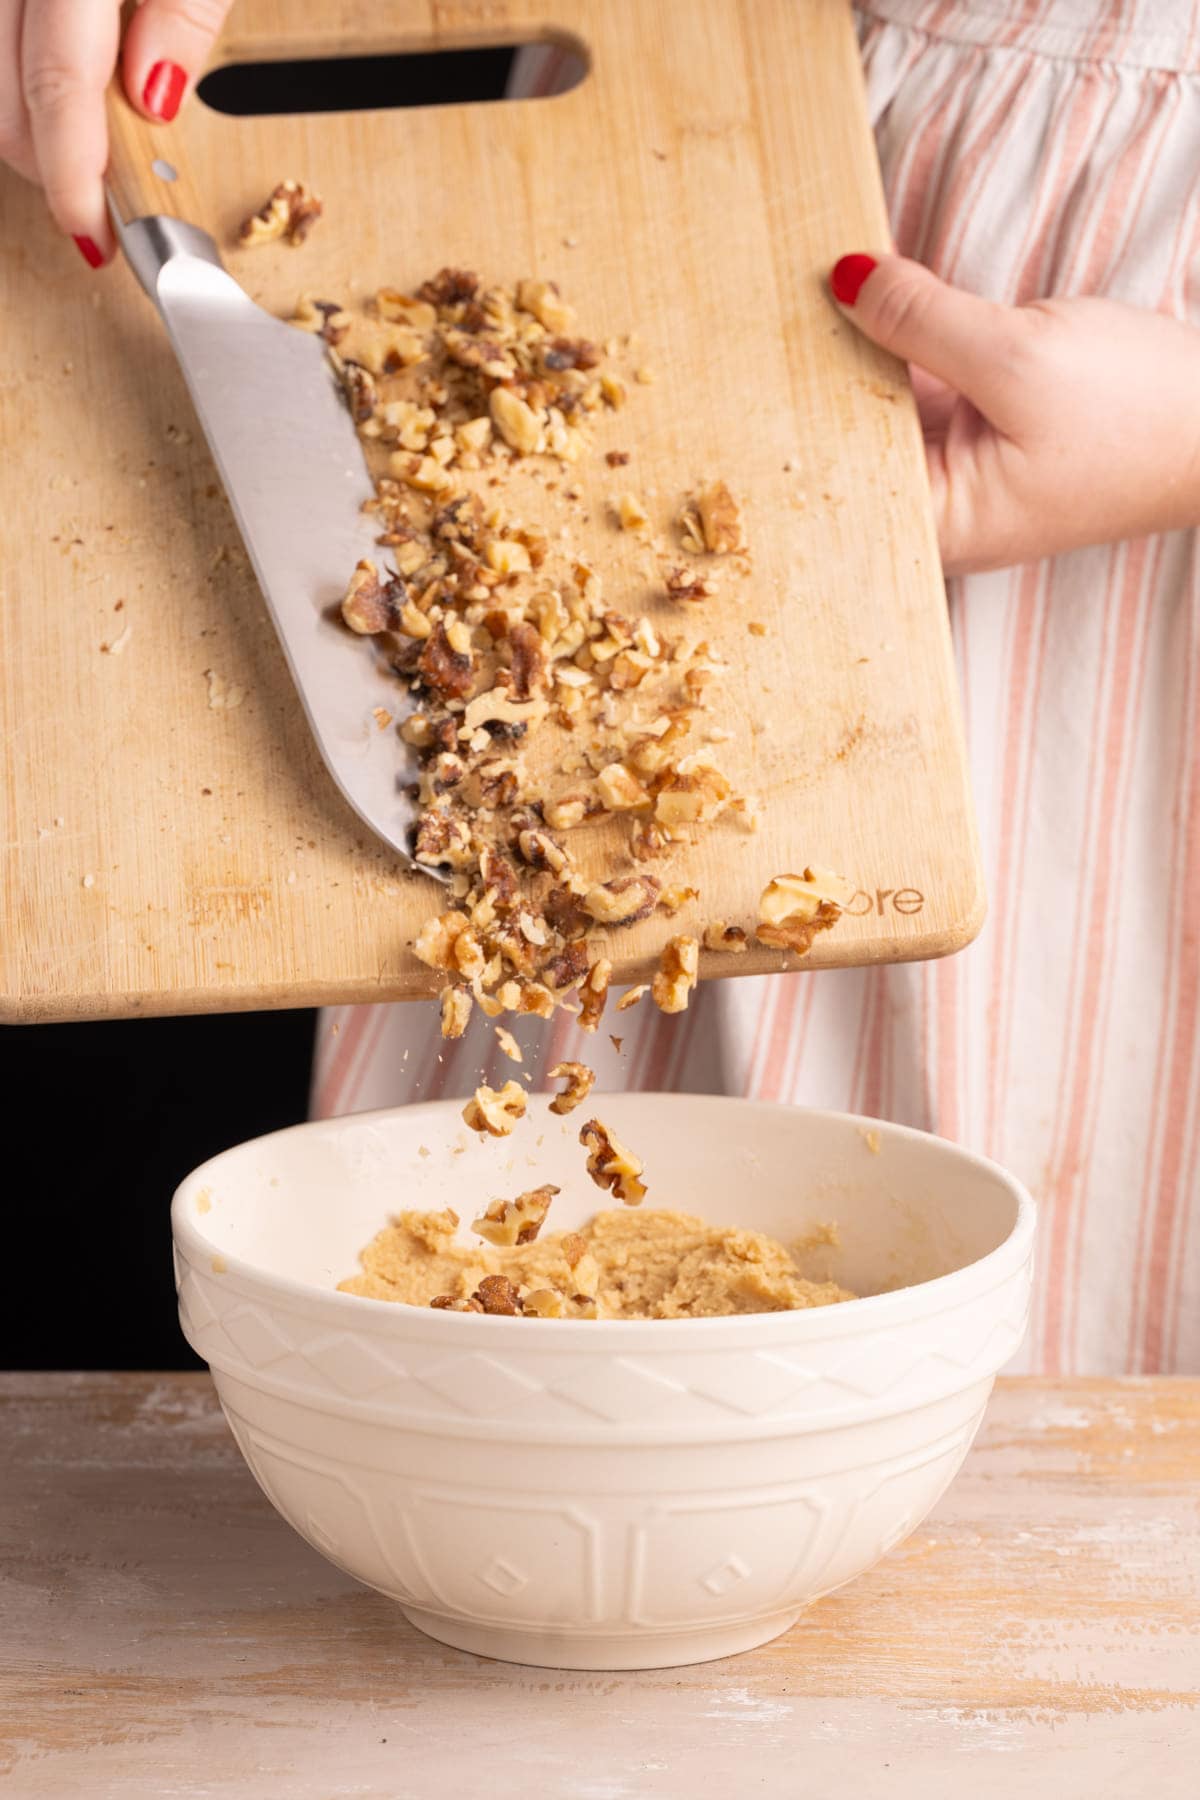
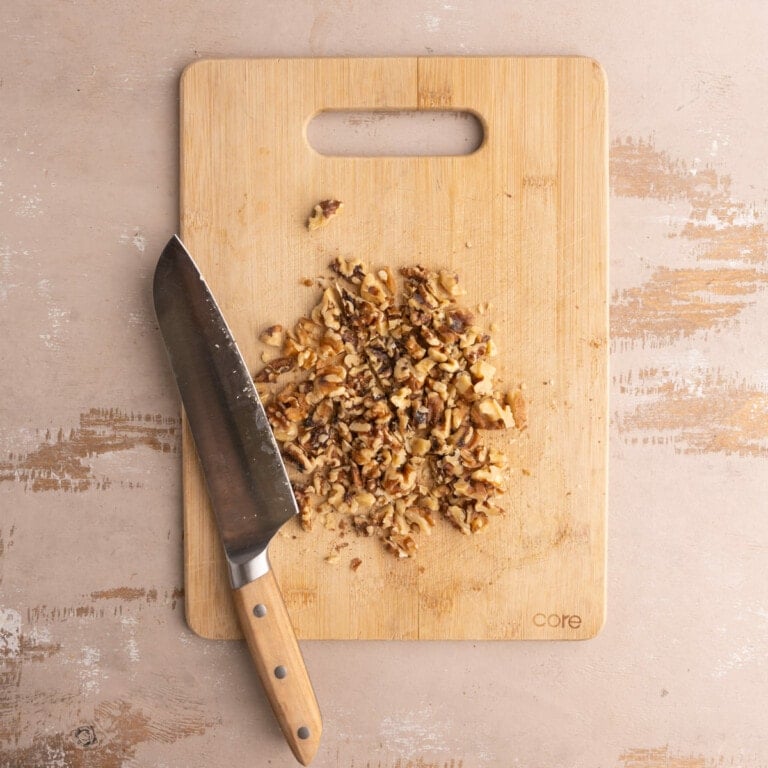
I also like to measure and prep everything ahead of time so my baking process is simple and seamless. Before starting my cookie dough, I always chop my walnuts.
Keep some larger pieces of walnuts and chop some into tiny fragments. This will ensure you get the nutty taste in every bite and are still left with some bigger pieces as well for that extra bit of crunch.
Cream the Butter and Sugar Together
It’s imperative that your butter is softened! This does not mean melted and definitely does not mean too cold and solid.
The easiest way to soften your butter is by taking it out of the refrigerator about 30-45 minutes before you start making your cookie dough to allow the butter to rise to room temperature naturally.
Of course, I understand there are times where you don’t want to wait! Don’t fret, you can easily expedite the softening process.
One way to do so is by microwaving your stick of butter on high for about 15 seconds. Poke the butter and if your finger leaves an imprint, it’s ready!
If after 15 seconds it is still too solid, continue to microwave in 5-second intervals until it’s softened, doing your little poke test in between each time you heat it.
Additionally, there are other ways to soften the butter without the microwave. For 5 more simple ways you can easily soften your butter, check out this article on how to soften butter quickly.
Green tip: Look for organic and palm oil-free butter if you can. Buying organic means you are supporting farms that do not use damaging pesticides and fertilizers, and palm oil production is a huge driver behind deforestation.
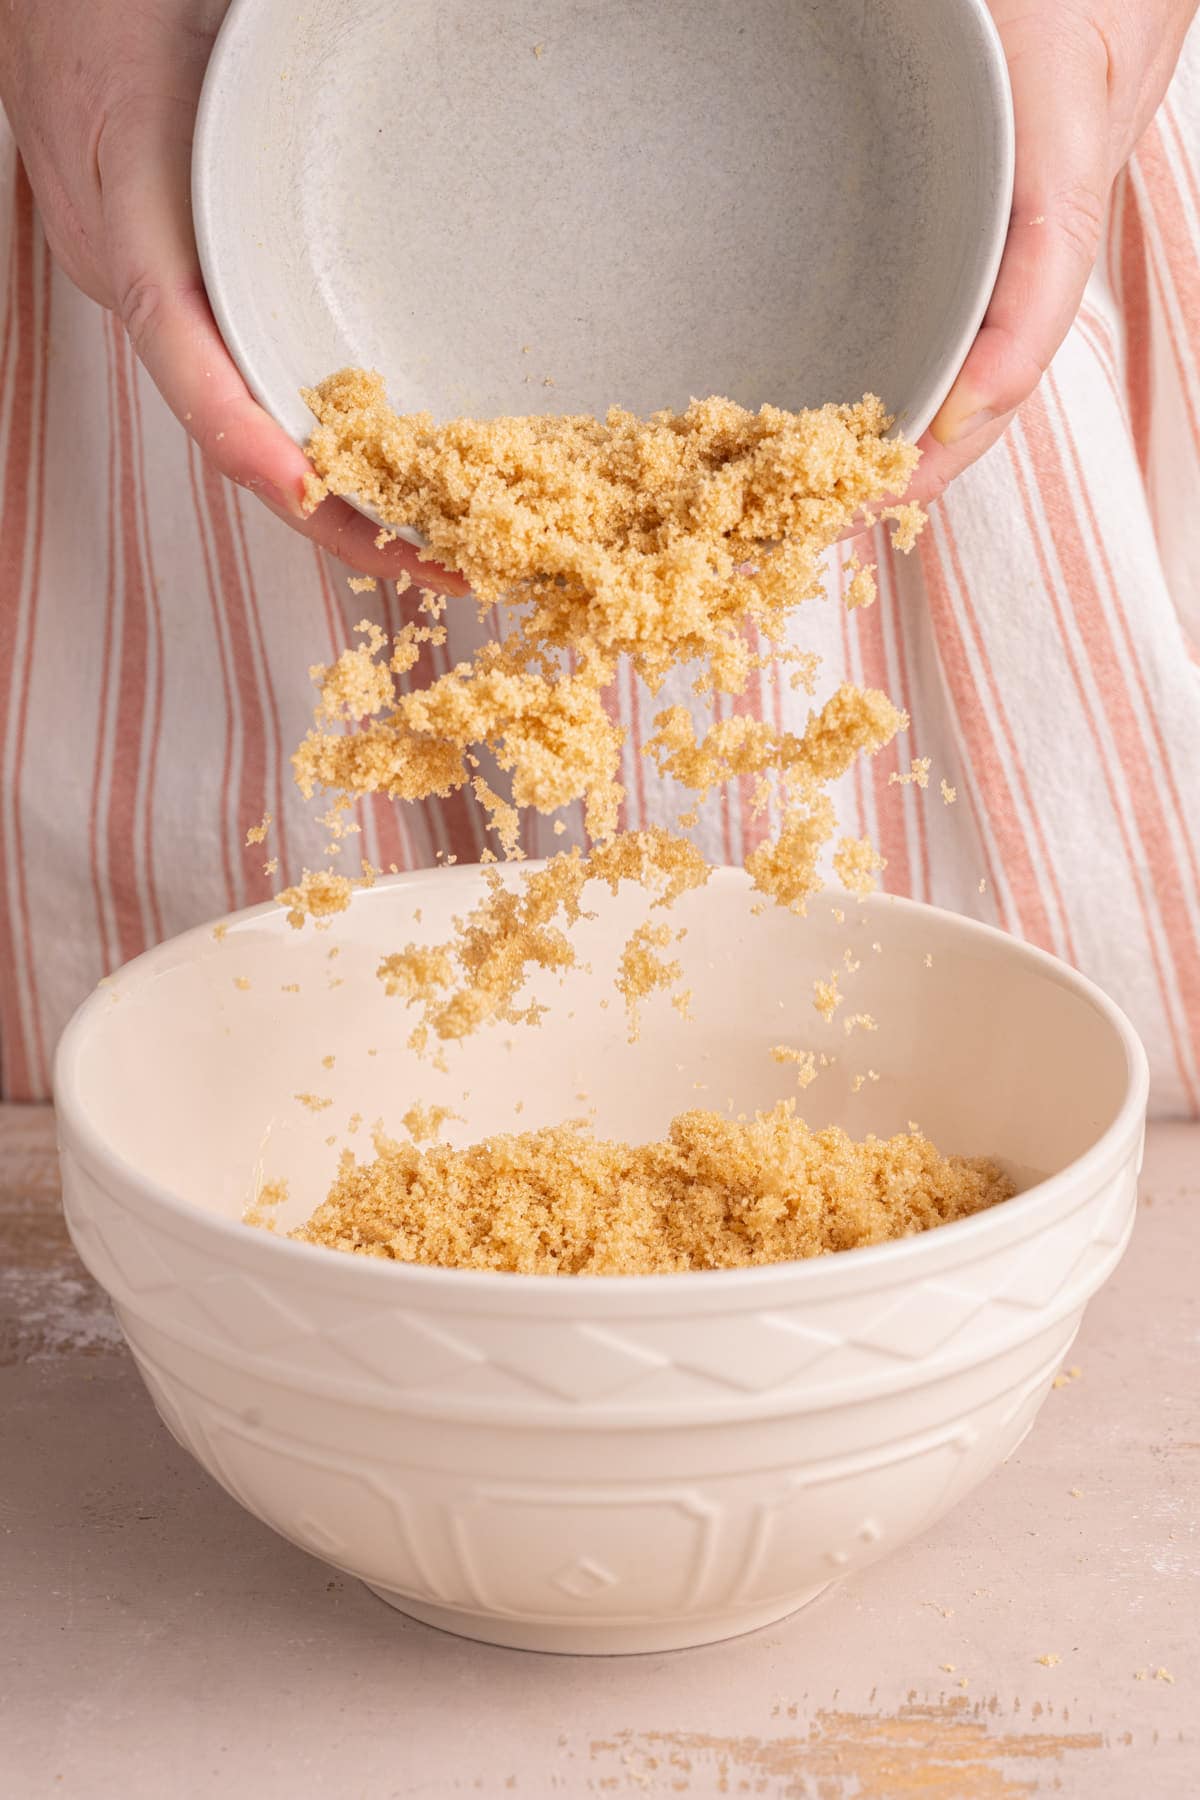
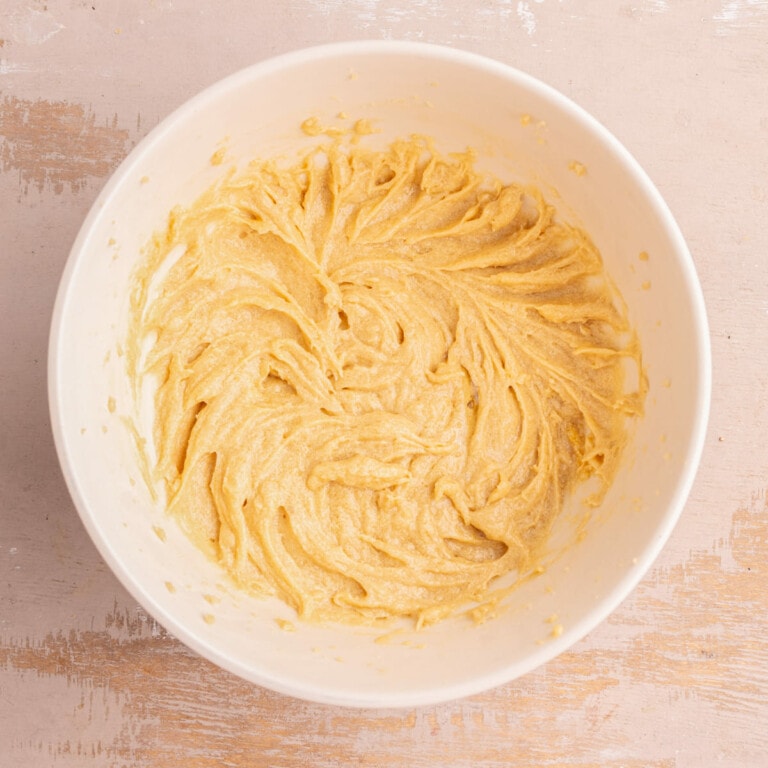
The key to perfectly textured cookies is creaming your butter and sugar together to start the dough. Creaming your sugar into your butter actually aerates the dough.
The sugar cuts into the butter, adding little air bubbles that ultimately make for a softer and chewier cookie.
Use a hand mixer on high to whip the softened butter and brown sugar together for 2-3 minutes, until it’s smooth and airy.
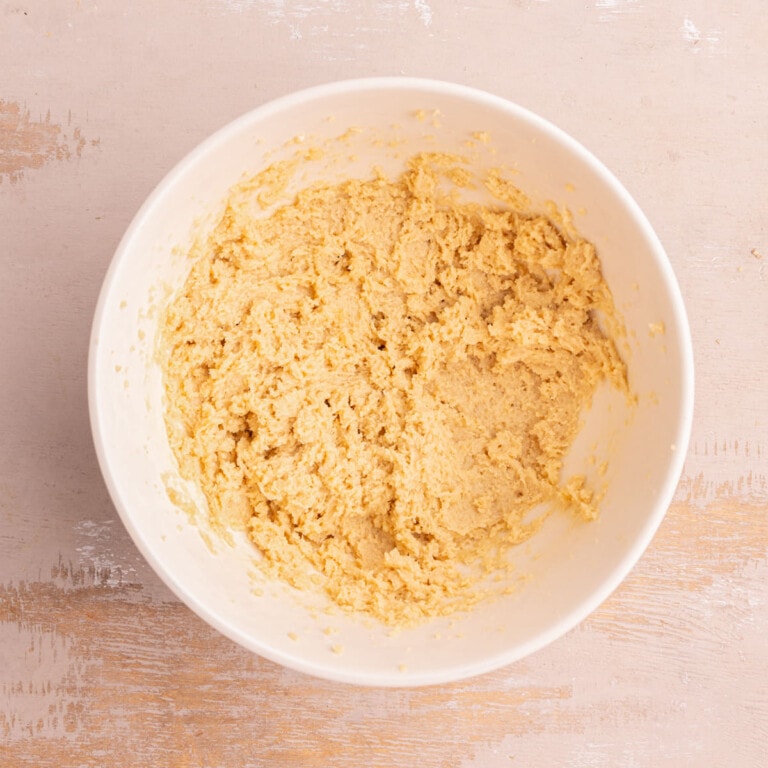
Add the Wet Ingredients Next
With one-bowl baking recipes, the order in which you add your ingredients will affect the consistency of your dough and overall success of your cookies.
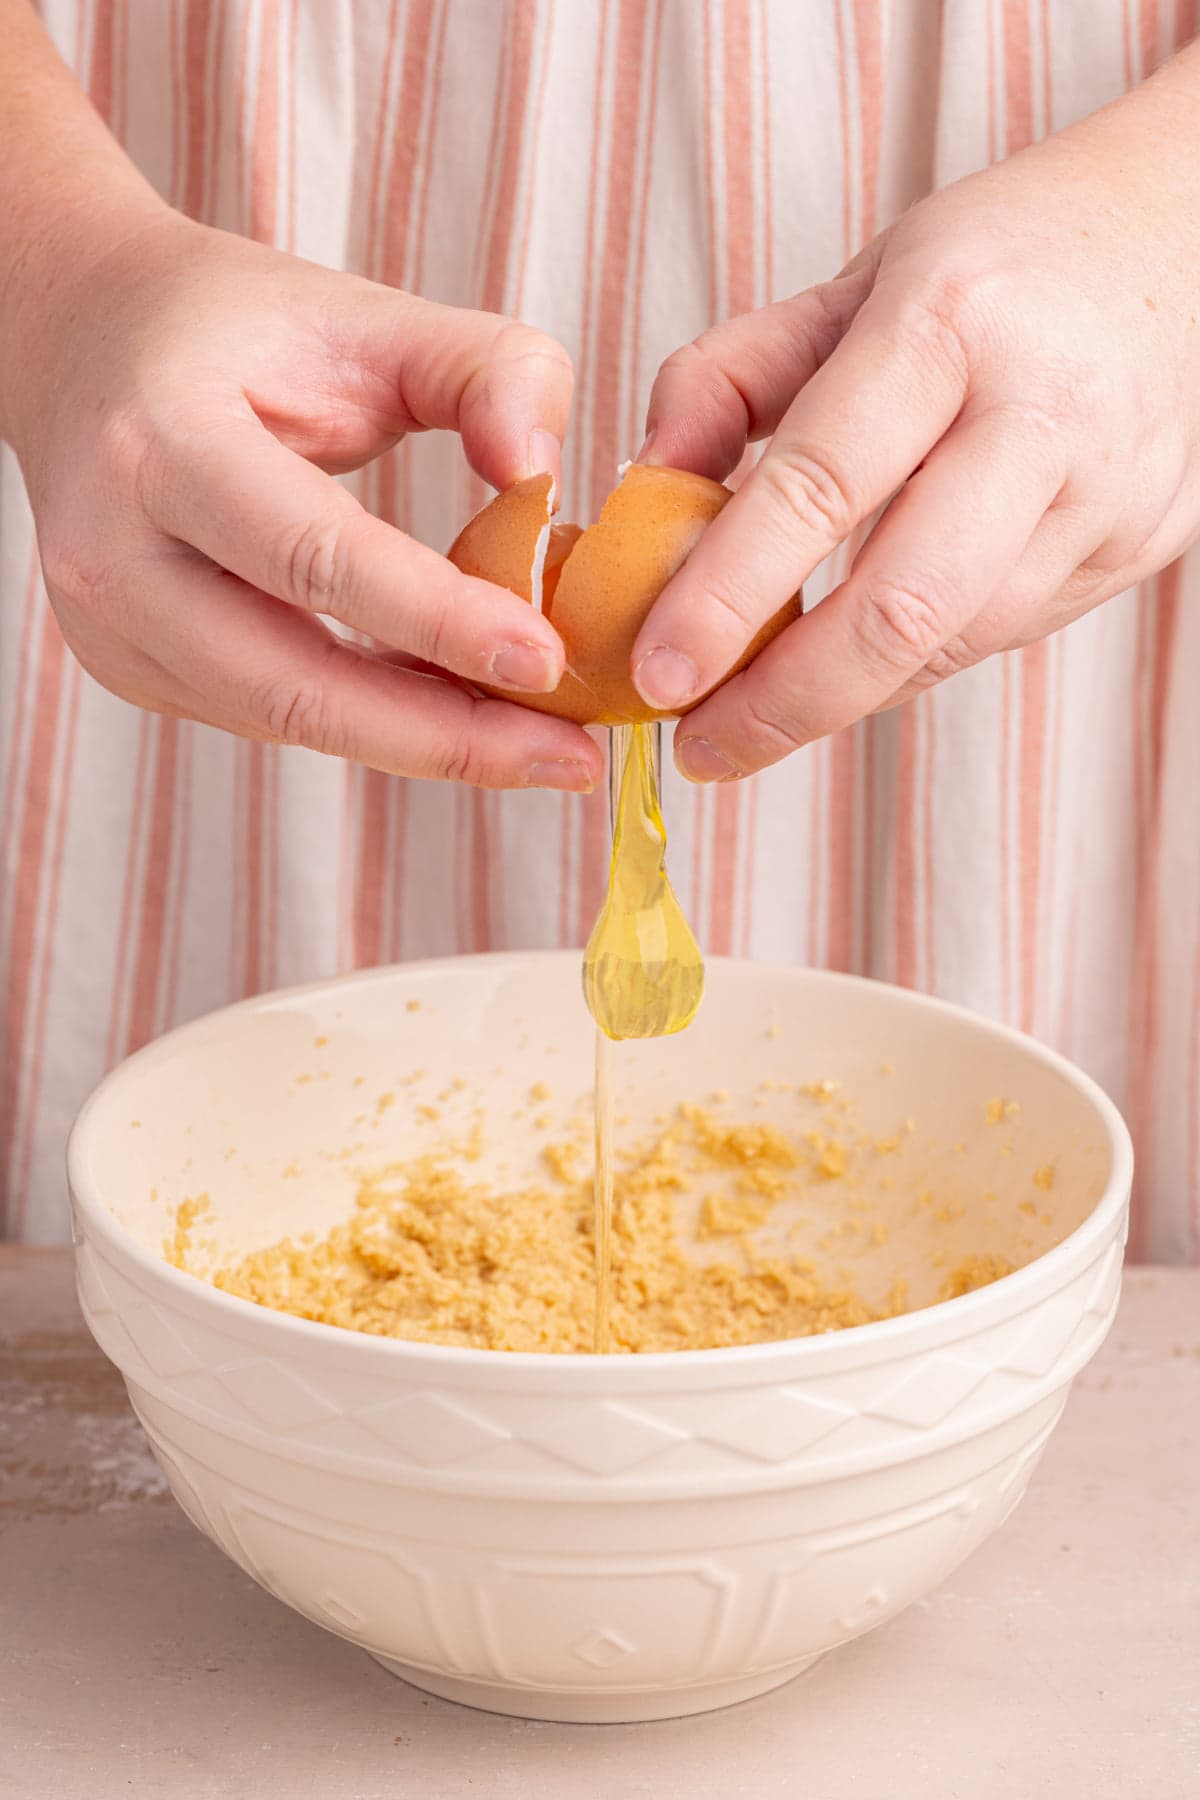
After creaming your butter and sugar together, it’s time to add the vanilla extract and egg.
Green tip: Look for pasture-raised eggs (over free-range or cage-free) to support agriculture that is less reliant on chemicals and fossil fuels.
Okay, here’s your obligatory reminder that best practice for baking is cracking your egg into a separate dish rather than adding it directly to your dough.
Why? Well, this will give you a chance to extract any eggshells that may fall into your dough. It also means you can salvage your dough in the off chance you have a bloody egg (yikes!).
Of course, if you’re like me and like to live your life on the edge, then you can take a chance and crack it directly in your bowl. Just do so at your own risk. 😉
Once your vanilla extract and egg is added into your cookie dough, grab that hand mixer again! Mix on low, just enough to integrate the egg. It’s best not to over-beat your dough once the egg is in there.
Add Your Dry Ingredients Next
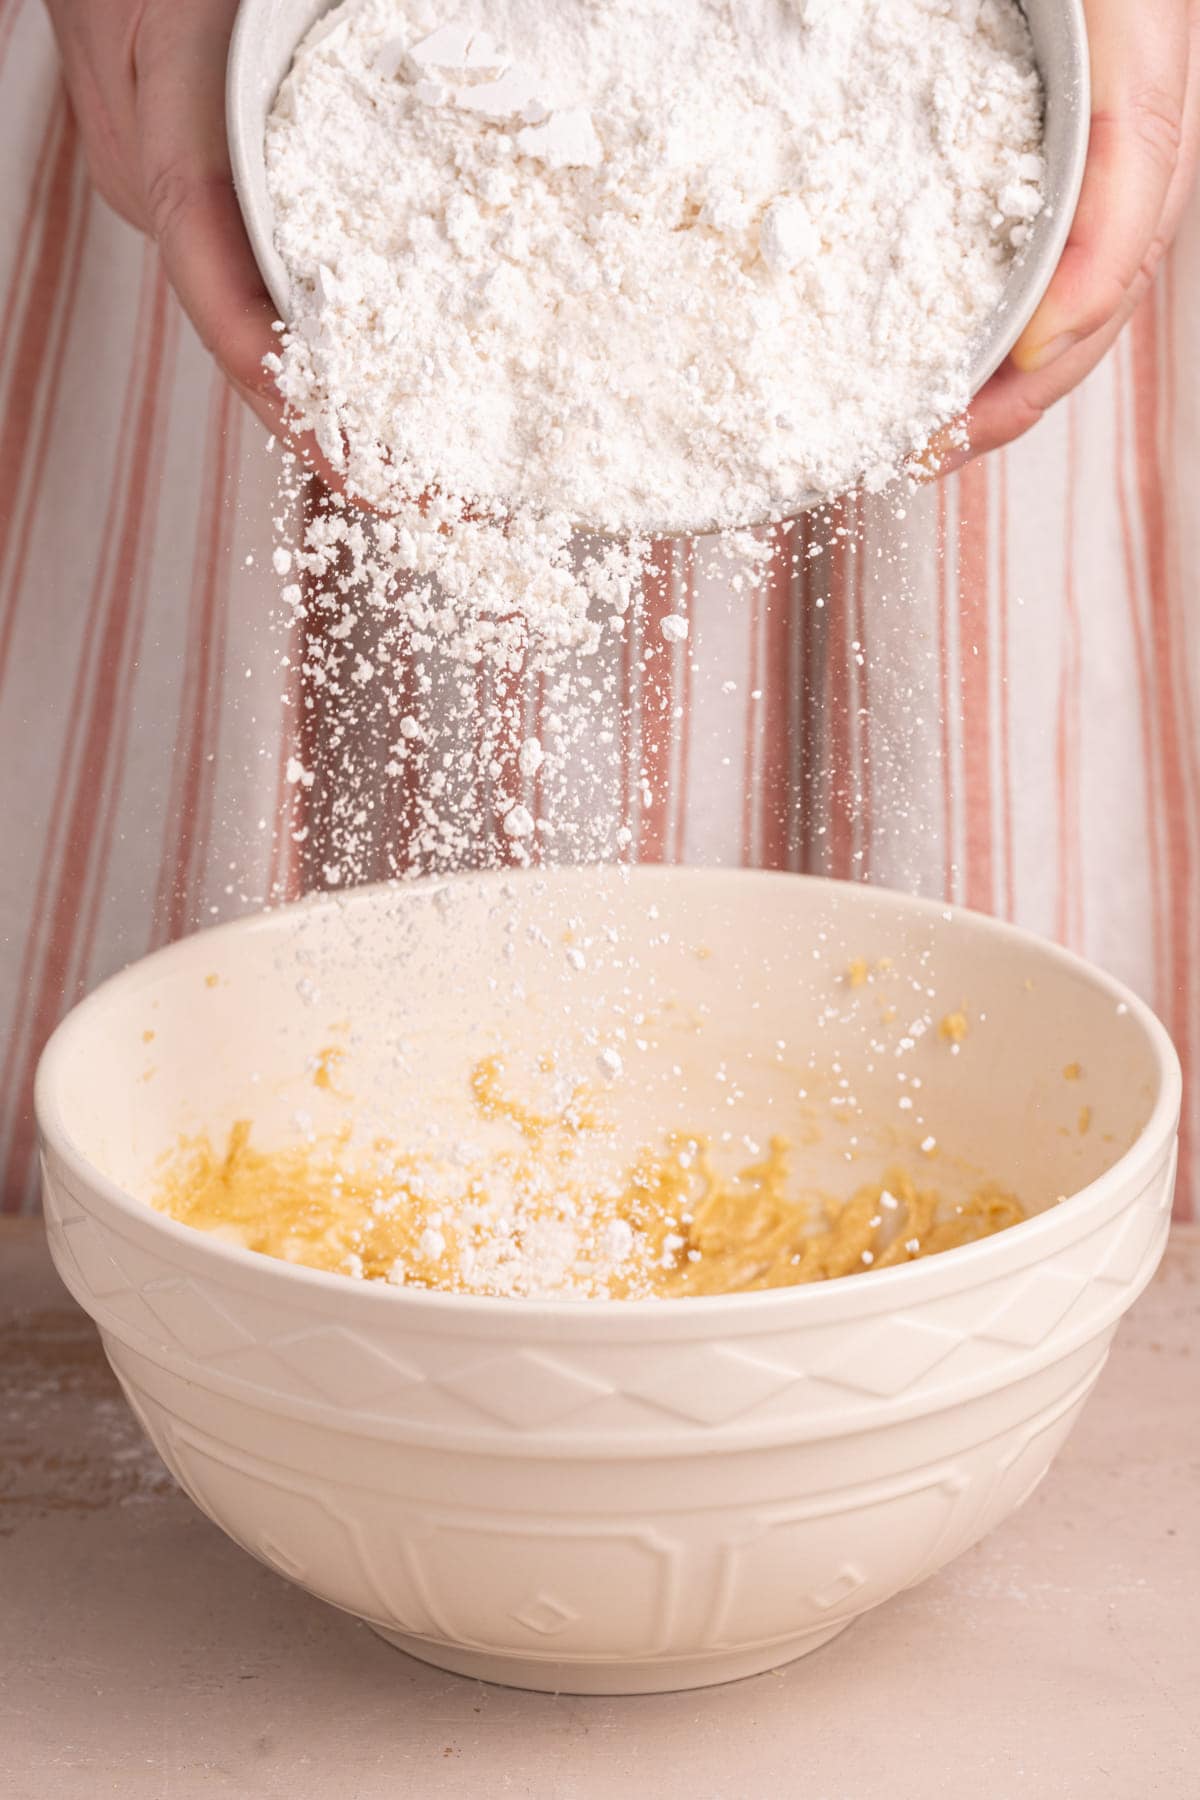
Next up: the dry ingredients! Add your flour, salt, and baking soda to the mix. Grab your trusty hand mixer again to combine the dry ingredients into your dough, making sure no lumps are left behind.
You may notice that some dry ingredients stick to the inside of the bowl. In this case, use a rubber spatula to push it down into the dough, ensuring everything is well-combined.
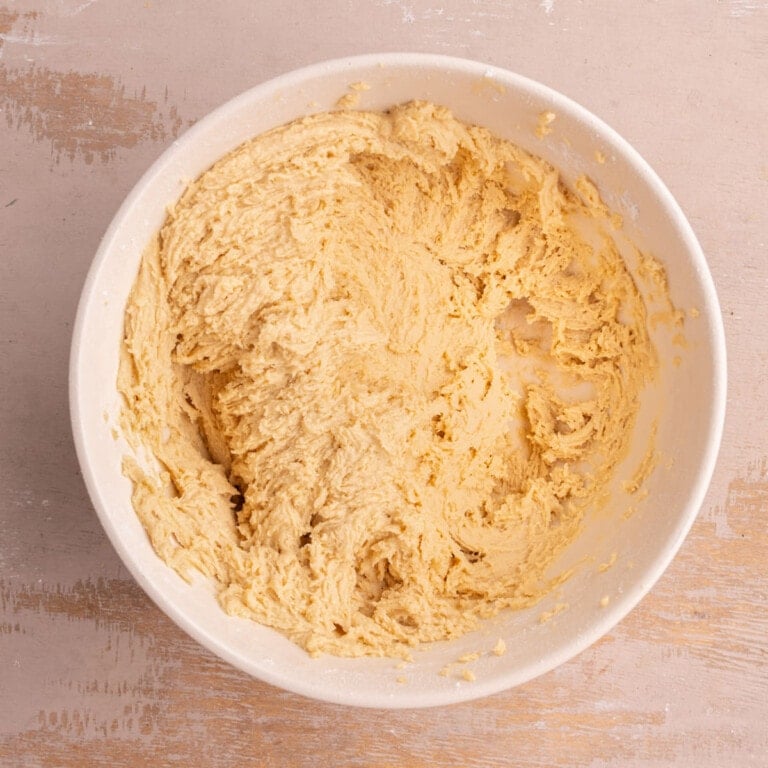
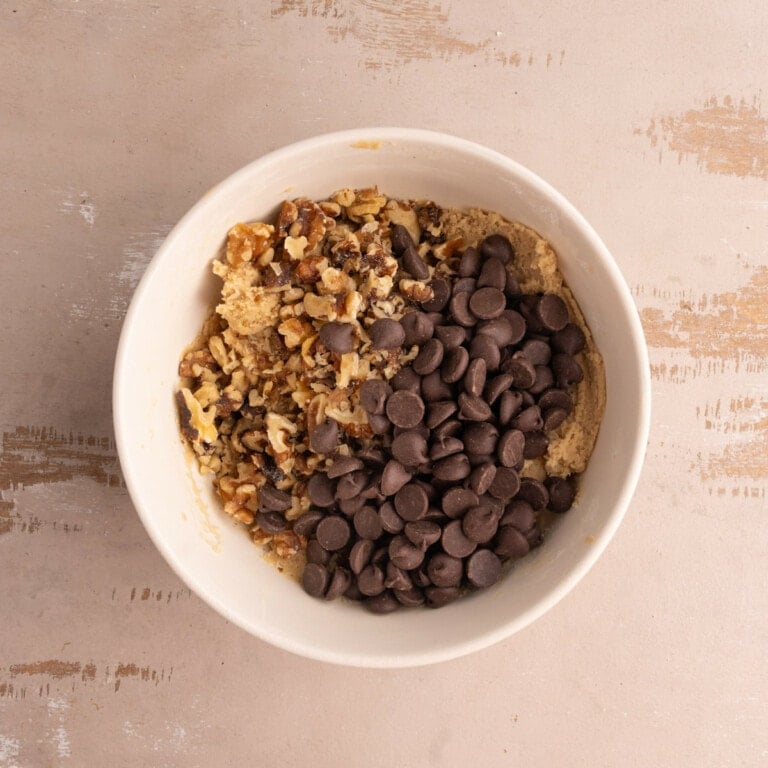
Fold in Your Walnuts and Chocolate Chips Last
Once your dry ingredients are integrated, all that’s left to do is add your walnuts and chocolate chips!
I like to conserve just a handful of each to place on top of the cookie dough once it’s shaped into cookies. Afterall, we eat with our eyes first, and seeing those walnuts and chocolate chips on top is part of the overall indulgent experience!
Pour the rest of the chocolate chips and walnuts into the cookie dough and use a rubber spatula to gently fold them in, until they are evenly distributed throughout.
How to Perfectly Bake Your Chocolate Chip Walnut Cookies
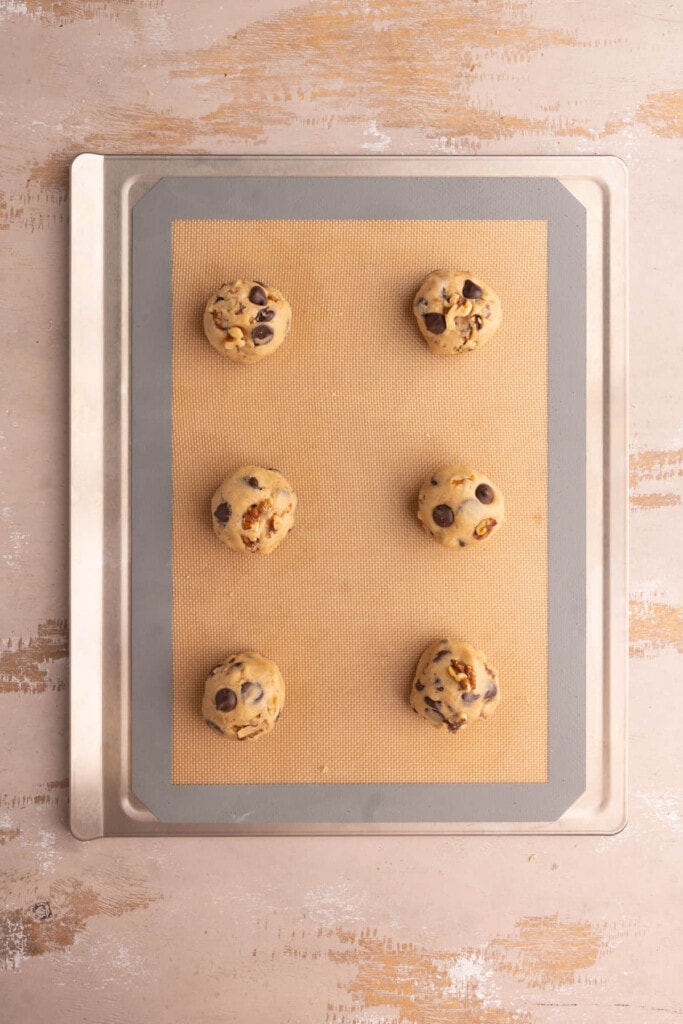
These walnut cookies with chocolate chips are pretty much foolproof! They hold their shape even without any chilling time, but you can expect a little bit of spreading, so keep that in mind as you line your cookies up on your prepped baking sheet.
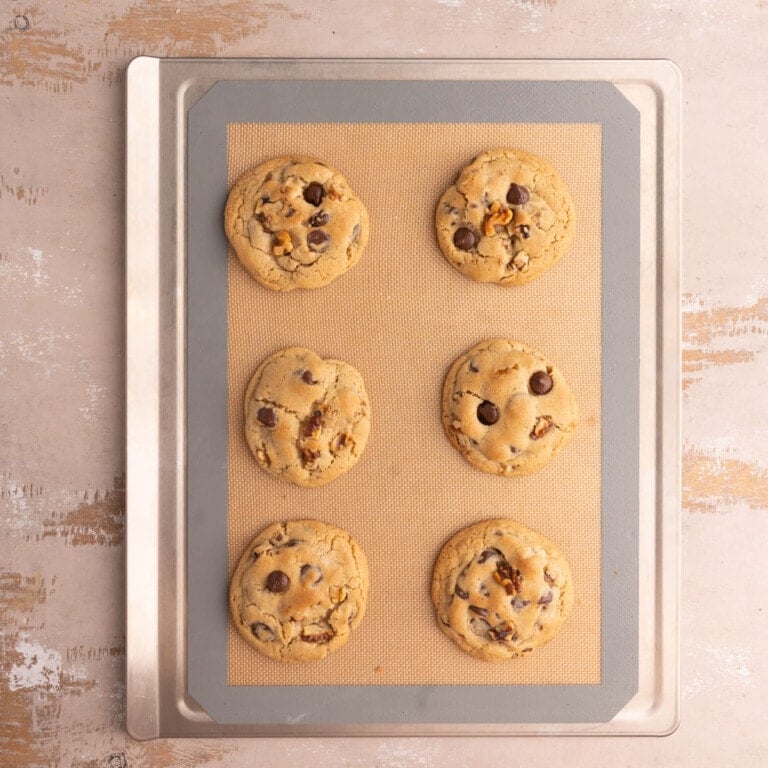
But here’s the true key to perfectly baking these chocolate-chip-stuffed cookies: always bake them on the top rack!
Heat rises, so the top rack of your oven is often significantly hotter than the bottom rack. If you place one cookie sheet on the top rack and one on the bottom, there will be a noticeable difference in baking time.
If both sheets don’t simultaneously fit on the top rack, I highly recommend baking the cookies in two separate rounds, so that they can all bake on the top rack.
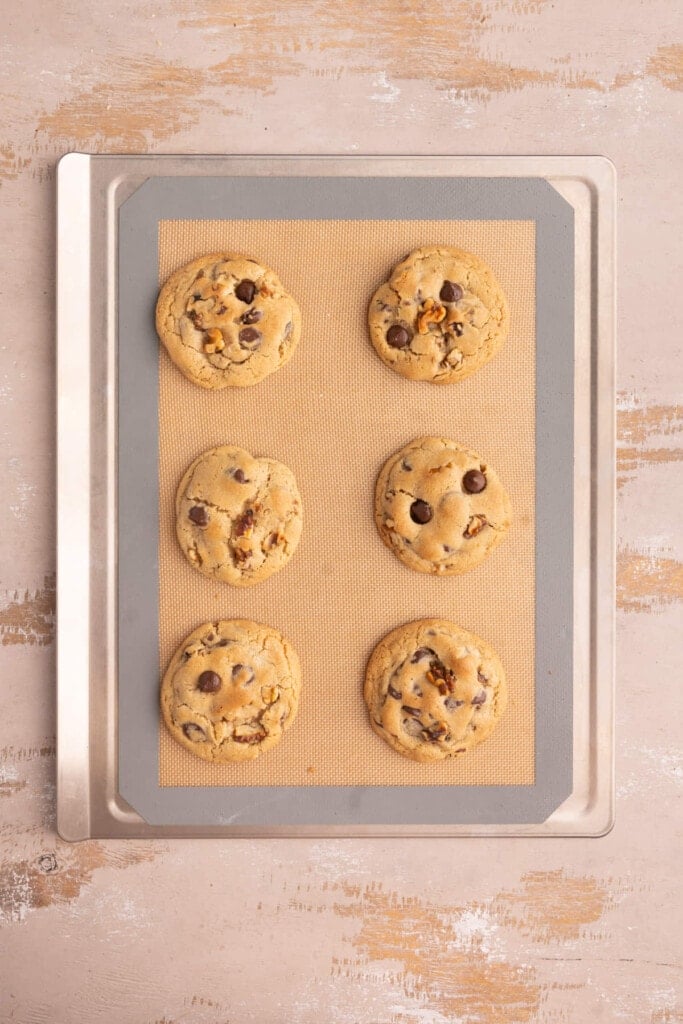
These cookies with walnuts and chocolate chips will bake beautifully in just 8-10 minutes at 375°F.
When the cookies are ready, the top and edges will start to turn golden brown and are a little bit crispy to touch. It’s okay if the center is slightly underdone, as they will continue to bake as they cool.
If you want perfectly round cookies, grab a round cookie cutter that’s a little bit larger than your cookie. While they’re still hot, scoot the cookie cutter around it. You’ll be left with perfect circles!
How to Properly Store Walnut Chocolate Chip Cookies
At room temperature, these chewy chocolate chip cookies will last for 5-7 days when covered or stored in an airtight container. In an airtight container in the fridge, they will last up to three weeks.
Quick tip: Storing your cookies with a piece of bread will keep them softer and chewier. This is the perfect use for the end piece!
These cookies do tend to firm up within the first few days of storing them. If you want to keep them softer and chewier, store a piece of bread in the container with them. Believe it or not, moisture from the bread stops the cookies from drying out.
You can also freeze them once they’re baked for up to a year, but I recommend freezing the unbaked dough instead. More on that next.
Green tip: Of the billions of tons of food wasted annually, 50% of food waste happens at home. Reduce your contribution to food waste by properly storing baked goods!
How to Freeze Cookie Dough
Freezing some or all of the dough for your chocolate chip walnut cookies is a great way to have dough on hand all year. Doing so means you can have freshly baked cookies whenever you want!
Shape the cookie dough into cookie dough balls and store them in a freezer safe storage bag (consider reusable storage bags for a more sustainable option!). They can be stored this way for 12 months.
Watch them closely when you bake them and add an extra minute or two to your baking time if need be.
Chocolate Chip Cookies with Walnuts Frequently Asked Questions
What is the secret to chewy cookies?
Using all light brown sugar in your cookies rather than a mix of brown sugar and white sugar or just white sugar alone, will add extra moisture to your cookie dough and ultimately result in a softer, chewier cookie.
Is it okay to use melted butter instead of softened?
Melted butter and softened butter are not interchangeable. This means, if a recipe calls for softened butter and you use melted butter, the texture of your final outcome will be affected.
If you accidentally overheat your butter while trying to soften it quickly and end up melting it, you can revive it by quicky adding a couple of ice cubes directly to the melted butter and stirring.
When it solidifies, remove the ice and use the revived butter.
Why You Should Make these 30-Minute Chewy Chocolate Chip Walnut Cookies
- The textures! Chewy cookies with melty chocolate and crunchy toasted walnuts.
- The flavor combo. The combination of full nutty flavor from the walnuts and rich chocolaty flavor from the chips is iconic.
- They’re easy! Only one bowl needed and requires no chilling time for quick and easy cookies in a flash!
If you’re loving these 30-Minute Chewy Chocolate Chip Walnut Cookies, and want more recipes with walnuts, check out these Cinnamon Sugar Candied Walnuts and this Tahini Pasta with Toasted Walnuts.

30-Minute Chewy Chocolate Chip Walnut Cookies
Print Save RateEquipment
- Cookie Scoop optional
Ingredients
- ½ cup walnuts
- ½ cup softened unsalted butter (½ cup butter = 1 stick)
- 1 cup light brown sugar
- 1 tablespoon vanilla extract
- 1 large egg
- 1 ¾ cup all-purpose flour
- ¼ teaspoon table salt
- ½ teaspoon baking soda
- ¾ cup chocolate chips (dark or semi-sweet)
Instructions
- Preheat your oven to 375°F and line two large baking sheets with parchment paper or a reusable baking mat. Chop the walnuts into small chunks.

- To a large mixing bowl, add softened butter and brown sugar. Use a hand mixer on high to cream together until light and smooth (about 2-3 minutes).
- Add the egg and vanilla extract and use your hand mixer on low to combine.
- Add the flour, salt, and baking soda and mix to combine, careful not to overbeat. Use a spatula to scrape any flour off the sides of the bowl and integrate it into your dough.
- Add the walnuts, and chocolate chips to your dough and use a rubber spatula to fold to combine. I like to keep a small handful of each out to place on top of the cookie dough once it's formed into cookies.
- Use a large cookie scoop or 2 heaping tablespoons of dough to form your cookies, adding them to the prepped baking sheets. Leave at least an inch of space in between each cookie for minor spreading. Add the conserved walnuts and chocolate chips on top.
- Bake for 8-10 minutes on the top rack. It's okay if they are slightly underdone. Allow them to cool on the baking sheet so they continue to bake as they cool. If you want perfectly round cookies, use a round cookie cutter, scooting it around the cookie while they are still hot. Enjoy!
Pro Tips
- You can freeze excess cookie dough before baking it to give you fresh baked cookies every time when the craving hits! Just bake them as normal straight out of the freezer.
- Cookie monsters are always happy at my house with this delicious selection of my best cookie recipes to choose from! Nom nom nom!
Share This Recipe