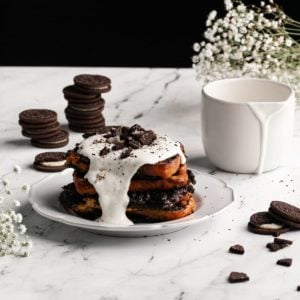
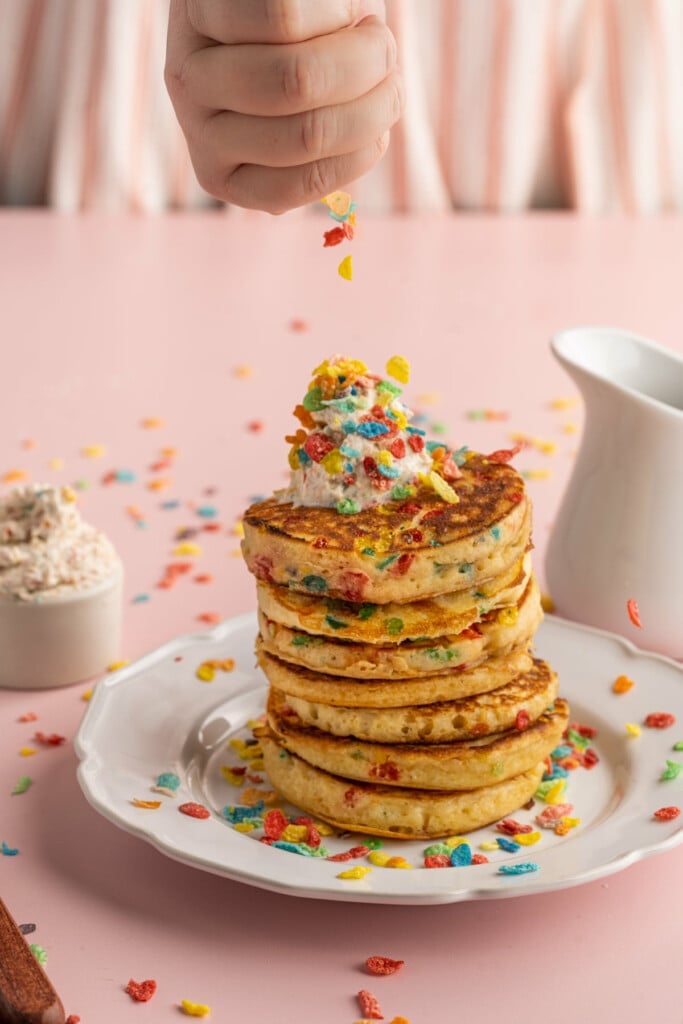
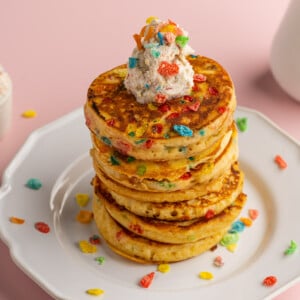
Looking for a fun way to elevate your homemade pancakes? These Fruity Pebbles Pancakes with Cereal Milk Whip bring color, crunch, and fruity flavor to every bite!
Plus, the pancakes are easy to make and come together in about 20 minutes, making this your new favorite homemade fluffy pancake recipe!
In this recipe, you will learn how to make your own quick acidified buttermilk to yield super fluffy pancakes with ingredients you likely already have at home.
You’ll also learn how to tell when it’s time to flip your pancakes, and the importance of getting your pan hot before adding the pancake batter to it.
Additionally, this recipe teaches you how to make a delicious and colorful cereal milk whipped cream, which is optionally, but highly encouraged!
Lastly, as with all of my recipes, you’ll learn how to properly store and reheat leftovers to help you avoid food waste.
As an environmental scientist, I am always trying to find ways to combat food waste, and cereal is one of those things I buy on sale, thinking they’ll be a great solution to busy mornings, but then forget about the box in the back of the pantry.
So, integrating almost-expired cereal into these delicious pancakes is a great way to use up that forgotten about cereal!
Fluffy Fruity Pebbles Pancakes Ingredients
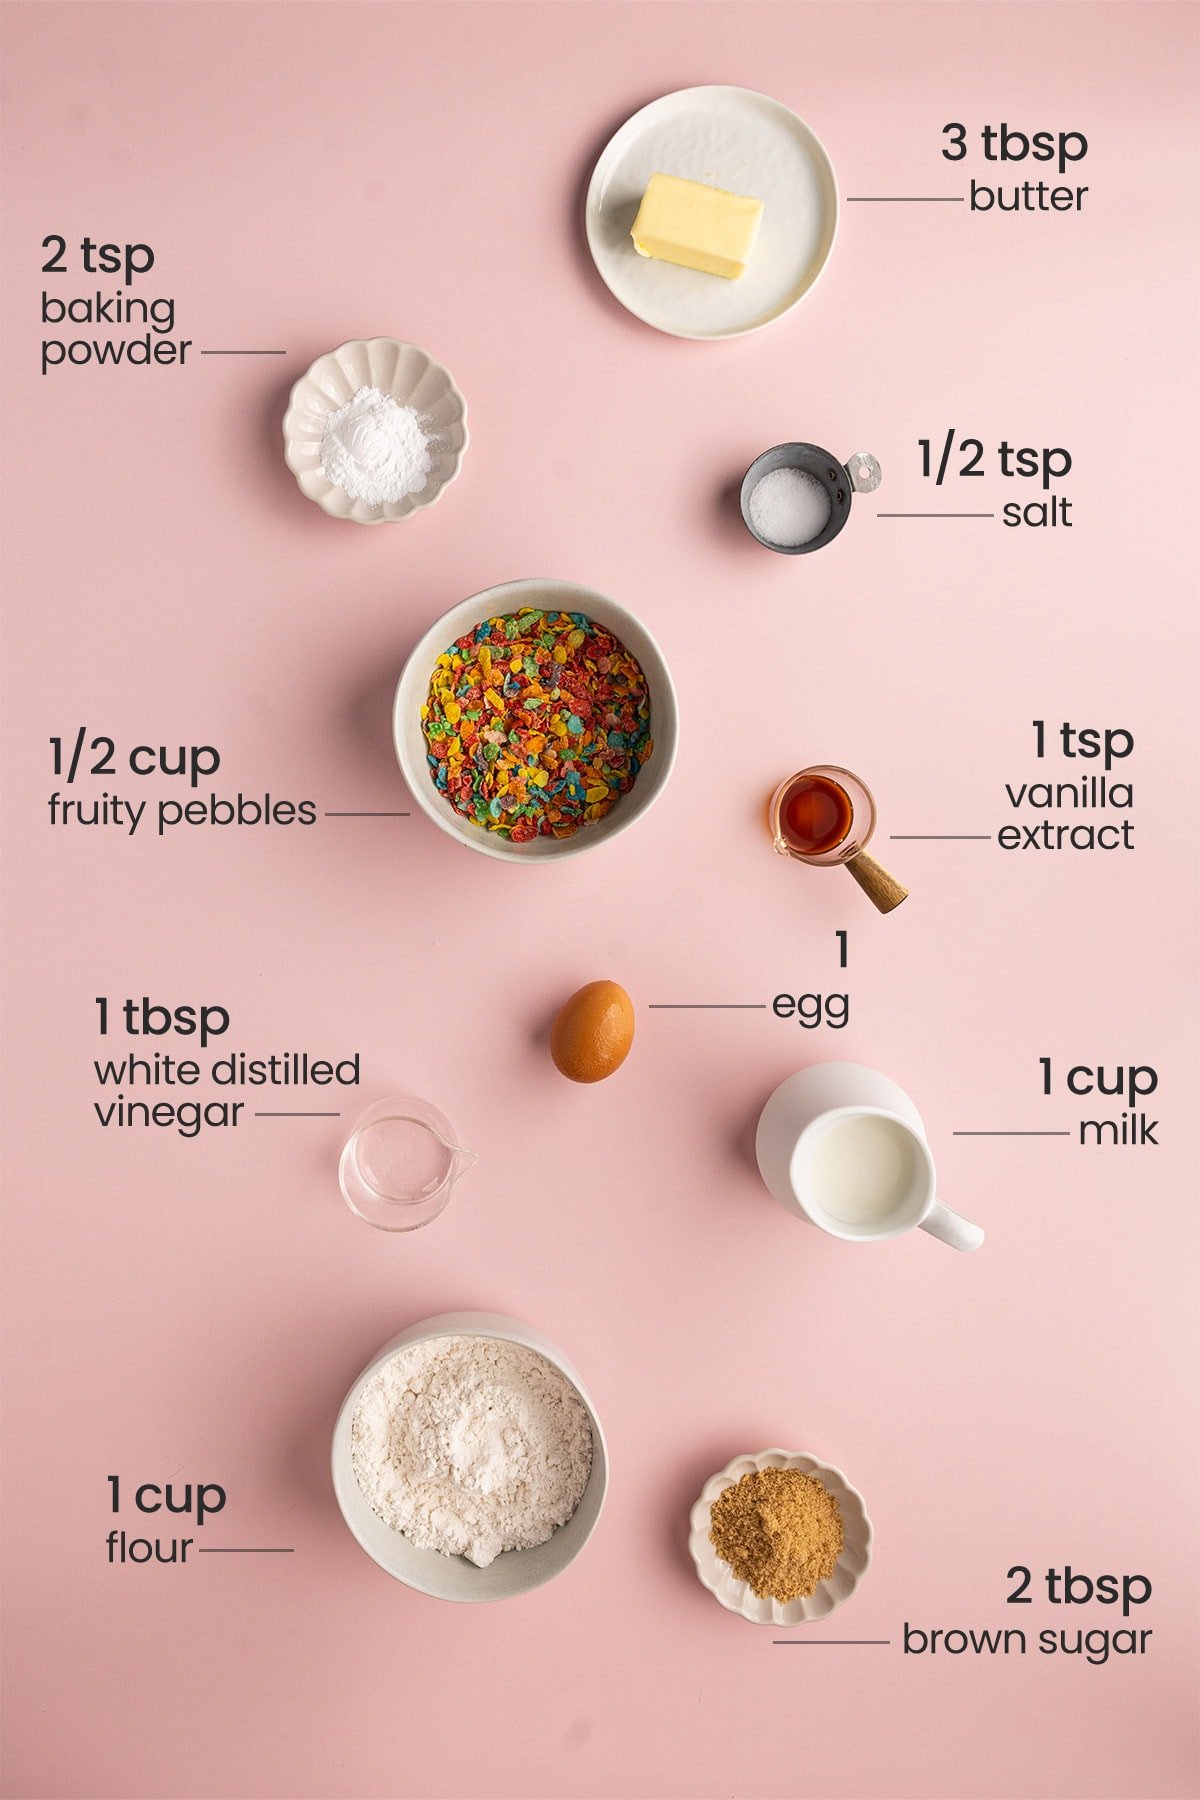
Here’s everything you need for the pancakes:
- Milk. Any kind of milk will do. You can use anything from skim to whole dairy milk, or even your favorite unsweetened plant-based milk.
- White distilled vinegar. Or even lemon juice. This will be added to your milk to make your own acidified buttermilk, yielding a thicker pancake batter.
- All-purpose flour.
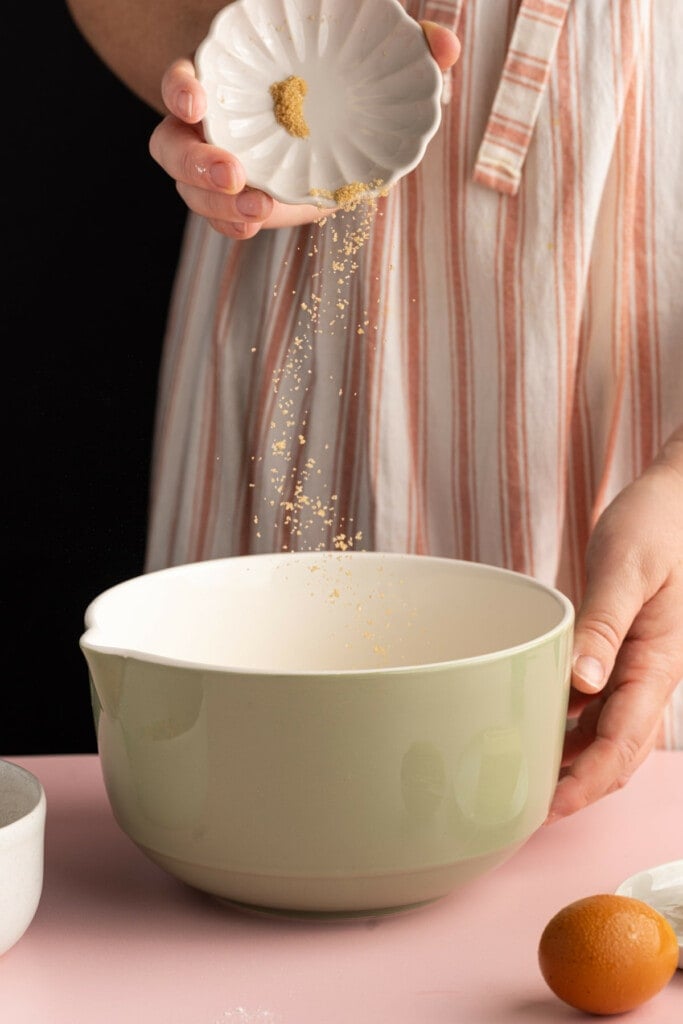
- Light brown sugar. Dark or even granulated sugars work, too.
- Salt.
- Baking powder.
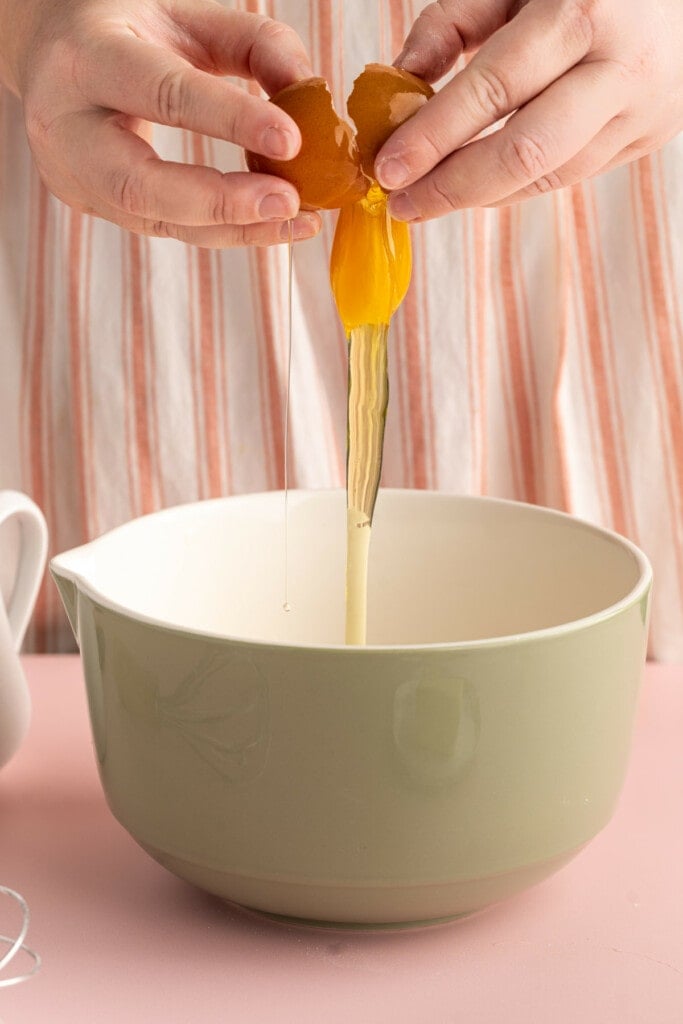
- Egg. A flax egg works here, too, if you want to make these vegan!
- Vanilla extract.
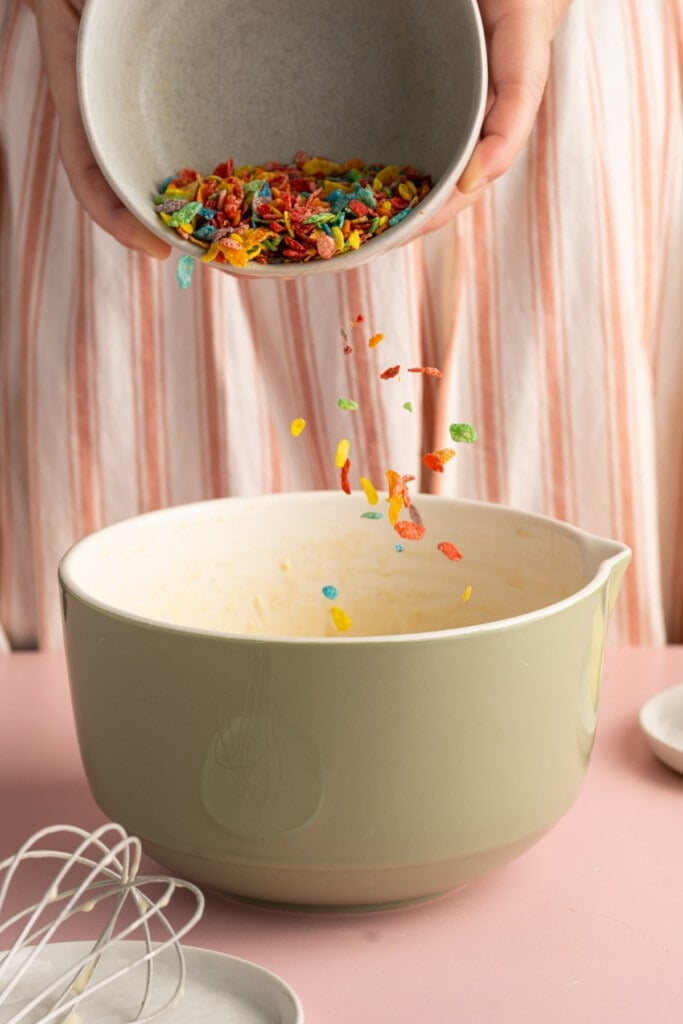
- Fruity pebbles cereal.
- Unsalted butter. As needed, to fry the pancakes in. You may not use all 3 tablespoons.
- Maple syrup for serving (optional).
Here’s everything you need for the Optional Cereal Milk Whipped Cream:
- Heavy cream. Or heavy whipping cream.
- Fruity pebbles. To soak in your cream to give it that fruity cereal flavor.
- Powdered sugar.

Fruity Pebbles Pancakes Tips and Tricks
How to Make Your Own Quick Buttermilk for Fluffy Pancakes
This homemade pancake recipe calls for acidified buttermilk, which will yield thicker pancake batter and thus, fluffier Fruity Pebbles Pancakes. You will easily be able to whip up your acidified buttermilk at home and can make it with any type of milk (dairy or not!).
I often make this quick version of buttermilk rather than buy storebought buttermilk for any recipes that call for buttermilk. I rarely have buttermilk on hand, and I don’t want to buy a whole carton just to make one recipe, so this trick comes in handy!
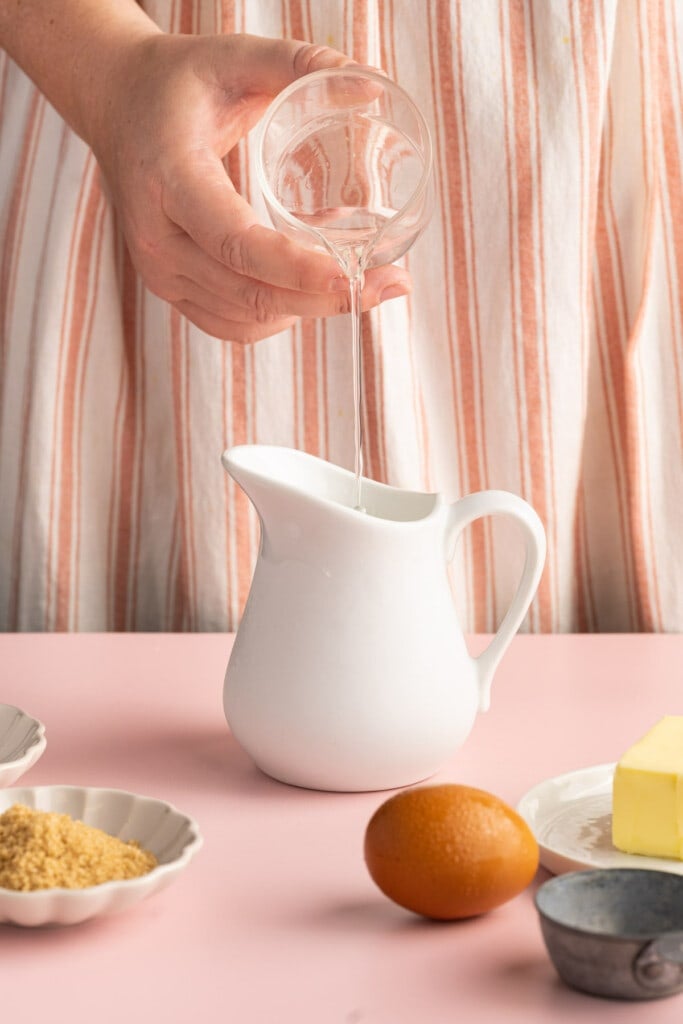
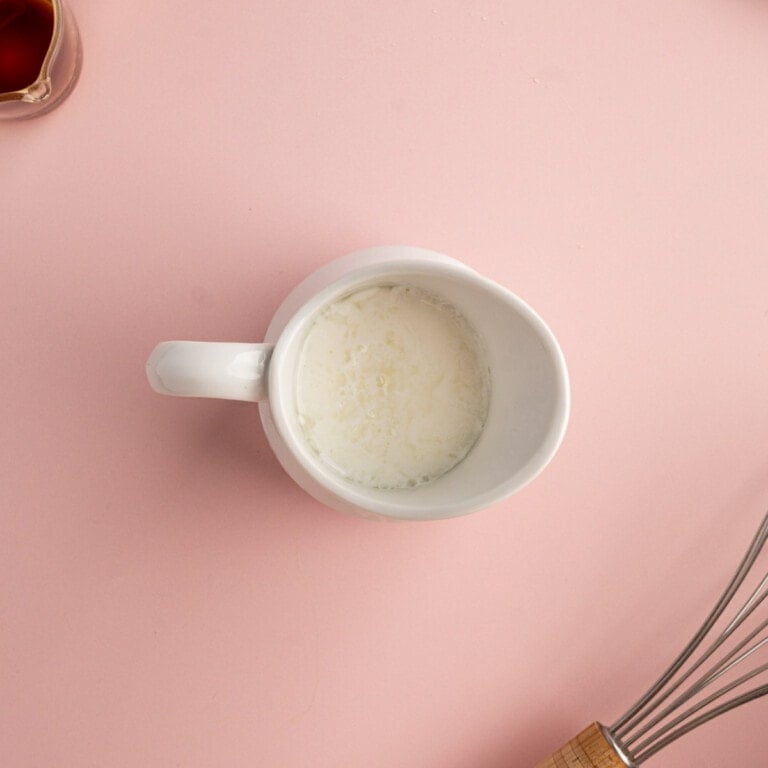
To make your quick buttermilk, add 1 tablespoon of white distilled vinegar (or lemon juice) to 1 cup of milk and set it aside. I usually just stir them together in my measuring cup.
In a matter of minutes, the milk will start to slightly curdle and thicken to form your acidified buttermilk. And yes, it’s absolutely safe to consume!
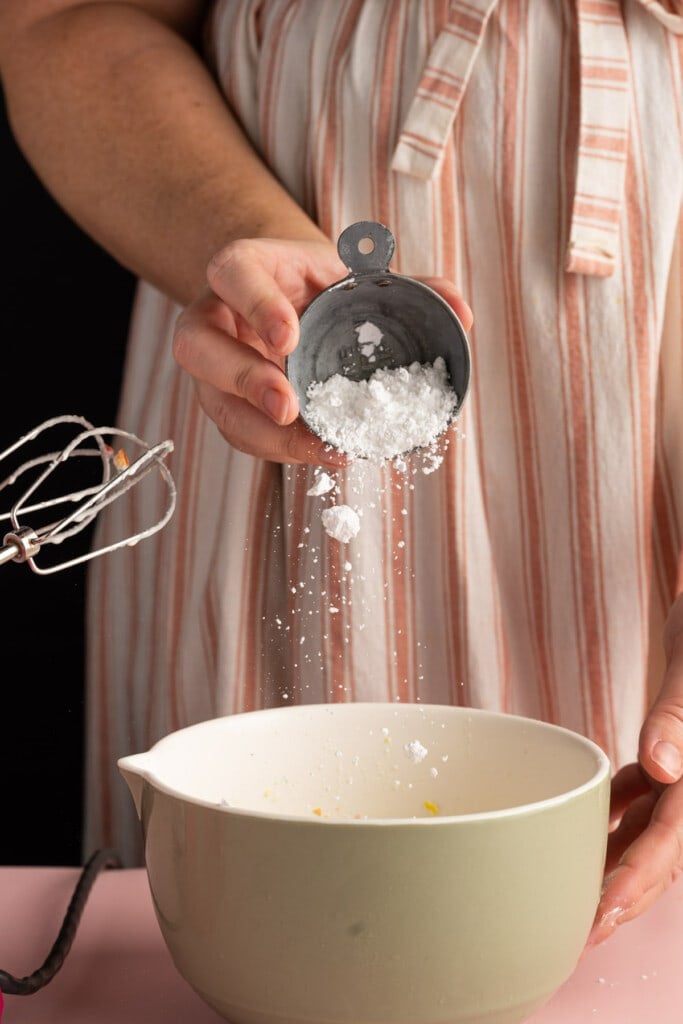
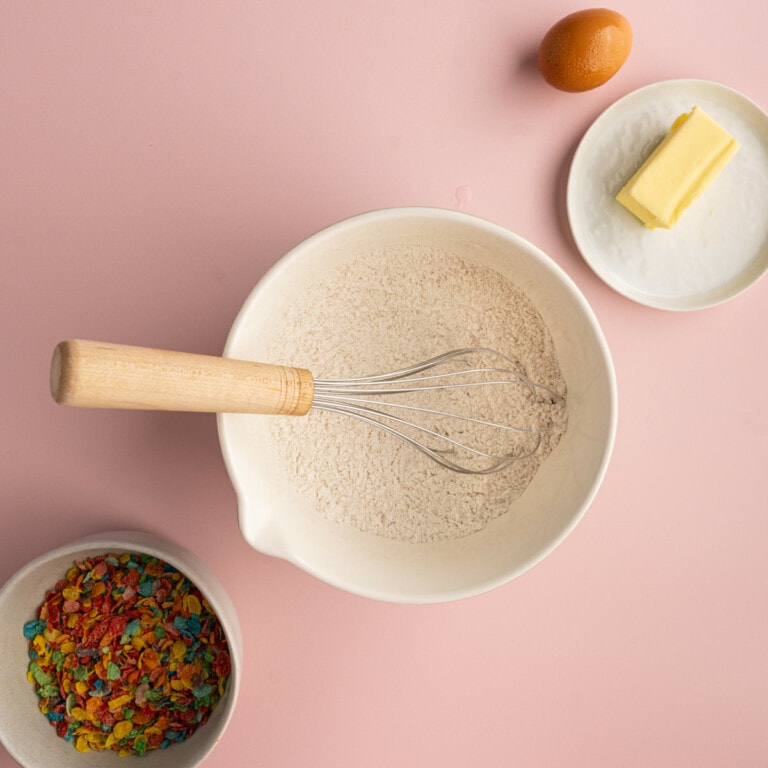
Whisk Together Your Dry Ingredients
Once you’ve set your homemade buttermilk aside, grab a large mixing bowl to get going on your pancake batter.
Add your all-purpose flour, brown sugar, baking powder, and salt to the bowl. Use a whisk to combine your dry ingredients just to ensure you don’t end up with any clumps in your batter.
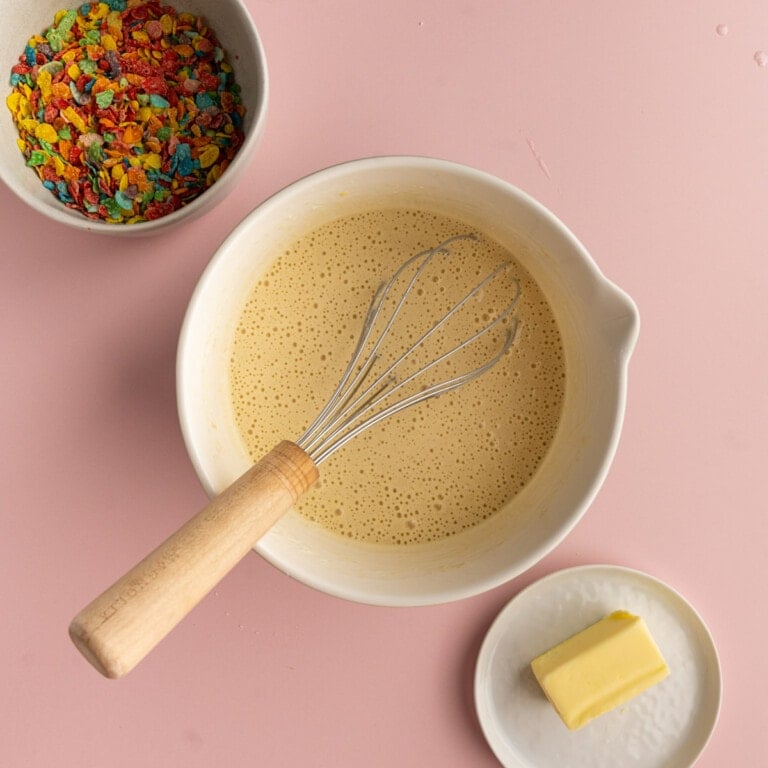
Add Your Wet Ingredients to the Pancake Batter
Next, add your wet ingredients to the mixing bowl with your dry ingredients. This includes the egg, vanilla extract, and buttermilk mixture. Then, whisk again until smooth.
As always, it’s best practice to crack your eggs into a separate bowl, instead of directly into your batter. This just gives you the opportunity to remove any eggshells that accidentally fall into your bowl if need be.
It also means that if in the small chance you got a rotten or even a bloody egg, you won’t have to waste the rest of your ingredients that are already in the bowl.
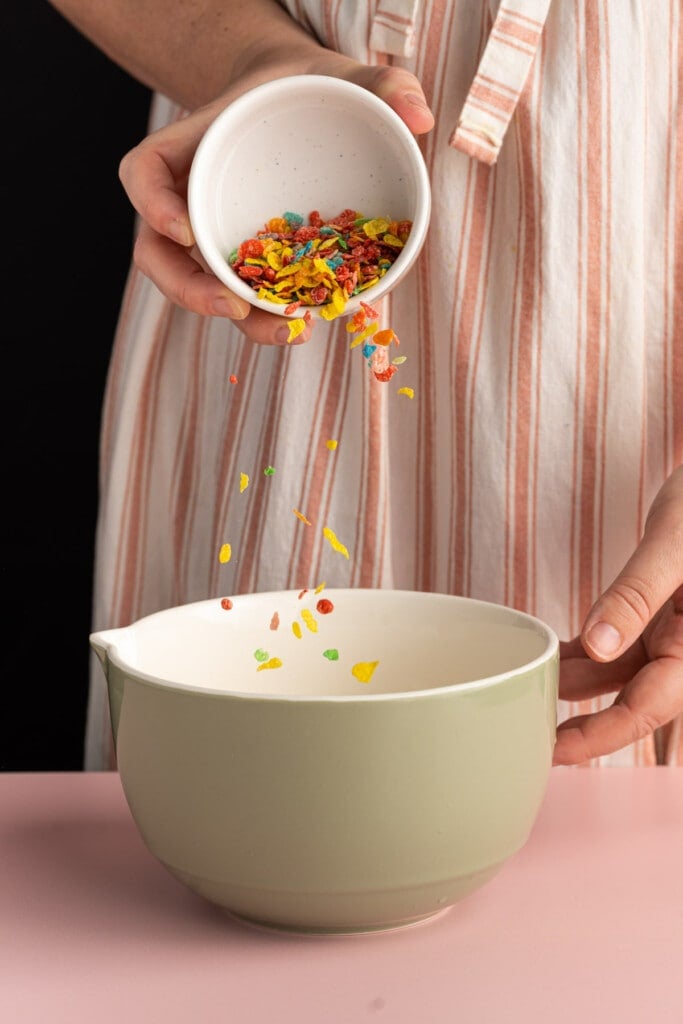
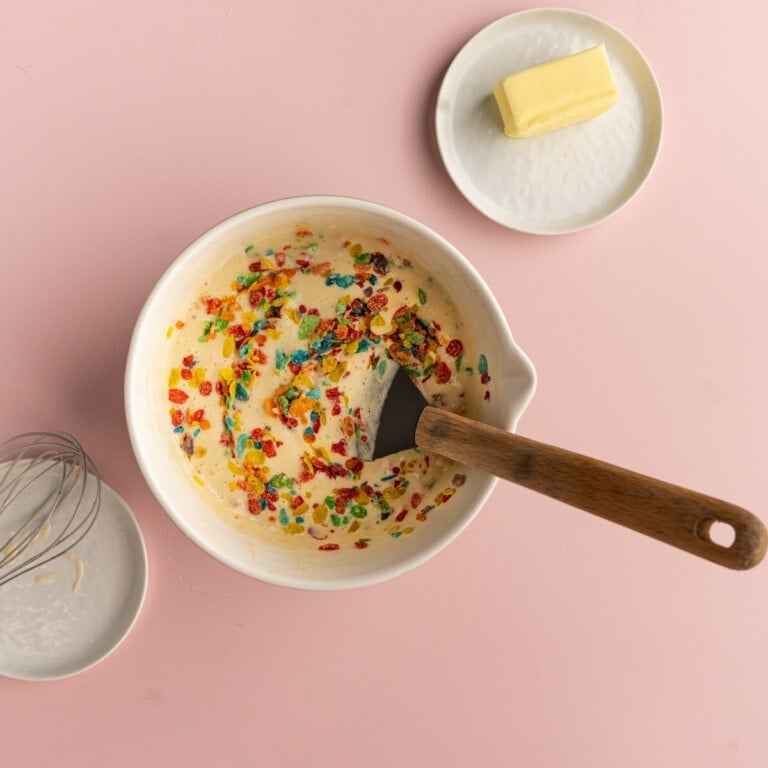
Add the Fruity Pebbles Last
I love adding Fruity Pebbles to recipes (see also: Fun Fruity Pebbles cookies!) because of the added flavor, crunch, and color they bring!
I fold my Fruity Pebbles right into my batter using a spatula. Please note that the longer the cereal sits in the batter, the more likely the color from the Fruity Pebbles will bleed into the batter.
Even worse, if they sit in the batter too long, they can get soggy and won’t add that delicious crunch we are looking for in these pancakes.
If you’re working particularly slow, you could instead sprinkle Fruity Pebbles into each pancake individually once you pour the batter into the pan.
This also means that if you only plan to fry up half the batter, and save the rest to make more pancakes later, it’s best to only add Fruity Pebbles to the batter you are using.
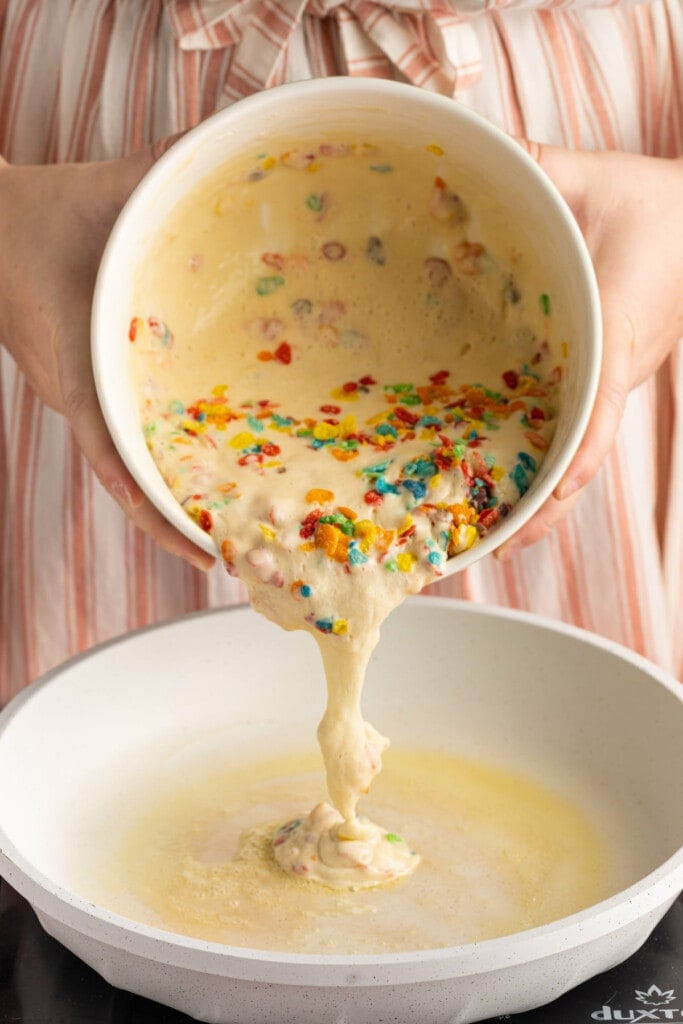
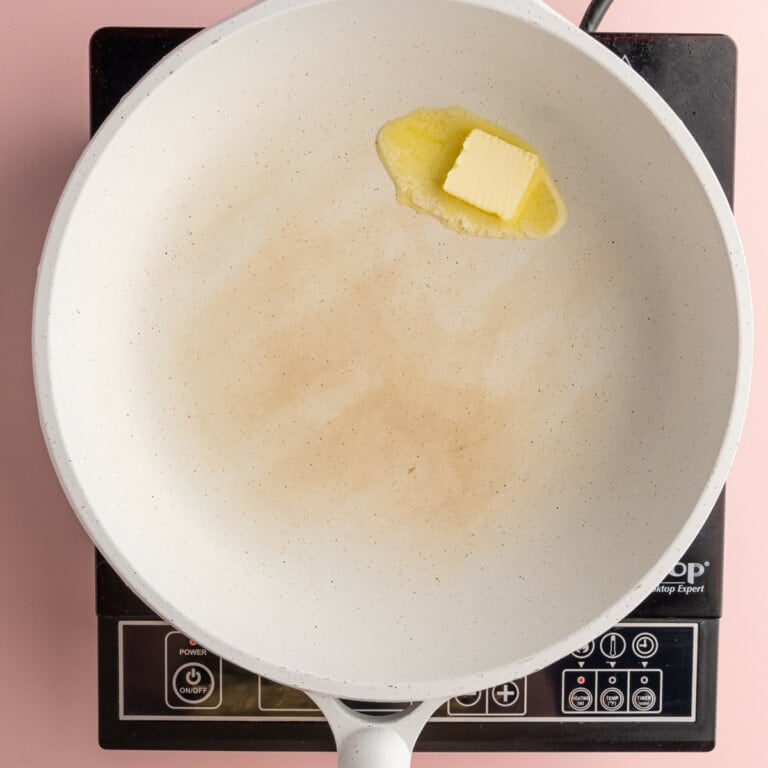
Give the Butter Time to Get Hot in the Pan
Before adding your batter, get the frying pan or griddle nice and hot on the stove with about 1 tablespoon of unsalted butter.
The butter should be completely melted and bubbling before you add any pancake batter. This will get you that perfect golden-brown crispy pancake exterior and make it so that your pancakes don’t spread too much and turn out too flat.
Green tip: Look for organic and palm oil-free butter if you can. Buying organic means you are supporting farms that do not use damaging pesticides and fertilizers, and palm oil production is a huge driver behind deforestation.
Fry Your Pancakes in the Hot Pan
Once your butter is hot in the pan, you’re ready to fry up your homemade pancakes with fruity pebbles! If you made your batter in a mixing bowl that doesn’t have a spout, you may want to transfer the batter back into the measuring cup or any container with a spout.
This will make pouring your batter into the pan much easier and less messy.
Leave at least an inch or two of space in between each pancake as your pour, so you have enough room to work with your spatula and flip them easily. I usually make just 2 homemade pancakes at a time, and definitely no more than 3 in an 11-inch pan.
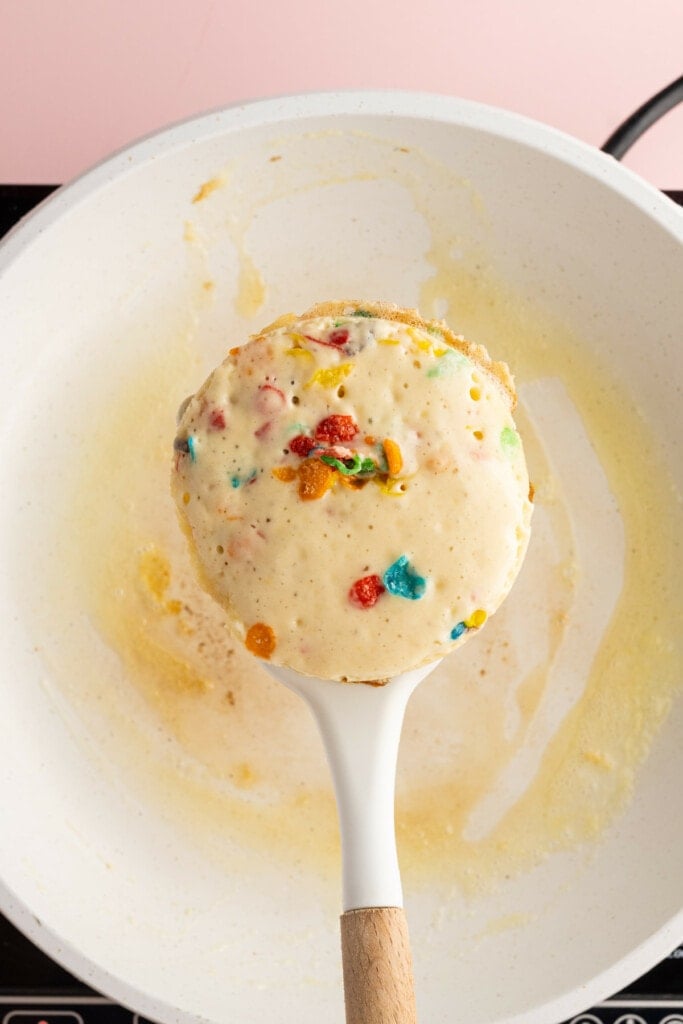
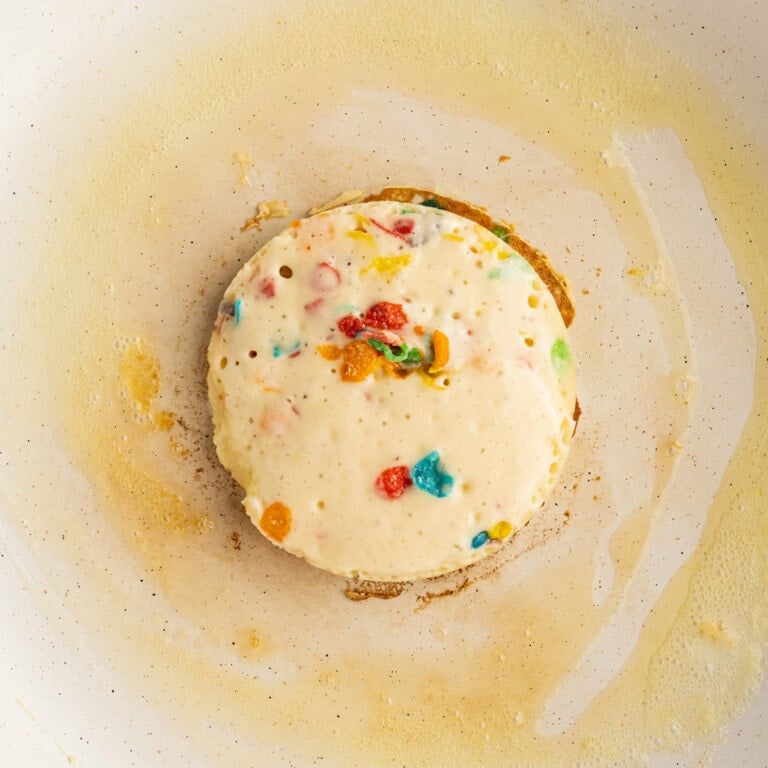
How to Know When Your Pancakes Are Ready to Flip?
Each pancake takes about 3-5 minutes on each side over medium heat. The best thing about pancakes is they give you a visual indicator of when they are ready to flip!
Keep an eye on them and when you see little air bubbles form in the pancake batter (as pictured below), they’re ready to flip!
Pro tip: For thicker, perfectly round pancakes, use these pancake molds!
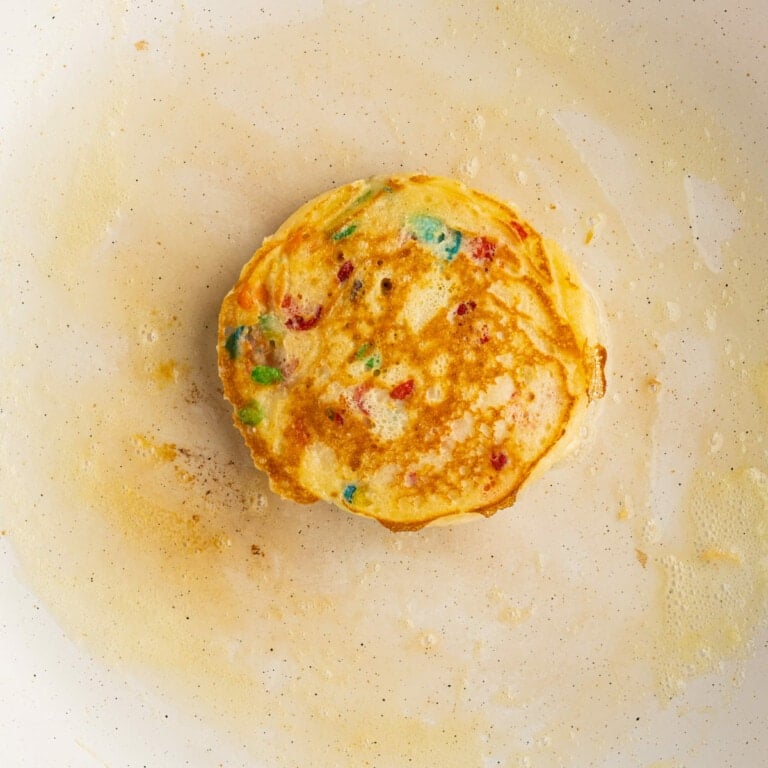
Fry the pancakes until they are golden brown on each side, adding more butter to the pan as needed. There should be a thin layer of butter in your pan at all times. You may or may not need all 3 tablespoons of butter.
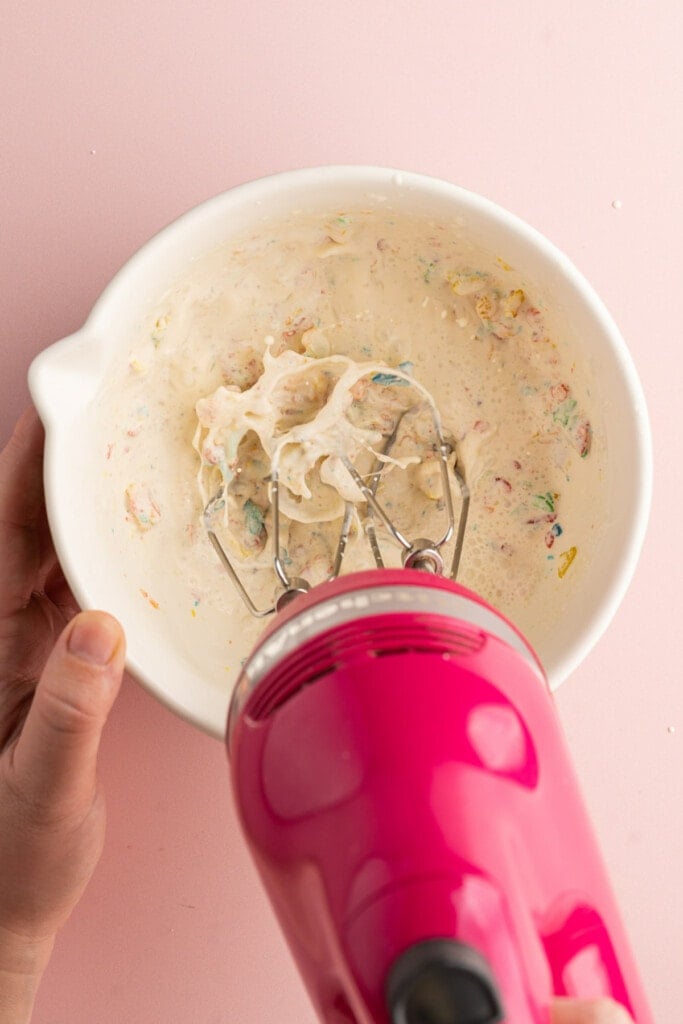
How to Make Cereal Milk Whipped Cream
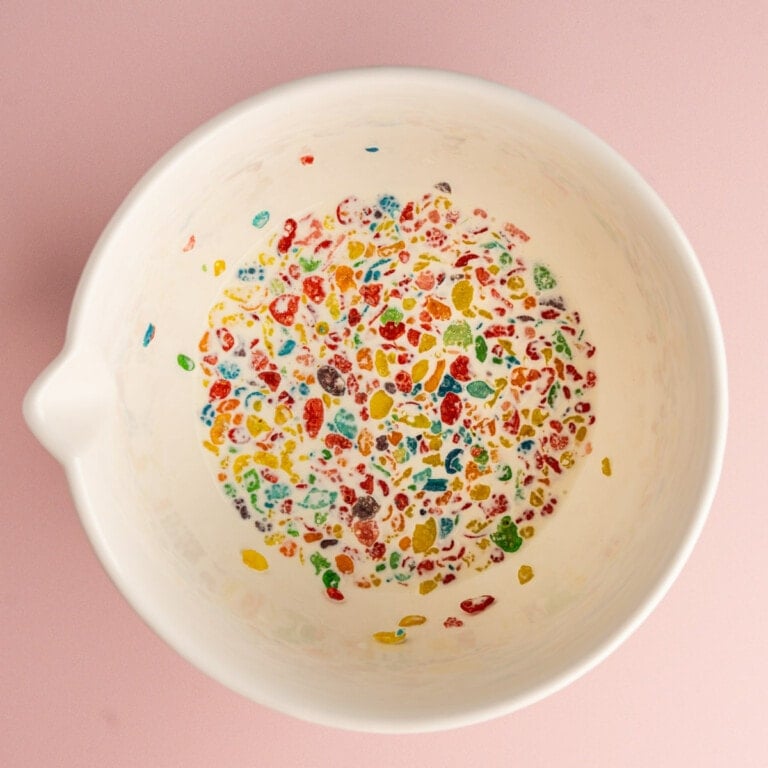
To make this Fruity Pebbles cereal milk whipped cream, add the fruity pebbles to the cream and set it in the refrigerator to soak for at least 30 minutes.
The longer it soaks, the more flavor the milk will extract from the cereal. After soaking, you will remove it from the refrigerator and add the powdered sugar.
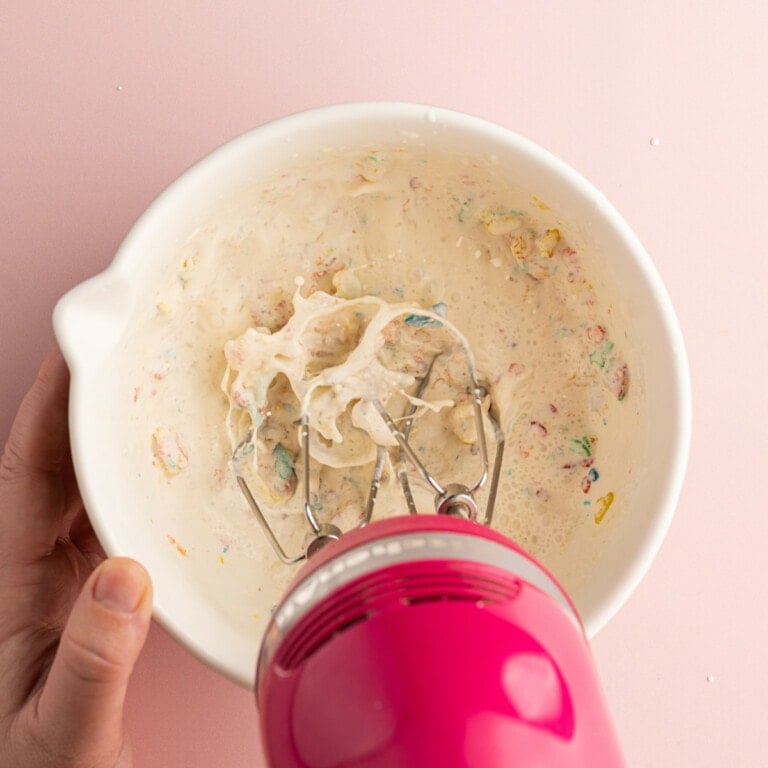
With typical cereal milk, you remove the cereal by pouring the cream through the sieve, but with this Fruity Pebbles whipped cream, there is no need.
Fruity Pebbles are tiny and super thin, and as they soak, they will soften. This means, as you beat the cream, the cereal will easily break down and integrate easily into the cream, leaving it with fun color and more flavor.
Whip the cold cereal milk cream until stiff peaks form. This whipped cream is such a delicious topping for these pancakes!
How to Store and Reheat Pancakes & Cereal Milk Whipped Cream
These Fruity Pebbles Pancakes will last in the refrigerator in an airtight container for up to 5 days. You can also freeze these pancakes for up to 3 months.
There are two easy ways to reheat your pancakes while keeping the integrity of their texture. You can refry them in a pan (no extra butter needed!) or reheat them in the oven at 350°F for about 5 minutes (or until heated thoroughly).
Of course, in a pinch, you can opt to microwave the leftover pancakes on high for 10-15 seconds (per pancake). However, microwaving them may make them a little bit rubbery, especially if you overdo it.
If you do microwave them, don’t stack the pancakes while microwaving to ensure a more even heating throughout.
If you freeze your pancakes, allow them to thaw overnight in the fridge before reheating them using one of the methods listed above. Alternatively, you can just add extra time to your re-heating.
If you have leftover batter that you haven’t cooked yet, you can keep it covered in the refrigerator for up to 3 days. Just store it away and fry up fresh pancakes within the next 2-3 days.
Green tip: Of the billions of tons of food wasted annually, 50% of food waste happens at home. Reduce your contribution to food waste by properly storing, reheating, and consuming leftovers.
Why You Should Make these Fruity Pebbles Pancakes with Cereal Milk Whip
- The textures. Super fluffy pancakes with crispy crunchy Fruity Pebble bits in each bite.
- They’re fun. The addition of Fruity Pebbles brings bright color and flavor to these homemade pancakes.
- They’re so quick! The pancakes themselves come together in about 20 minutes if you pre-make your whipped cream!
If you’re loving these Fruity Pebbles Pancakes and want more delicious syrup-soakers, check out this Sourdough French Toast and these Dairy-Free Waffles.
Fruity Pebbles Pancakes with Cereal Milk Whip
Print Save RateEquipment
- Pancake Molds (optional)
- Hand Mixer (only if making optional cereal milk whipped cream)
Ingredients
Fluffy Fruity Pebbles Pancakes
- 1 cup milk (dairy or plant-based)
- 1 tablespoon white distilled vinegar (or lemon juice)
- 1 cup all-purpose flour
- 2 teaspoons baking powder
- 2 tablespoons light brown sugar
- ½ teaspoon salt
- 1 large egg
- 1 teaspoon vanilla extract
- ½ cup Fruity Pebbles
- 3 tablespoon unsalted butter
Optional Cereal Milk Whipped Cream
- ½ cup heavy cream
- ⅓ cup Fruity Pebbles
- 1 tablespoon powdered sugar
Instructions
Optional Cereal Milk Whipped Cream
- Add the heavy cream and Fruity Pebbles to a small bowl and stir a couple of time to combine. Set the bowl in the refrigerator for at least 30 minutes to soak.

- After 30 minutes, remove the Fruity Pebbles cream from the refrigerator and add the powdered sugar. Use a hand mixer on high to beat until stiff peaks form. Set aside until ready to serve over pancakes!*No need to sift out the cereal as you would with a typical cereal milk. The Fruity Pebbles will soften and easily breakup into the whipped cream as you use your hand mixer.
Fruity Pebbles Pancakes
- In a measuring cup or small bowl, add the vinegar to the milk and set aside to slightly curdle to make acidified buttermilk.
- In a large mixing bowl, whisk together the flour, baking powder, brown sugar, and salt.
- Add the egg, vanilla extract, and your buttermilk mixture, and whisk until smooth, careful not to overbeat.
- Fold in the Fruity Pebbles and transfer batter to a measuring cup or other container with spout for easy pouring (see notes).
- Add butter to your griddle or pan and allow it to heat up on medium-high until the butter is melted.
- For the thickest, most perfectly round pancakes, use pancake molds. Pour batter into your molds or freeform circles onto the pan and cook over medium heat.
- When it's ready to flip, the batter on the uncooked side will start to form little air bubbles. Use a spatula to flip the pancakes, and allow them to cook on the other side for 2-3 minutes.
- Repeat steps 6 and 7 until the pancake batter is used up, adding butter before each batch to keep your griddle greased. Serve warm with Cereal Milk Whipped Cream (optional) and maple syrup.
Pro Tips
- The longer the Fruity Pebbles sit in the batter, the more likely they are to get soggy and lose their crunch. Work quickly once you’ve added the cereal. Or, if you feel more comfortable, you can simply sprinkle Fruity Pebbles into each individual pancake in the pan before flipping them.
- Love cereal? I’m sure you’ll love this collection of my best recipes using cereal!
Share This Recipe